Greetings Rainmakers!
Welcome to this month’s State of the Platform. This is our last SOTP of 2023 … it’s been a big year for Rainmaker Platform. Let’s dive in.
We’ve added a lot of improvements, including extra RainMail functionality, more Beaver Builder options, and back-end changes to boost efficiency, speed and ease of use. We’ve integrated features many of you have been asking for, including enhanced VAT options, new full-width templates, Google Analytics 4 and more.
Everything we’ve been adding to the Platform gives you the tools to market your business and sell your products and services. Content is part of the equation — and many of you use our content creation tools — but there’s so much more than just what meets the eye.
In this State of the Platform, we’ll take a quick look at our most recent changes, then review a couple of the lesser-used features you might not know about.
Platform Updates
Since the last State of the Platform, we’ve released versions 3.4.2 and 3.4.2.1. One of the biggest changes is swapping our VAT service from Taxamo to Quaderno. Taxamo was sold, and the acquirer’s business model is a challenge to some Rainmakers. This change only affects those who are collecting the European VAT, but if you’re one of those, be aware if you add new tax jurisdictions.
In addition, we’ve added minor changes to the back end of the platform and upgraded a couple of RainMail components. You might have noticed an email error or two recently in our broadcasts; we use RainMail ourselves when we create email broadcasts, and those errors helped our developers identify and fix a block editor send issue. With 3.4.2.1, it’s been fixed.
For the full list of changes, check out the 3.4 changelog.
Forgotten Features
We took a look at our most- and least-used features on the Andromeda version of the platform recently and there were some interesting finds.
Many of you are using Beaver Builder to design and produce visually appealing pages. Our SEO features, MemberPress, Google Analytics and the Rainmaker LMS are all being widely used as well.
That makes sense; many of these features are critical to creating a great, content-rich digital business. But there are some powerful Modules and Add-ons many of you aren’t using that might help you out.
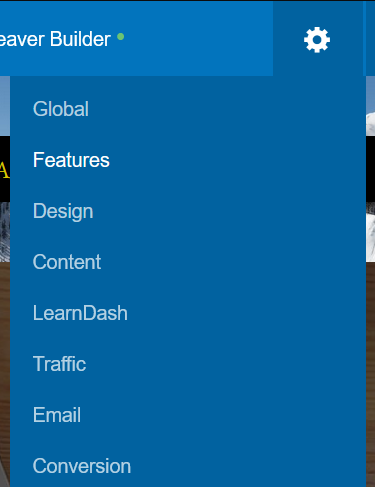
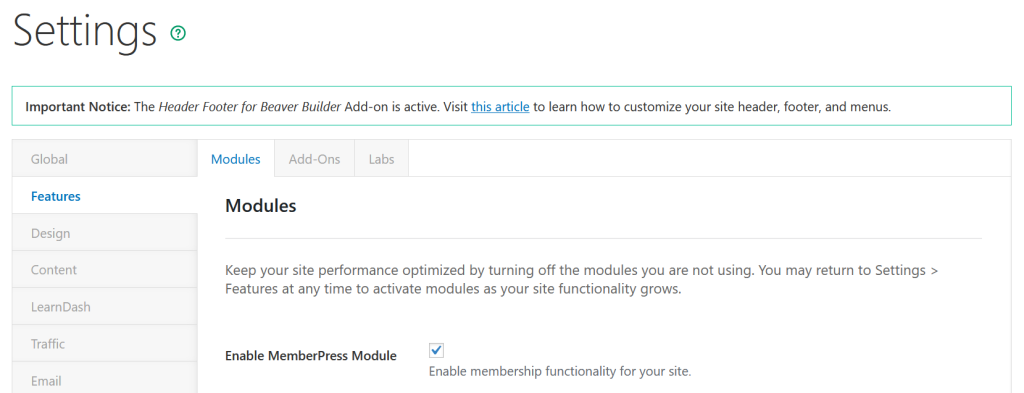
You can enable or disable all of our Modules and Add-ons in the same place: mouse over the Settings gear menu at the top right of your screen, then click “Features.”
This will take you to the Modules screen. You can click the Add-ons tab to get to Add-ons.
Let’s take a look at one Module and two Add-ons you might not know you had included with your license at no additional cost.
LearnDash
Courses are powerful pieces of content you can use as an incentive for lead generation, email capture and revenue generation. You can create courses in a variety of ways, but a learning management system (LMS) is the easiest.
We realized when we started Rainmaker Platform that course creation was going to be a critical part of authority building, so we built our own: Rainmaker LMS. In the last couple of years, though, we realized there was a need for an LMS that had some new and different features. That’s where LearnDash comes in.
Rainmaker LMS allows you to create courses so you can package up your knowledge. It’s built into the platform and has been from the beginning. Why would you use LearnDash instead?
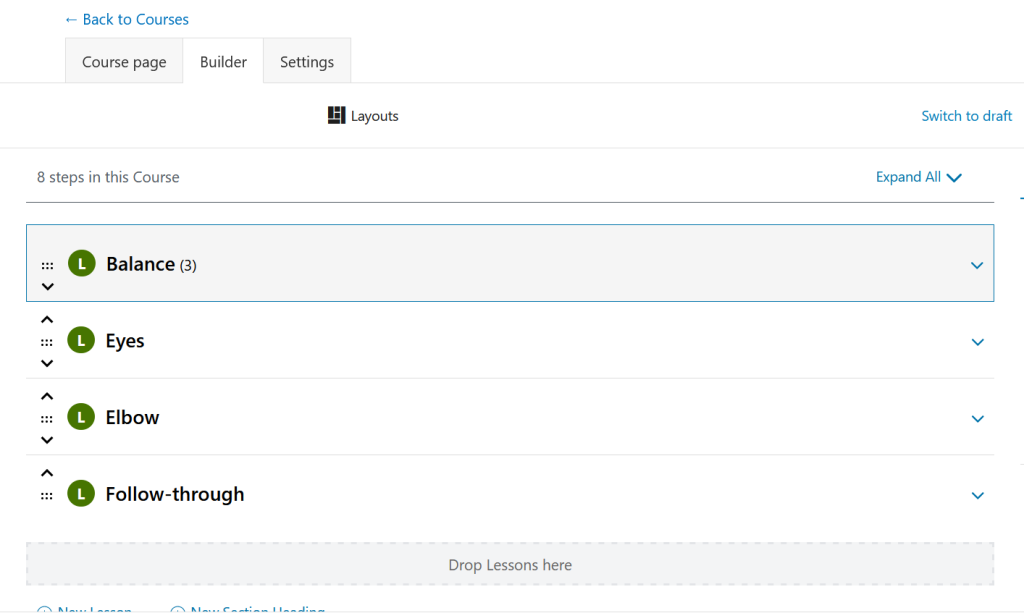
For one, LearnDash includes many course-specific options, letting you tailor your courses more specifically to your students and curriculum. It also allows you to gate content with a minimum of effort and comes with an easy-to-use builder that lets you see and adjust your course structure in real time.
There’s a whole lot more under the hood; we’re only scratching the surface here. Want to get started? Go to the Features page, then enable LearnDash from the Modules tab. Once you’re up and running, check out our guide “Building Your First LearnDash Course.”
PowerPack
Many of our Andromeda clients use Beaver Builder. It’s a powerful visual editor that allows you to create beautiful pages that grab and hold your audience’s attention. But as good as Beaver Builder is out of the box, there are plenty of ways to extend and enhance it with Add-ons like PowerPack.
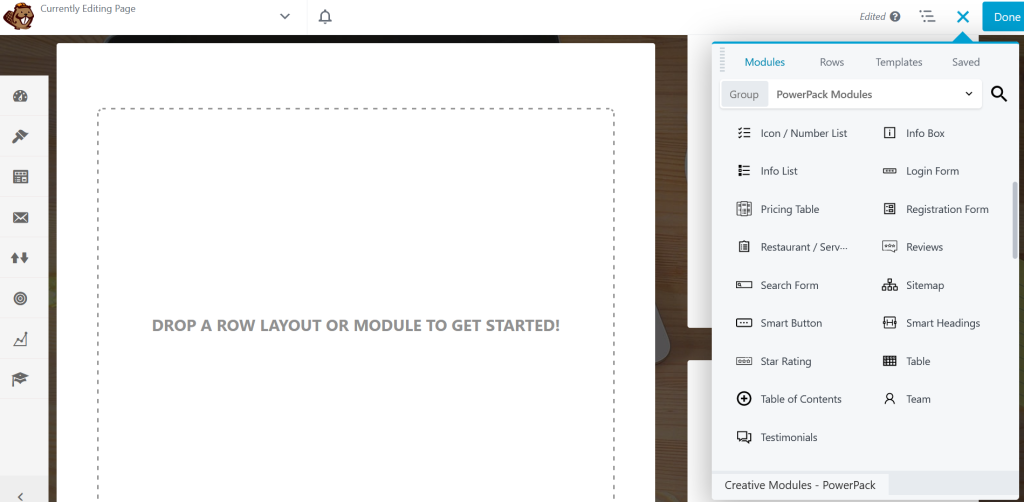
PowerPack adds a lot to the standard Beaver Builder experience. One of the big additions is a new collection of advanced modules. Table of contents, Instagram feed, pricing table, restaurant menu … you name it, there’s something pre-built you can use instead of having to build it manually.
It also adds new templates you can use to build landing pages, home pages and other important site elements.
I use PowerPack personally when I’m putting together pages. It helps a ton; I’m OK with HTML and CSS, but not great, and the less I have to mess with custom elements or trying to mash together multiple basic Beaver Builder modules to make something, the happier I am. You may find it useful too.
To get started with PowerPack, just enable it from the Features menu under the Add-ons tab. Make sure Beaver Builder is checked too; you won’t be able to enable PowerPack unless Beaver Builder has been enabled as well. Then check out our video guide “How to Build and Design Your Site with Beaver Builder.”
ShortPixel
Site speed matters for both Google and your users. Bounce rate increases 32% when a page’s load time goes from one to three seconds; it only gets worse from there. We’ve covered Autoptimize before; it offers several ways to cut down your load times. One of these is through ShortPixel.
The bulk of any site’s load time will usually be images or video, as they take up more space than text. That makes image optimization critical. Fat images are a real issue for many of our clients. When you upload images to your site, ShortPixel will download thwe images to their network, optimize them and replace the images in your media library with smaller, faster versions.
To turn on ShortPixel, enable it from the Features menu under Add-ons. Then click the link that says “Settings > ShortPixel.”
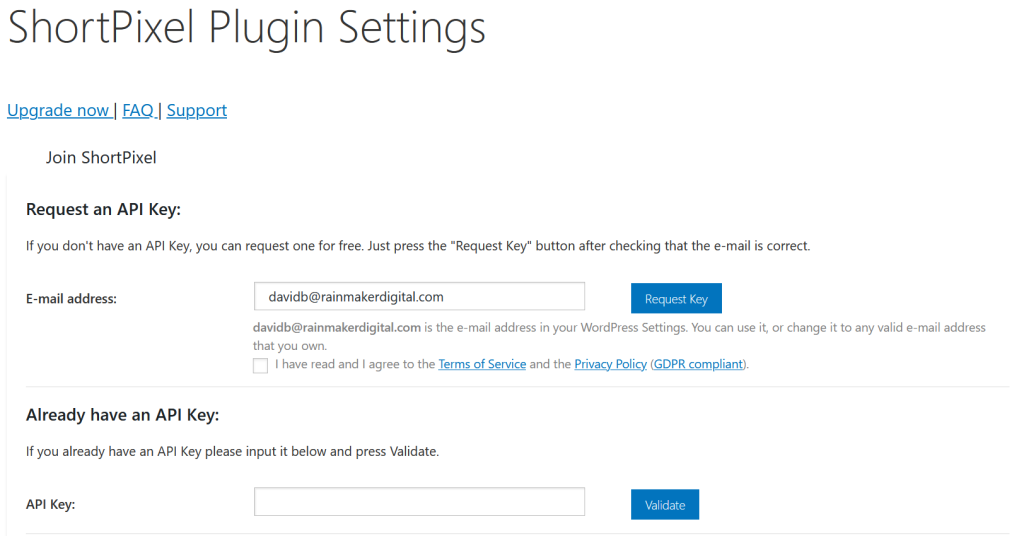
This will take you to your ShortPixel settings page.
Enter your email address and click “request key.” Copy and paste the key you receive in the API Key field, then click “Validate.” This will connect ShortPixel’s service to your Rainmaker Platform site.
ShortPixel’s basic version is included in your Rainmaker Platform subscription, but depending on how many images you’re serving, you may need more. If it turns out you’re one of those clients, you’ll need to visit the ShortPixel site and choose a paid plan (or click “Upgrade Now” from your ShortPixel settings page). These plans are inexpensive, and if you’re seeing a lot of traffic, the extra money is worth it for both your audience and your SEO needs.
Discover the Features You’ve Been Missing
There are plenty more Modules and Add-ons that you can use to enhance your Rainmaker Platform site; we’ve only scratched the surface here. Take a look through your site’s Features page — because though Rainmaker Platform is great out of the box, it gets even better when you customize it to your own needs. Content publication is something we do really well, but there’s so much more you can do with the platform.
Thanks for being our client. We appreciate your business. That wraps up this last State of the Platform of 2023. Enjoy the holidays, and if you need a hand with anything, we’re here to help. Just drop us a line, anytime.
Best Regards,
David Brandon
Copywriter
Rainmaker Digital Services
