
We’re in the homestretch for 2025. Time flies. It’s been a year of big changes for Rainmaker Platform so far. We still have some very big enhancements coming before the end of the year, and we can’t wait to share them with you. We’ll let you know soon once we finalize launch dates.
It’s not just the platform that’s keeping us busy, either. We are in beta delivery on two huge client projects as well. One is an ad- and membership-driven content site with thousands of articles, users, and sales. The other is an exclusive eCommerce site with five-, six- and seven-figure transactions. We’re always open to projects of any size, from a single page of copy to a full ground-up website build with custom work. Reach out if you need a hand.
Finally, we just wrapped up a promotion for a free landing page review. It’s too late for this one, but we have a couple more offers coming before the end of the year … stay tuned.
Close the Gate on Your Content
MemberPress lets you get very detailed with the way you control access to your content on Rainmaker Platform. If you’ve gone to an article on any subscription site recently — think Substack, Patreon, and many news sites — you’ve probably seen a few different ways in which content providers control access to their work. Some will allow you to read a limited number of free articles. Others allow you to read a free article, then ask you to sign up for a membership to read more. Still others keep you from seeing any of their content at all without signing up for a membership. And some have different tiers of content, depending on how much you pay.
Rainmaker Platform allows for a huge amount of flexibility in how you gate your content. Here’s how you can gate your content effectively while still getting your audience interested in your story.
Getting Started with MemberPress Rules
MemberPress allows you to control access to your content, primarily via the use of “Rules.” Rules allow you to set parameters around your content, like “content with this tag” or “content in this membership,” then choose how that content behaves. There are also ways to gate certain content individually.
We’ve covered the basics of MemberPress, including the use of Rules, extensively in previous State of the Platform articles. For more information on the basics, see “Getting Started with MemberPress” and “MemberPress — Rule Your Content.”
Setting Up Content Access Controls
To make your content worth controlling access to, you need to get people interested in it. That can be accomplished in a number of different ways, and you can see examples of them all around the web.
The New York Times has a big enough name that everything they offer is entirely behind a membership wall. They don’t need to tell you why you should sign up; it’s the New York Times. You know who they are, and you already know whether you want their content or not. (Most businesses are not like this; yours probably isn’t.)
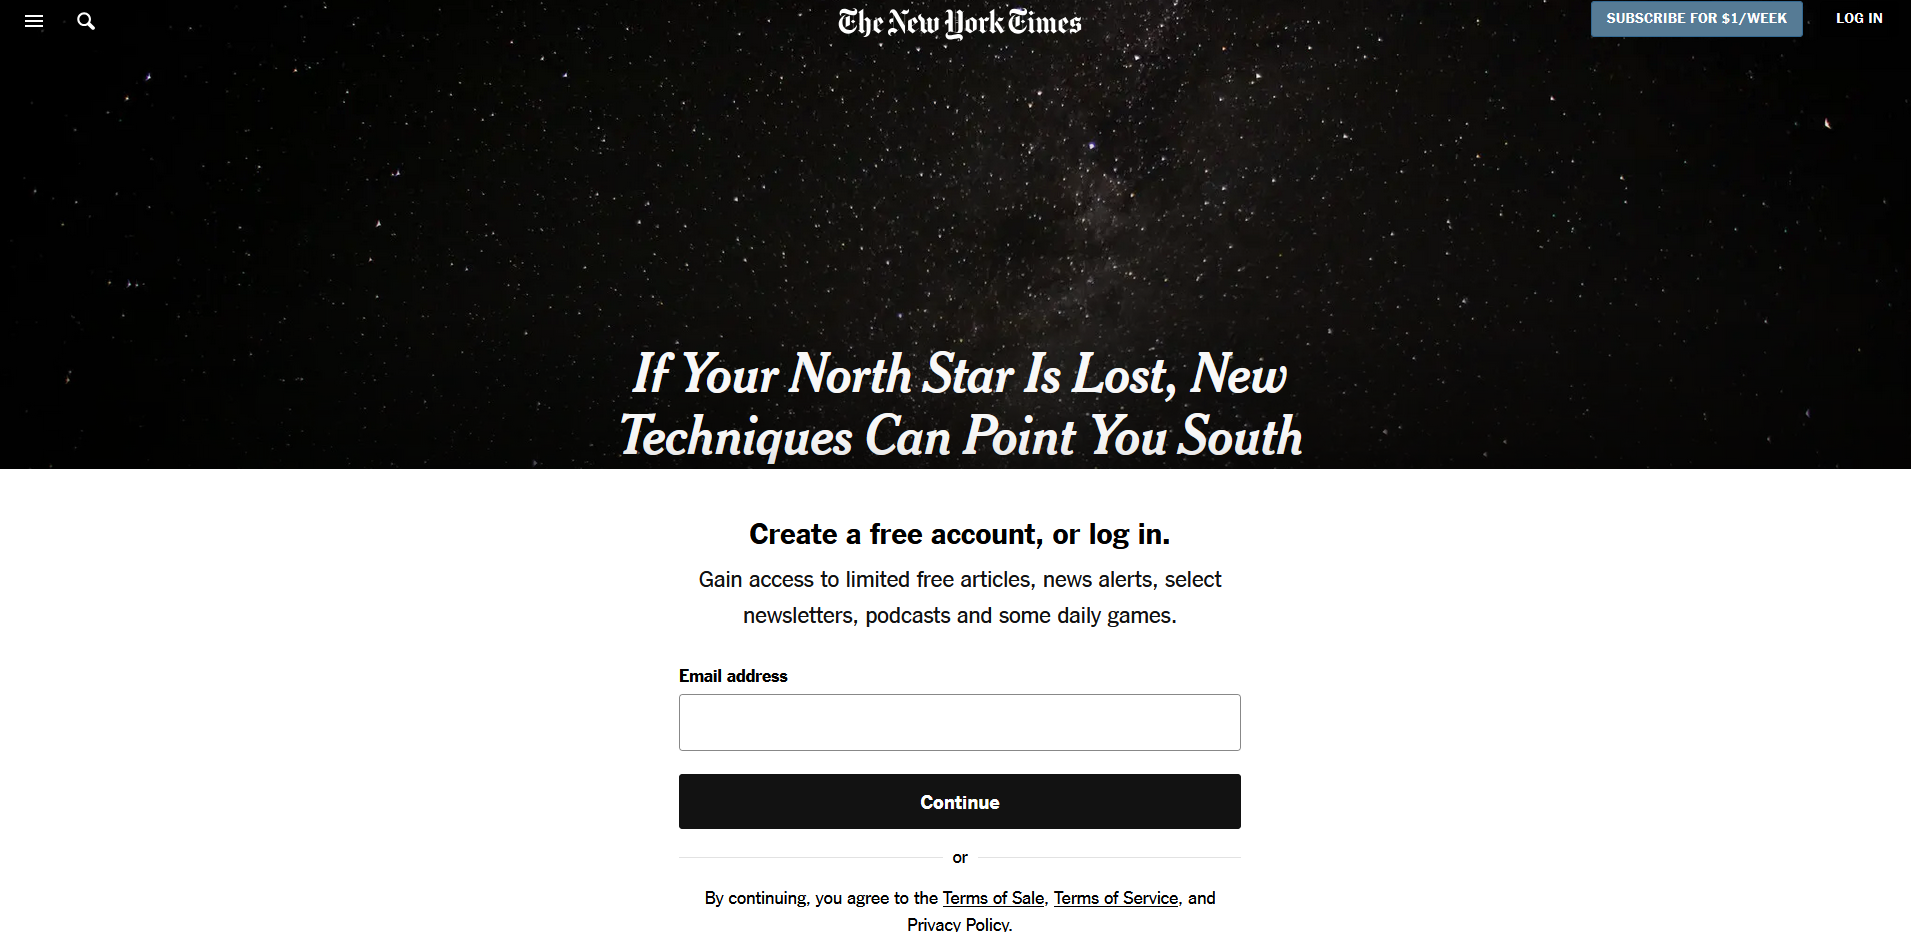
Go to any of their articles and you’ll immediately be greeted by an email capture portal.
You might also see a paywall with a teaser for the content that’s behind the wall. This can take a couple of forms. First you might see a dedicated landing page. Smaller streaming services like Dropout and Nebula often take this tack, showcasing their services ahead of time.

Many of our own clients do this with eBooks and courses. You may be one of them.
You may also see an excerpt model, like many Substack blogs use (this one is statistician Nate Silver’s):
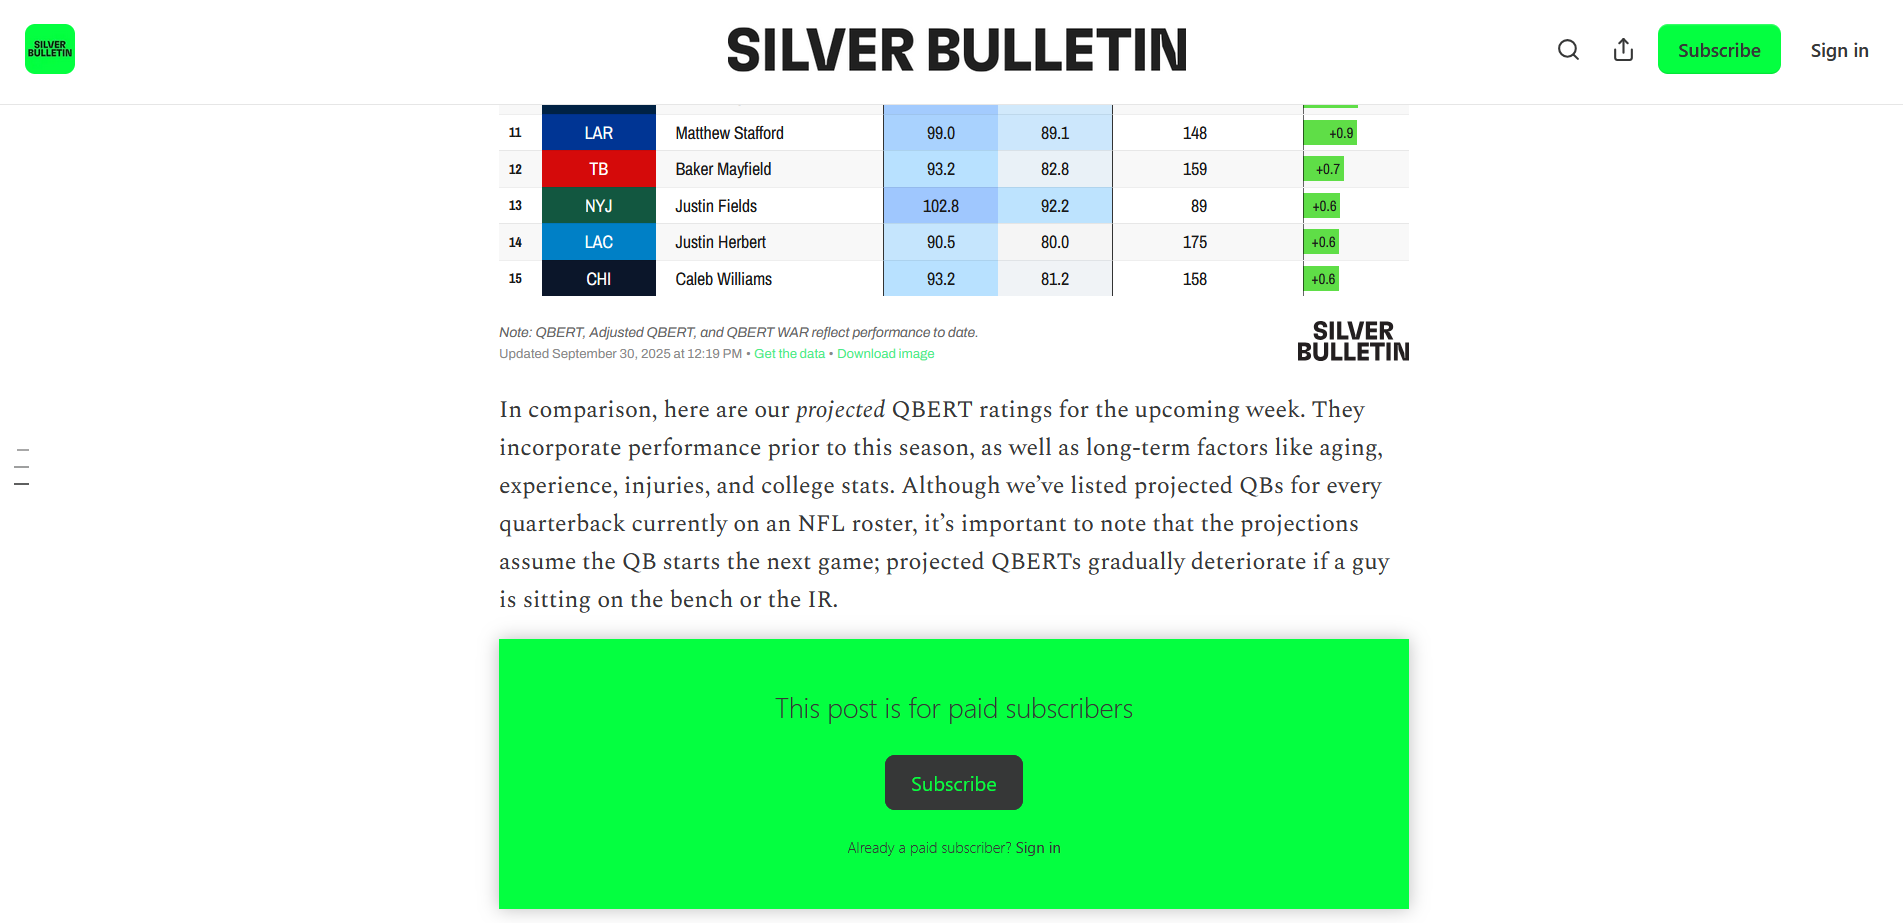
In this model, you can read just enough of any article to whet your appetite, but not enough to get into the meat.
Let’s take a look at how you can set up these content gates on your Rainmaker Platform site.
Gating Your Content with MemberPress
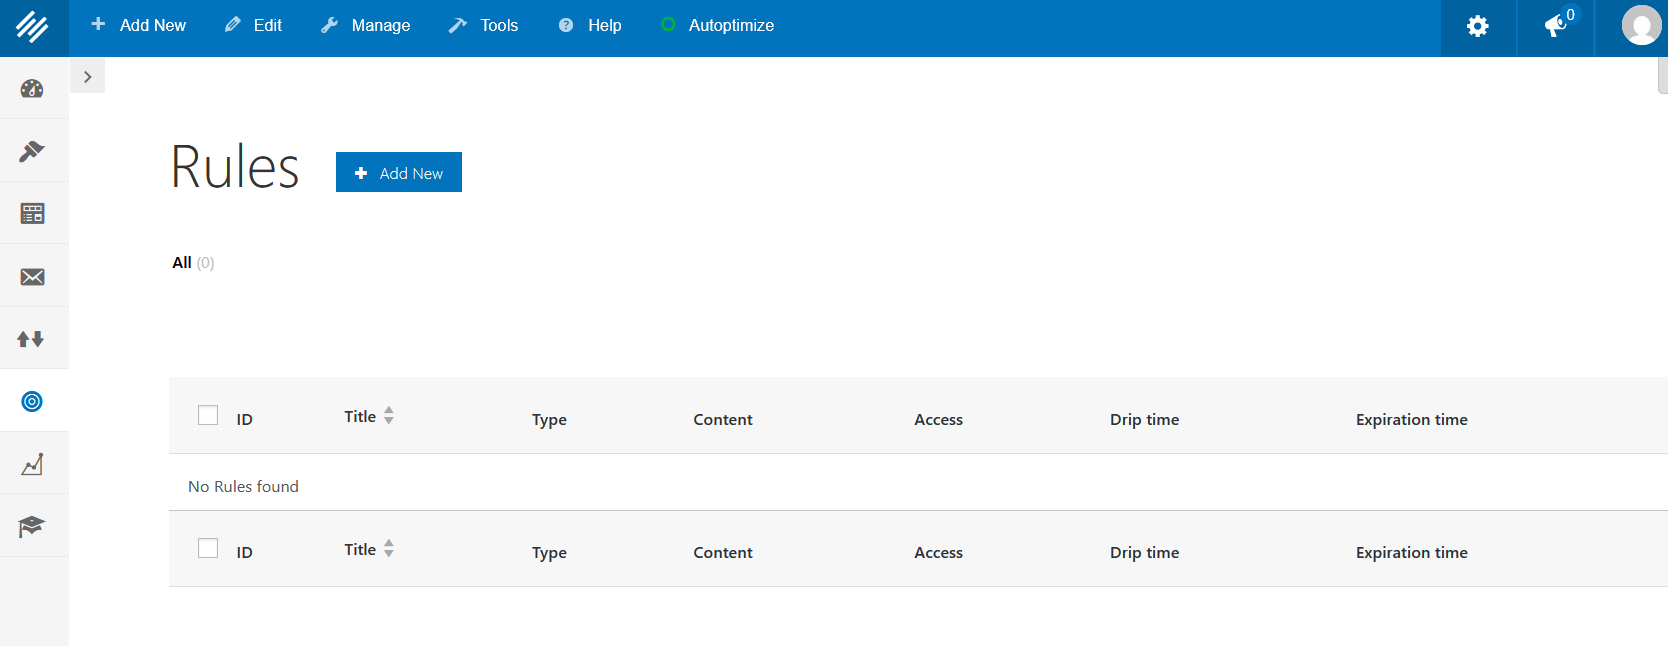
Start from the Rules screen first. If you go to the left hand menu > Conversion > MemberPress > Rules, you can see all your current rules.
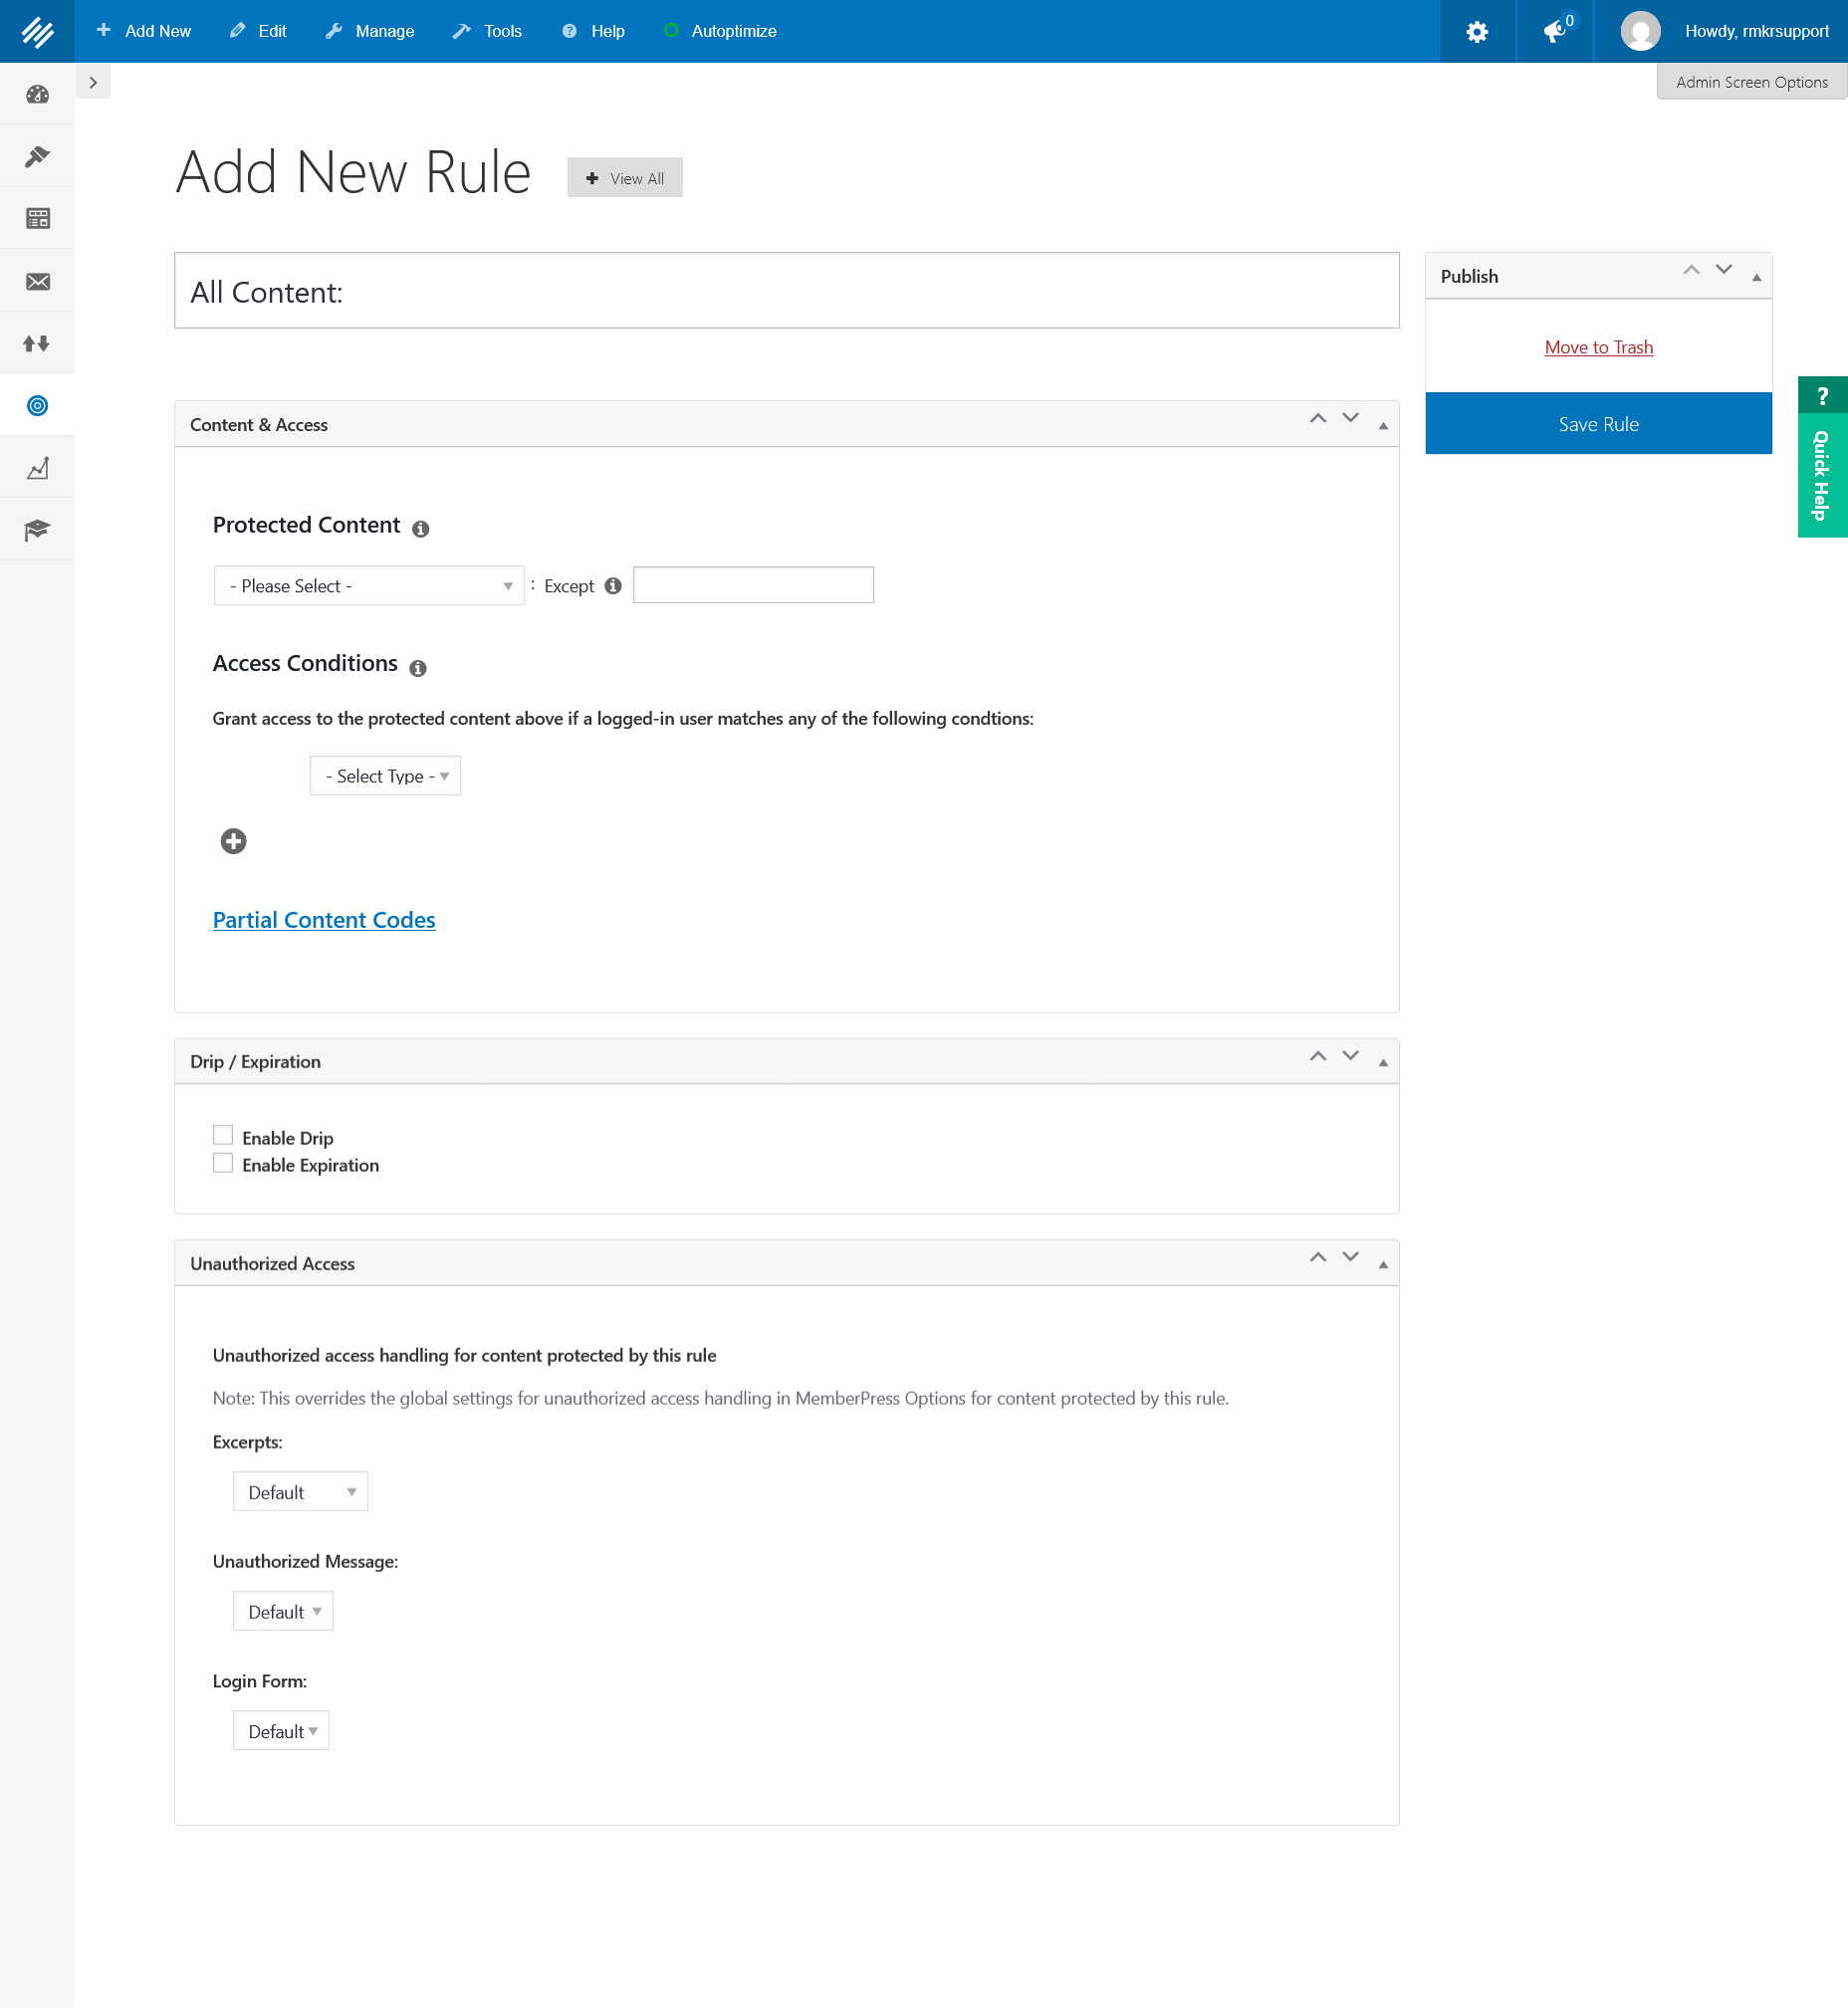
Click the blue “Add New” button to create a new one.
If you haven’t used Rules before, again, it’s a great time to reference our article “MemberPress — Rule Your Content,” which has a detailed walkthrough of how to create one from scratch. But here’s a quick refresher:
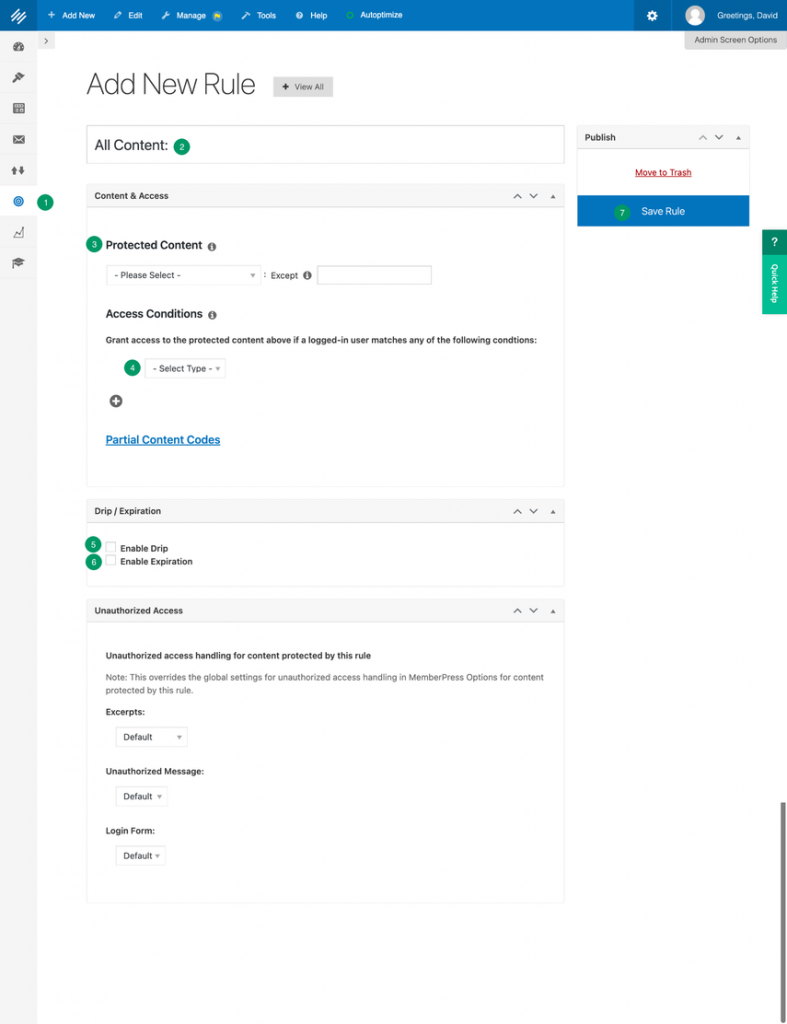
- Go to Rules and create a new Rule.
- Name your rule.
- Choose what you want to gate from the drop-down menu.
- Choose which group you want to be able to see that content.
- Decide whether you want that content to be released over time as a drip. Check yes or no.
- Decide whether you want this rule to expire. Check yes or no.
- Click “Save Rule” on the right side of the page.
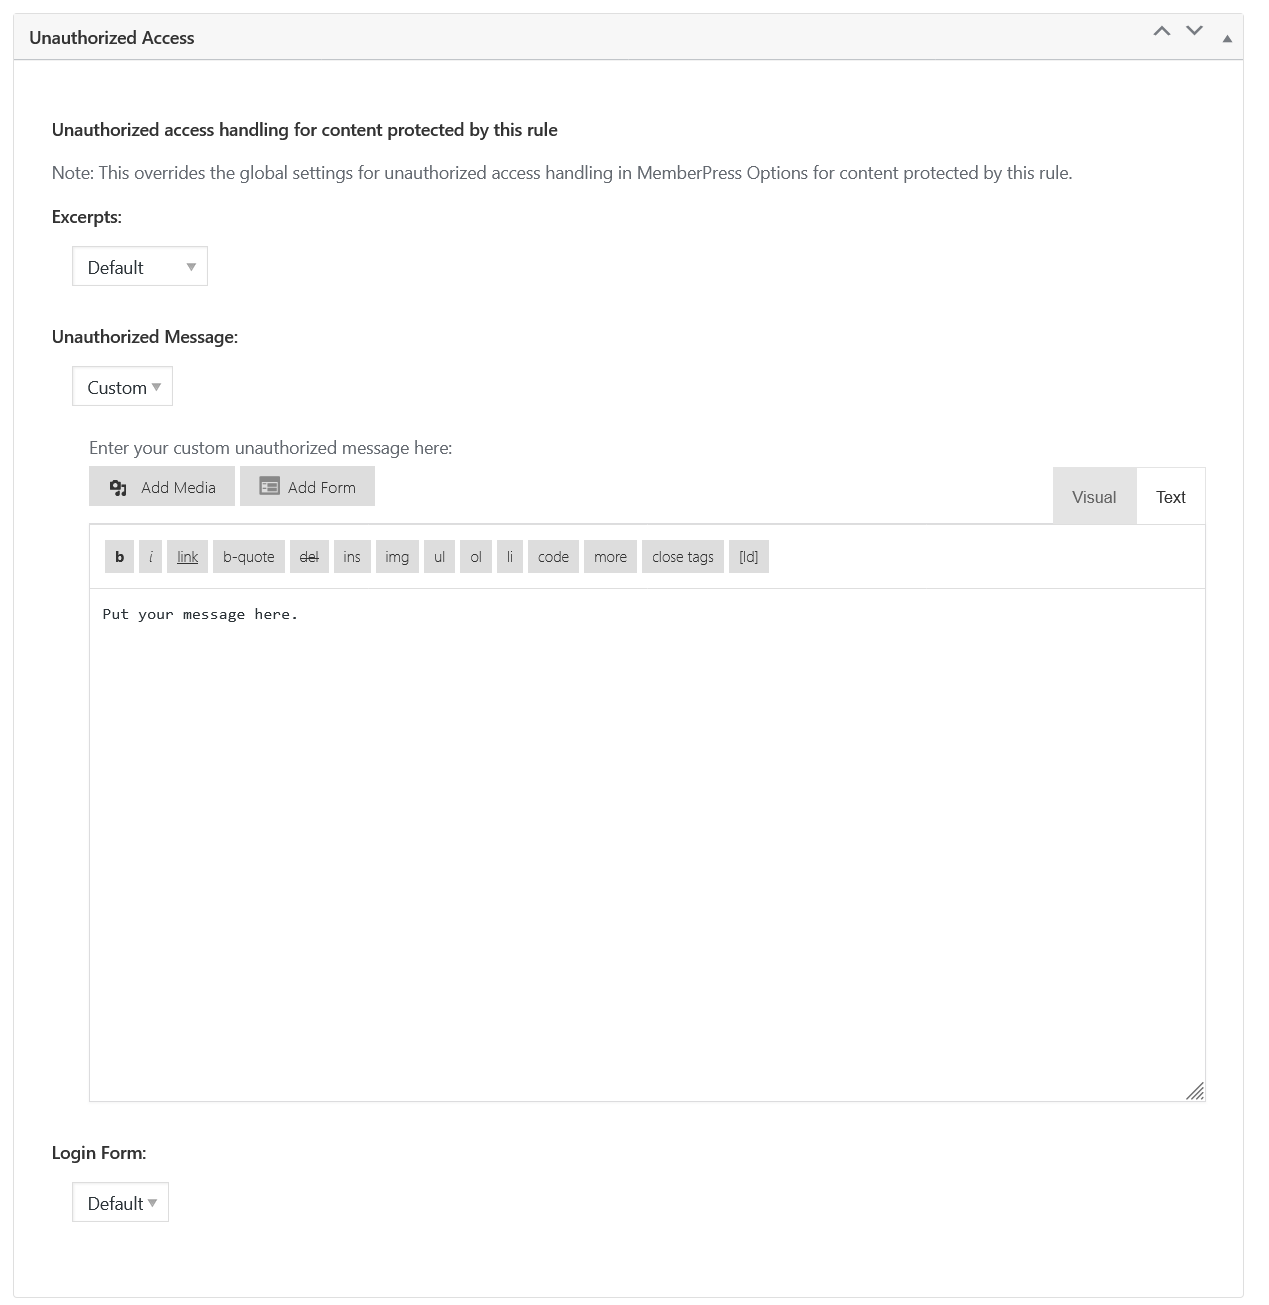
If you want a full paywall (everything behind the wall) like the New York Times, choose “All Content” from the first Protected Content dropdown, then associate it with a membership in the Access Conditions. No one except for those members will be able to access that content. Then choose “Custom” from the dropdown for the unauthorized message in the “Unauthorized Access” box and create a message with a link to the page where they can sign up for the membership.
This also works well with the excerpts on a landing page model used by Dropout and Nebula, which follows the same process — just in this case, you’re building a more extensive landing page for the membership which includes detailed teasers for your content.
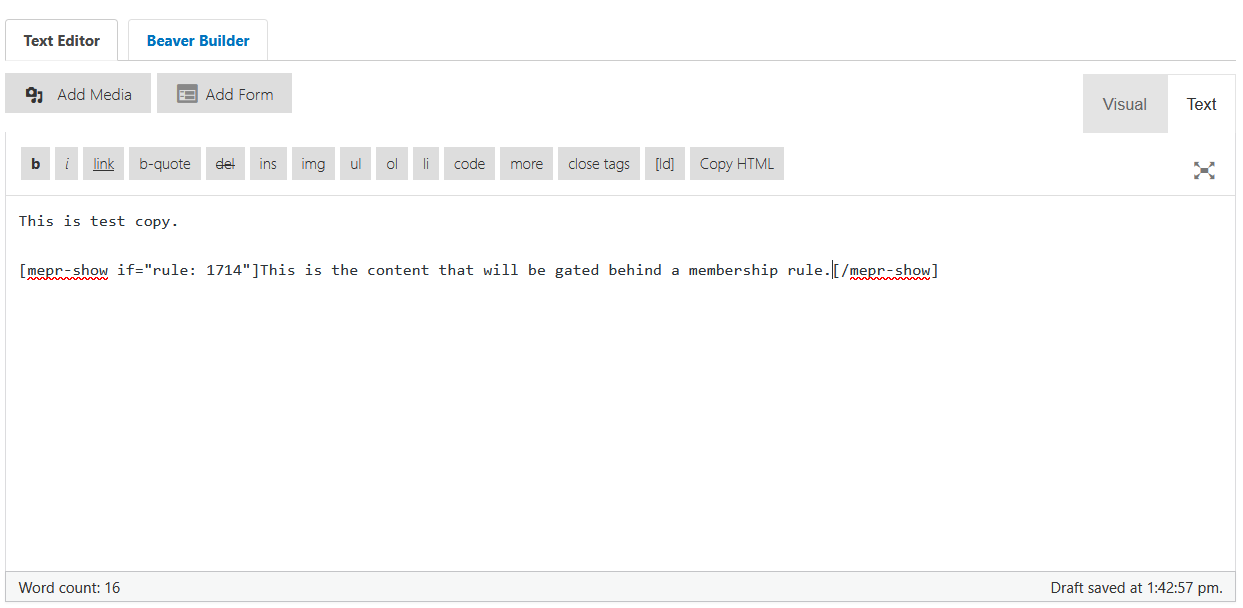
If you want to add partial protection to your content, click the “Partial Content Codes” link in the Content & Access box.
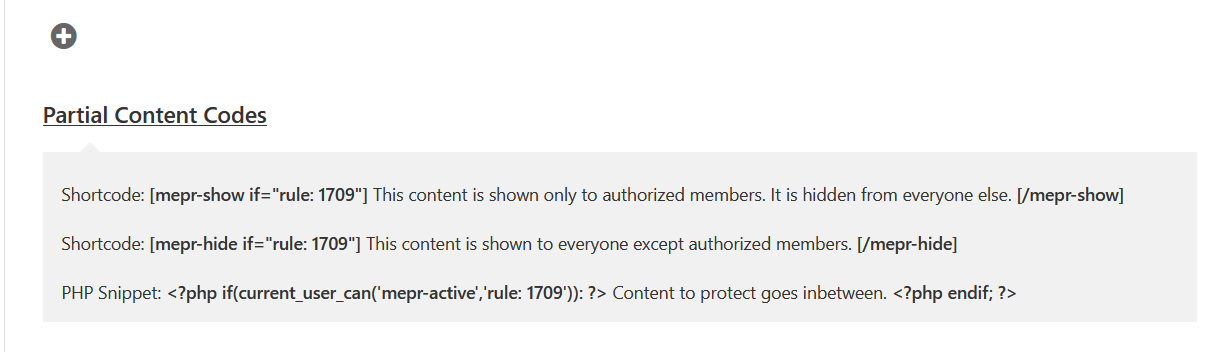
Copy the “mepr-show” shortcode and put the content you want to protect in between the tags.
The easiest way to do this is to, from a new post or page, click the three dots at the top right of the editor to open the menu and click “Switch to Classic Editor” (in blue at the bottom right of the image).
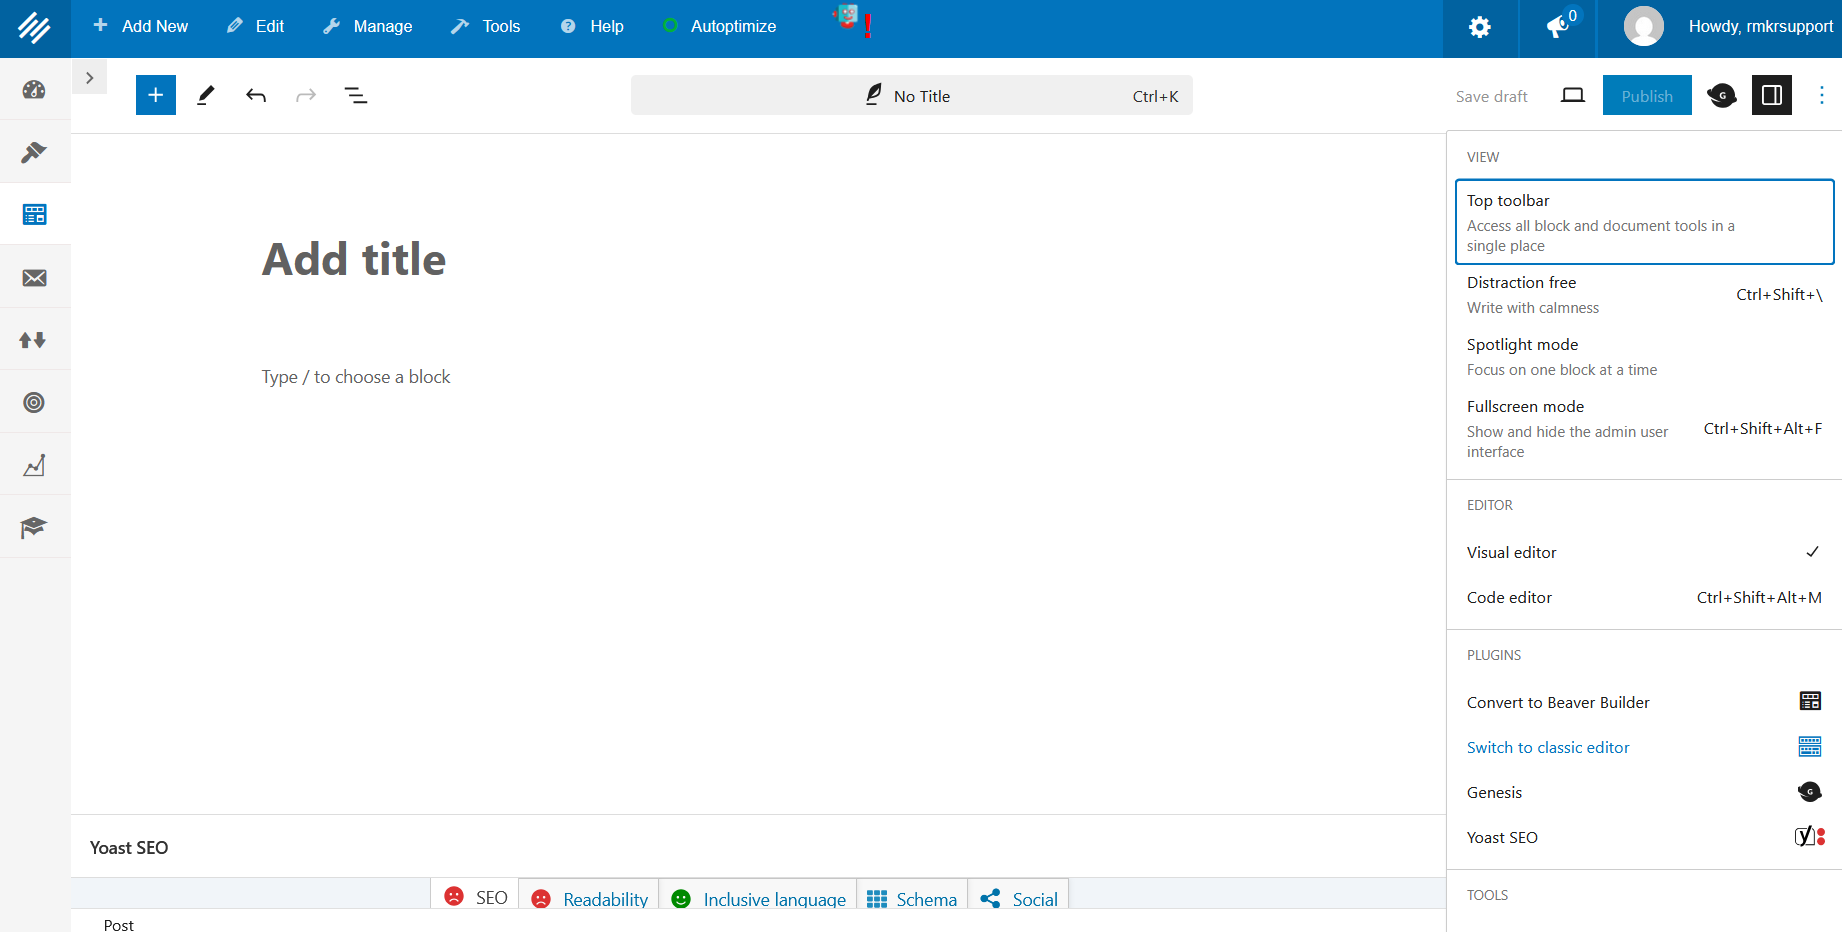
This will take you to the classic editor. You’ll be on the “Visual” tab — click the “Text” tab at the top right of the main text editor box to swap to the code view.
Add the tags around the content you want to protect.
From here, you can save the draft and swap back to the visual editor or the block editor to finish editing your content.
Make Your Memberships Valuable
These different methods of putting your content behind a membership “gate” add value to a membership.
One caveat: charge a good “price of admission.” This could be anything from an email address to multiple thousands of dollars. Some ask for too much. Some ask for too little. We’ve seen a few people fall in the trap of providing a “free” tier that doesn’t actually have any value, for example; it’s not a taste test at that point, you’re basically waving it under their nose and saying they can’t have it. On the flip side, others have given away so much for free that no one sees any value in the paid content. Don’t get caught at either extreme.
To avoid these pitfalls, consider a survey or focus group. Perhaps even show your membership to people outside your organization (people you trust to have smart opinions, not just friends). Consider using A/B testing or market research, especially with your target audience, for a more detailed picture.
Controlling access to your content is a powerful tool, and this article is barely scratching the surface on what you can do with memberships. Use these tools to gate your content and drive signups. And if you need a hand, don’t hesitate to reach out. Just drop us a line, anytime.
Best Regards,
David Brandon
Copywriter
Rainmaker Digital Services