Even when the work isn’t exciting, there’s still work to be done with Rainmaker Platform.
We’re in a bit of a grace period between big updates right now for the platform. As the technologies connecting to the platform get updated, we have to check compatibility (and payment gateways have been a constantly moving target). It’s still important, but not as exciting — still, it’s good to go check that all the platform code continues to play well with other tools, trends and technologies.
In this State of the Platform, we’ll briefly get you up to speed on the latest update, then go through a few tips on creating products in Rainmaker Platform. Let’s get to it.
Update 3.4.7.1
This month, we had a minor release, 3.4.7.1. This maintenance update fixed a RainMail issue with autoresponders that was affecting the way subscribers transitioned from one list to another for a small number of clients.
For more information, see the changelog.
eCommerce Made Simple
Rainmaker Platform allows you to manage your online presence in a variety of ways. One of these is eCommerce. If you haven’t sold products through the platform before, it may seem intimidating — there are a lot of options. But publishing and selling products on Rainmaker Platform can be very simple.
Just because you can get complicated doesn’t mean you should. You can get started selling online in minutes. Let’s go through the basics of eCommerce on Rainmaker Platform and how you can build the three most common types of products.
Getting Started
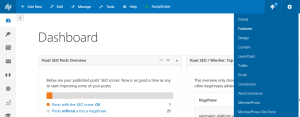
To get started, you’ll need to turn on WooCommerce in the Features menu. Find this under Features in the Settings gear menu at the top right of your Rainmaker Platform dashboard.
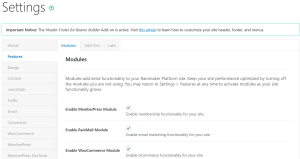
Make sure the check box next to Enable WooCommerce Module is checked, scroll down and click the Save button at the bottom of the screen.
Some additional integrations need to be turned on under the Add-Ons tab from this same screen. If you want to sell MemberPress memberships or LearnDash courses, you’ll need to enable those modules as well as the Add-Ons that enable their integration. For more information on memberships, see our article “Getting Started with MemberPress,” and for more on LearnDash integration see “Turn Knowledge Into Profit.”
You’ll also need to set up a payment gateway. For more on that, see the section “Getting Started” in our article “Start Selling with WooCommerce.” In some European countries you may have to deal with VAT; for that, you’ll need to enable Quaderno. Just search for “Quaderno” in the Knowledge Base or reach out to us if you need help.
Adding Products to WooCommerce
Once you’ve enabled WooCommerce and set up a payment gateway, you’re ready to start selling products.
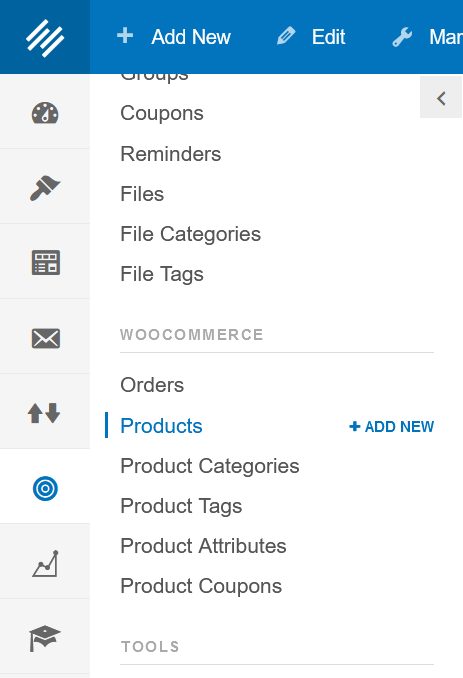
Go to the left hand menu > Conversion > WooCommerce > Products.
You can either click “Add New” from the menu here or choose the blue “Add New” button from the next screen.
This will take you to the product editor.
The Initial Information
Regardless of what type of product you’re adding, every entry needs at least some of the same information.
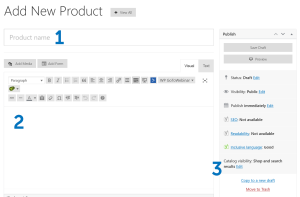
Add 1) a product name, 2) a long description, and 3) what visibility you want (you can hide this product or have it only display in certain places if you’d like).
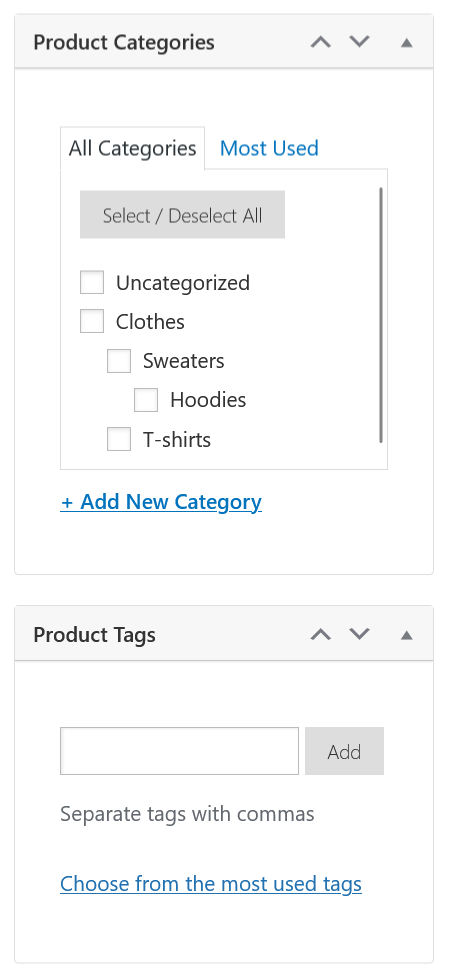
Next come categories and tags. Look on the right side of the screen and scroll down to find these.
Add or adjust taxonomy here. For more on this, see our video walkthrough.
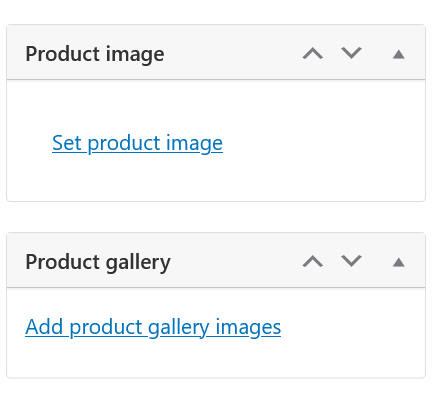
Keep scrolling down and looking at the right side of the page to get to the product image and product gallery.
From here, add a main image and supplementary images to your product. These assets aren’t required, but we highly recommend them. You might be surprised how many people ask for “the green eBook” based on the cover art. On average, consumers expect five photos for each product.
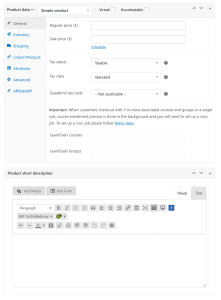
The next boxes we’re going to look at are the product data pane and the product short description, which display in the middle of the screen as you scroll down.
In the product data pane, fill out pricing information (and if you’re worried about VAT, your Quaderno tax data). In the product short description pane, add a short description that may display in catalog pages.
All of this is data that will be the same for any kind of product you want to enter. Every one of your products must include these fields; you can do more than this, but you shouldn’t do less.
Click the “Save Draft” or “Publish” buttons on the right when you’re done to save or publish your product, just as you would with a post or page. In this case, though, we’re not quite done. We need a little more information depending on the type of product we’re selling.
Product Types
Let’s take a look at the three most common types of products our clients sell: digital products, digital downloads, and physical products.
Digital Products
Digital products is a catchall term for anything that’s digital, but isn’t downloadable. That includes memberships, subscriptions and courses. To create a digital product, check the “Virtual” checkbox at the top of the product data pane.
Then add your membership, subscription or course information. The process varies based on the type of digital asset you’re selling.
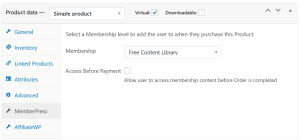
For memberships, click the “MemberPress” section in the product pane, then choose the correct membership.
In this example, we’ve chosen the “Free Content Library.”
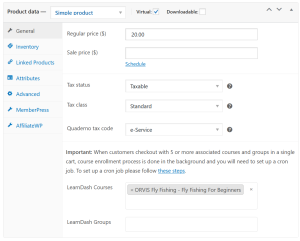
For courses via LearnDash, go to the “General” tab. You’ll see a spot at the bottom of the interface where you can add a LearnDash course or group.
In this example, we’ve added the “Fly Fishing for Beginners” course.
As we explained earlier, you’ll need these modules and their add-on integrations enabled in the Features and Add-Ons settings in order to create these connections.
Digital Downloads
Digital downloads are virtual products that are downloaded — like eBooks, sound files or podcasts.
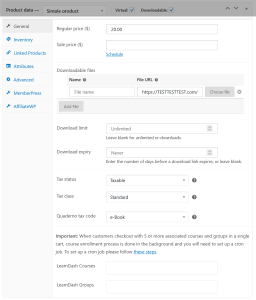
If you’re selling a digital download, make sure you check the “Virtual” and “Downloadable” boxes at the top of the product pane.
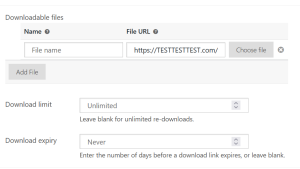
You’ll see a section added inside the product pane for the download.
Click “Choose File” to choose or upload the file you want to sell, then set any parameters for that file’s use after purchase.
In this example, we’re adding an eBook. All other settings are the same as a regular digital product except for the downloadable file, the “Downloadable” check box at the top and the tax code.
Physical Product
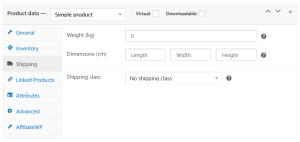
A physical product should have no boxes checked at the top of the pane, unlike its digital brethren. Though not required, most physical products need shipping information.
Click the “Shipping” section on the left side of the product pane.
Here you can add weight, dimension and a shipping class (if needed) to your product.
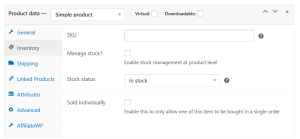
You can also manage inventory from here under the “Inventory” section of the product pane.
From here you can add a SKU (if needed) and manage your inventory. You don’t absolutely need to add inventory numbers here when you’re just starting out, but checking the “Manage stock” checkbox and entering your quantity can help you avoid selling products you don’t have if that’s a concern.
eCommerce Should Be Easy
It shouldn’t take you more than a few minutes to build a product with this guide, even if you’re just getting started. If you haven’t dipped your toes into the eCommerce pool yet, this is your notice to come on in. The water’s fine.
Thanks for reading this month’s State of the Platform. We hope you found these tips and updates helpful. And if you need a hand with building eCommerce products (or anything else), don’t hesitate to reach out. Just drop us a line, anytime.
Best Regards,
David Brandon
Copywriter
Rainmaker Digital Services
