
Greetings Rainmakers!
There were only about 1,000 people in the world that could receive the first email sent by Ray Tomlinson in 1971 — ARPANET hadn’t even become the Internet yet.
The first message was so mundane that the inventor can’t even remember what it said, stating “The test messages were entirely forgettable and I have, therefore, forgotten them.”
Times change.
Today’s email is ubiquitous and powerful, and every marketing platform worth its salt allows you to blast messages to numbers of people far greater than Tomlinson could have ever envisioned. Rainmaker Platform is no different.
Email is an incredibly useful tool in your marketing arsenal. If you just decide to browse to the Rainmaker Platform Email Settings page, though, you might be a little overwhelmed unless you’re as tech-savvy as Tomlinson. MX? TXT? API? And what if you want to integrate your current email solution? How does that work?
This State of the Platform takes you through the Email Settings page on the Andromeda version of Rainmaker Platform and the options you need to know. We’ll show you how to set up RainMail as your email marketing platform or integrate other solutions like Mailchimp or Constant Contact. And we’ll give you a quick look at how to set your global email settings.
Serving Up RainMail, Right to the Inbox
First, navigate to the Email Settings page on your Rainmaker site. Log in to your Dashboard, then click the gear icon in the upper right corner and choose “Email.”
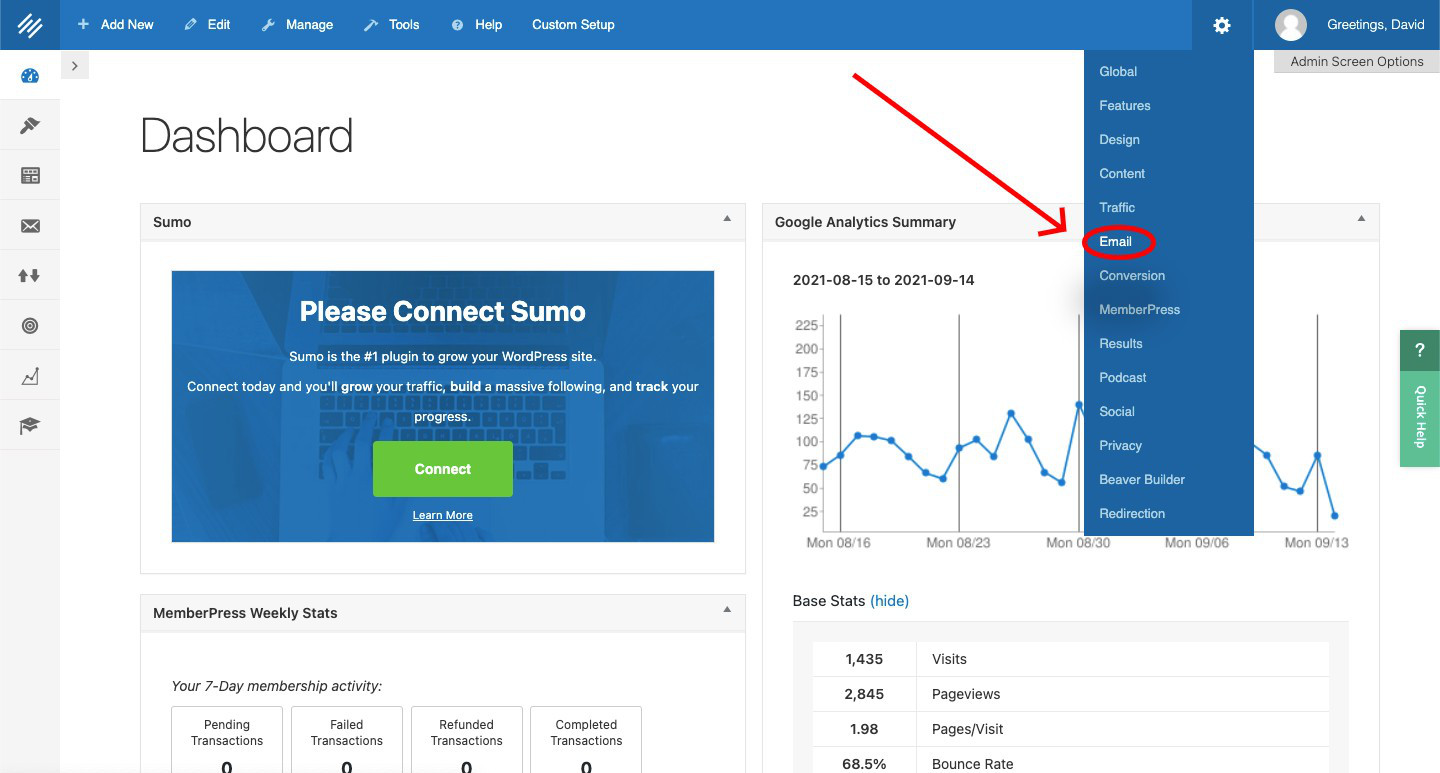
This will take you to the Email Settings page. The first group of settings you’ll see is a block titled “RainMail” and subtitled “Domain Authorization.” This is where you set up your RainMail account.
Note — if you want to use a different email provider for your marketing such as AWeber or Infusionsoft, you can set that up further down the page, as we’ll discuss later.
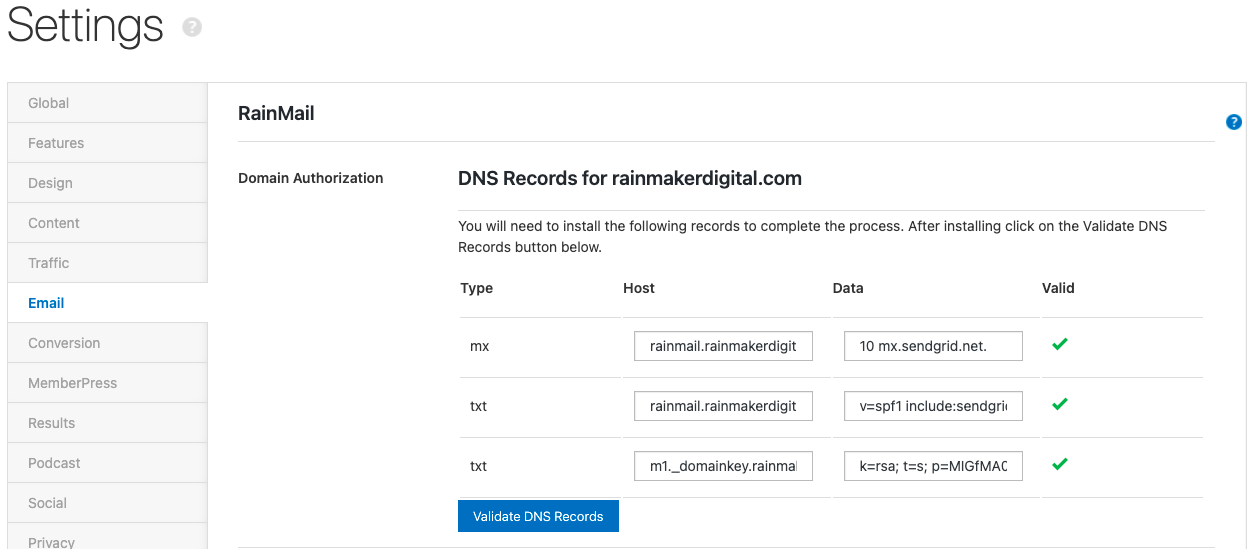
“DNS,” or “Domain Name System,” translates IP addresses like 45.79.144.219 into easily identifiable names, like “RainmakerDigital.com.” When you reference a particular domain name on your browser the DNS will make sure you are served the right page. DNS isn’t just used for web browsing, though — it’s important for email as well.
To actually send and receive through RainMail or any other mail service, you need the right nameserver for your email exchange, or “mx.” If you set up your site through Rainmaker Digital and have not yet used RainMail, you’ll need to contact us to get the correct nameservers set up. You will also need the correct mx information if you migrated your site from elsewhere or have a domain name through a third party like GoDaddy or BlueHost.
“TXT” is another important DNS term to understand. This literally just refers to “text,” but in the context of email, TXT records are used to reference special DNS information that helps servers make sure email is authentic. These records certify that your email is from who it says it’s from and can be trusted.
The primary TXT records for email are “SPF” and “DKIM.” SPF, or “Sender Policy Framework,” lets the server know who can send mail from your domain — basically, making sure nobody can write a fake return address on the digital corner of the envelope. DKIM, or “DomainKeys Identified Mail,” encrypts and digitally signs the email. Think of DKIM like the old wax letter signet you see in movies — it both signifies who the sender is and seals the message against tampering. Together, these DNS records certify who’s sending email and help it get delivered. We will set up SPF for any RainMail installation, but DKIM is only used if SPF isn’t enough to get the job done.
All of these DNS records will be managed by the nameservers which manage your domain name — NOT necessarily your site host. If your nameservers are not through Rainmaker Digital, you’ll have to talk to the DNS authority that controls your DNS records. If your DNS records are managed by us, we will set your site up with the right DNS records when your RainMail is activated. Just contact one of our Client Services representatives or open a support ticket.
Once these are set up, you can validate the DNS by clicking the big blue button and RainMail will be ready to send email that gets delivered. If we set it up for you, you won’t have to do anything.
Getting the Right “Look”
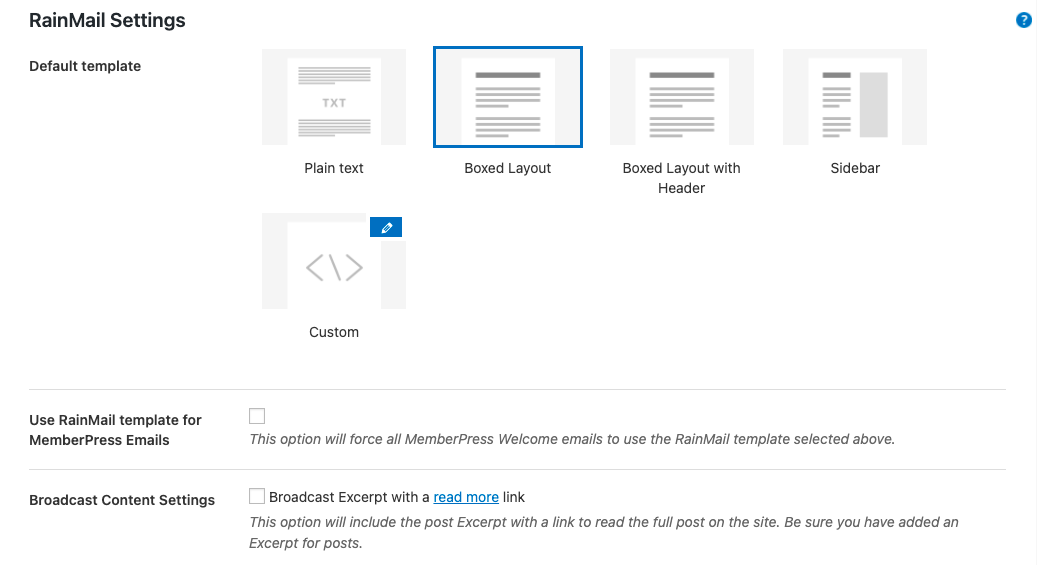
As you scroll down the Email Settings page, you’ll see the next section: “RainMail Settings.”
Under here you’ll be able to customize the look and feel of your emails. These are global settings which apply to every message you send, as opposed to the actual email editor which allows you to edit some of these options on an email-by-email basis.
You can set the default email template and choose how you would like your content to be displayed. There are a couple of settings down below here you can adjust, and both are clearly explained on the page itself.
As you continue to move down the page, you can set up a header image with several different options for alternate text or other displayed content here.
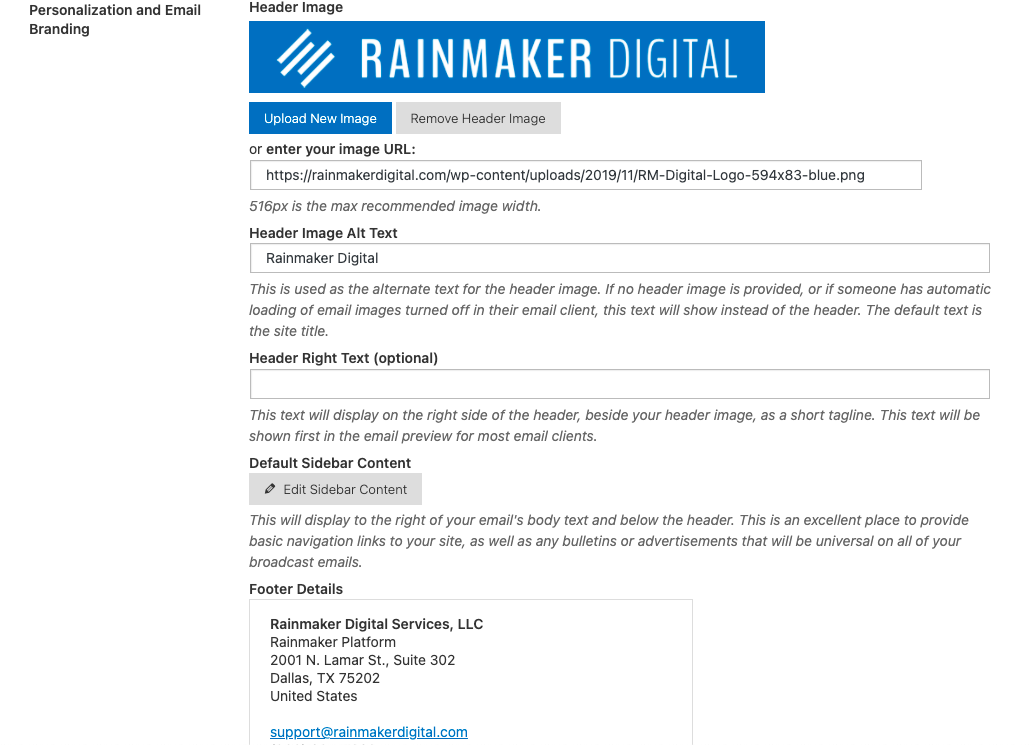
It is important to include Alt Text in case your subscribers don’t see images when they receive your messages. Make the alt text useful and compelling so your readers will take the time to load the images or at least read the email. Be careful, though — for something like a header image which is just duplicating the title, there’s no need to add alt text and confuse a screen reader.
Click into the “Edit Sidebar Content” button if you want to use a sidebar for navigation links or ads. You can also add and edit your email footer (your broadcast “signature”) here.
“Email Envelope Settings” is next down the page. You can set the default address you want email to send from as well as the default sender name here. You can still change the sender from the individual email page like you normally would as well.

Using Someone Else’s Service
We’d love for you to make RainMail your email platform of choice, but we understand that many people have other services they use, and Rainmaker Platform allows for that. We currently support integrations with Mailchimp, AWeber, Infusionsoft, Sumo, ConvertKit and Constant Contact through the Email Settings page. You can also activate Mad Mimi and GetResponse through Rainmaker Labs on the Features page.
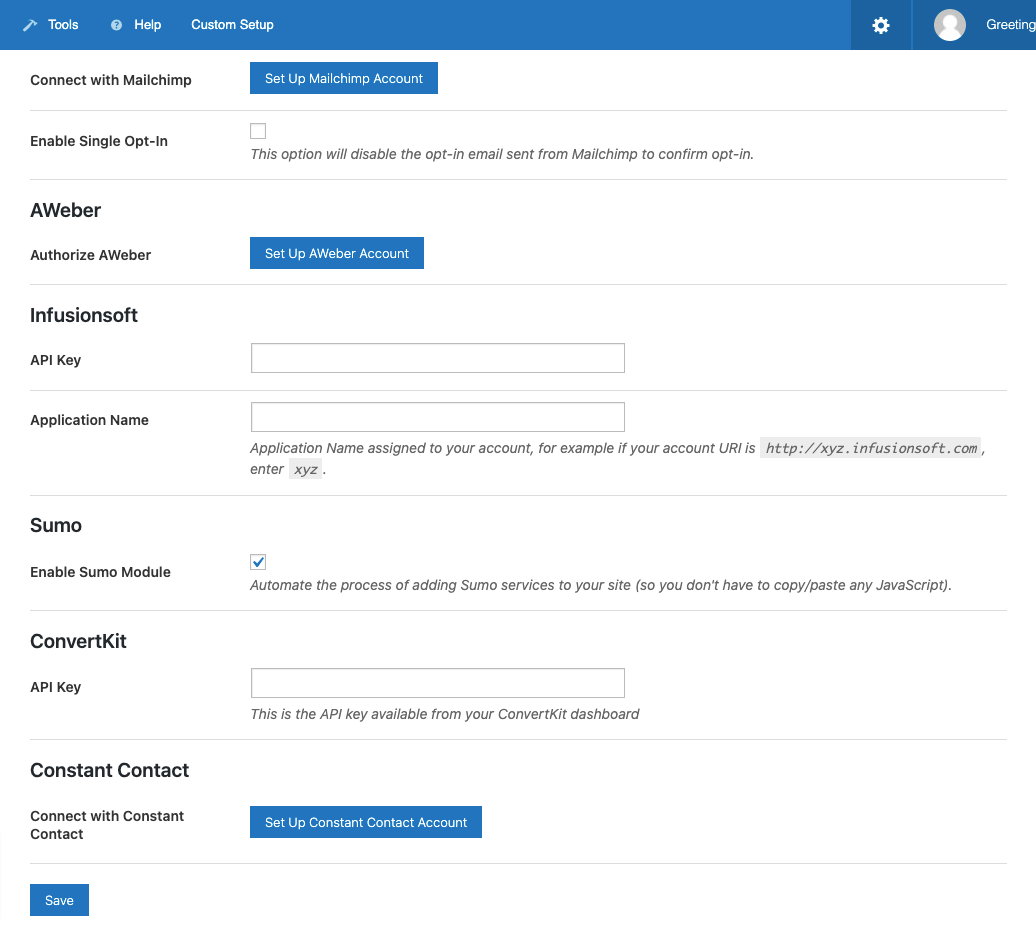
You’ll need to get the setup information from these third-party providers. In general, authorization or an API key is all that’s needed. If you have questions, let us know — we can certainly help you with the setup process once you have the right information.
When you’re done with your email settings scroll down to the very bottom of the page and be sure to click “Save.” Make sure you lock them in before you leave.
Email That Works
Congratulations — you’ve mastered your Rainmaker Platform global email settings. If you have questions about your email settings, changing your RainMail configuration or creating broadcast emails, reach out. We’re here to help.
Best Regards,
Ed Bardwell
President
Rainmaker Digital Services