Summer’s over (though you wouldn’t know it from the outside temperature). We’re fully in autumn now, preparing for winter. The holiday season is right around the corner; retailers, both online and offline, are all preparing for the biggest selling time of the year. We are too.
Stay tuned; we’ll be offering our popular Two Sites, One Price promotion again close to the end of this year, so get ready for that if you have a couple of sites you want to start for new businesses.
Also, we’ve just created a new business outreach tool called Essentials of Digital Marketing. This handy guide is aimed at the roughly 25% of all businesses that have no online presence … we’re making it as easy as possible for them to get online. And of course, if you know any businesses that could use a hand getting online, please pass it on.
https://rainmakerdigital.com/thrive/
In the meantime, in this State of the Platform we have some details on recent platform changes and some tips on how to adjust pricing on your products or services. Read on for more.
Maintenance Updates 3.4.7.3 and 3.4.7.4
This month’s updates have been maintenance releases to fix issues that have resulted in customer support tickets. 3.4.7.3 fixed the cookie opt-in displaying incorrectly on some Full-Width No Header Footer pages and 3.4.7.4 addressed a Safari-only issue with the Classic editor and resolved a “Read More” link issue on automated broadcasts of post emails. For more information, see the changelog.
Stay tuned for more updates as we get closer to the end of the year. We’re working to start 2025 with a bang, adding extended functionality and new features.
Setting Sale Pricing in Rainmaker Platform
Rainmaker Platform makes eCommerce easy.
There are many ways to sell with Rainmaker Platform. Most of our clients who do eCommerce lean on WooCommerce, but memberships and courses can be sold on their own through MemberPress and LearnDash.
At this time of year, special deals and pricing are critical. You probably already have your promotions set, but it’s never too late to add. Here’s how you can set sale pricing on LearnDash, MemberPress and WooCommerce.
LearnDash
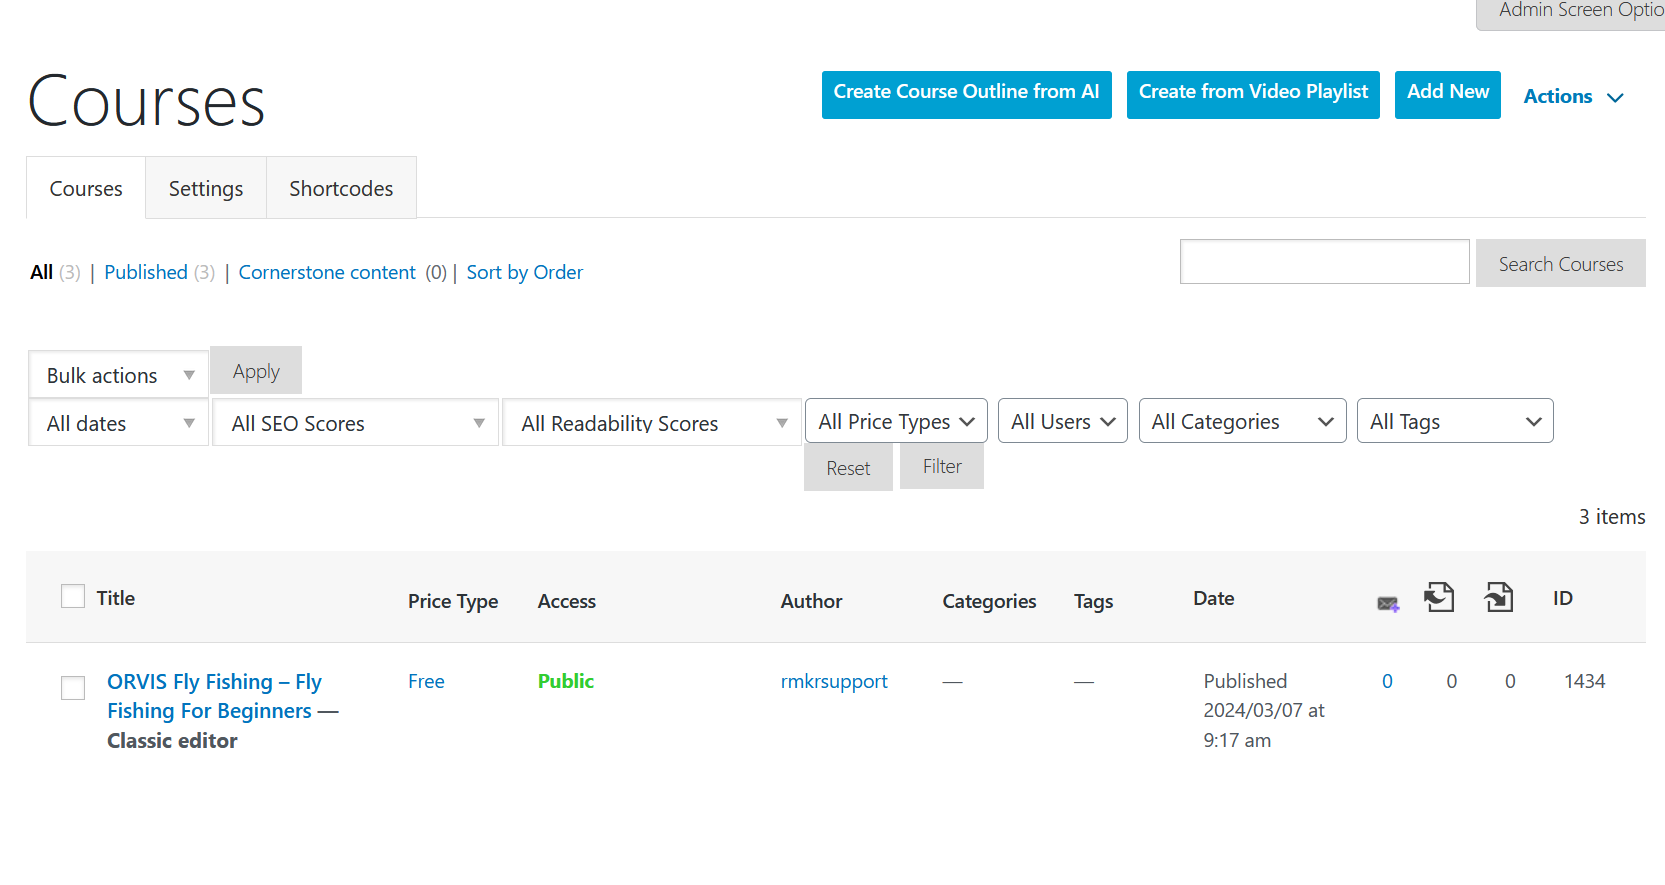
From your LearnDash Courses page (accessible from the left hand menu > Content > LearnDash > Courses), choose the course you want to manage pricing for.
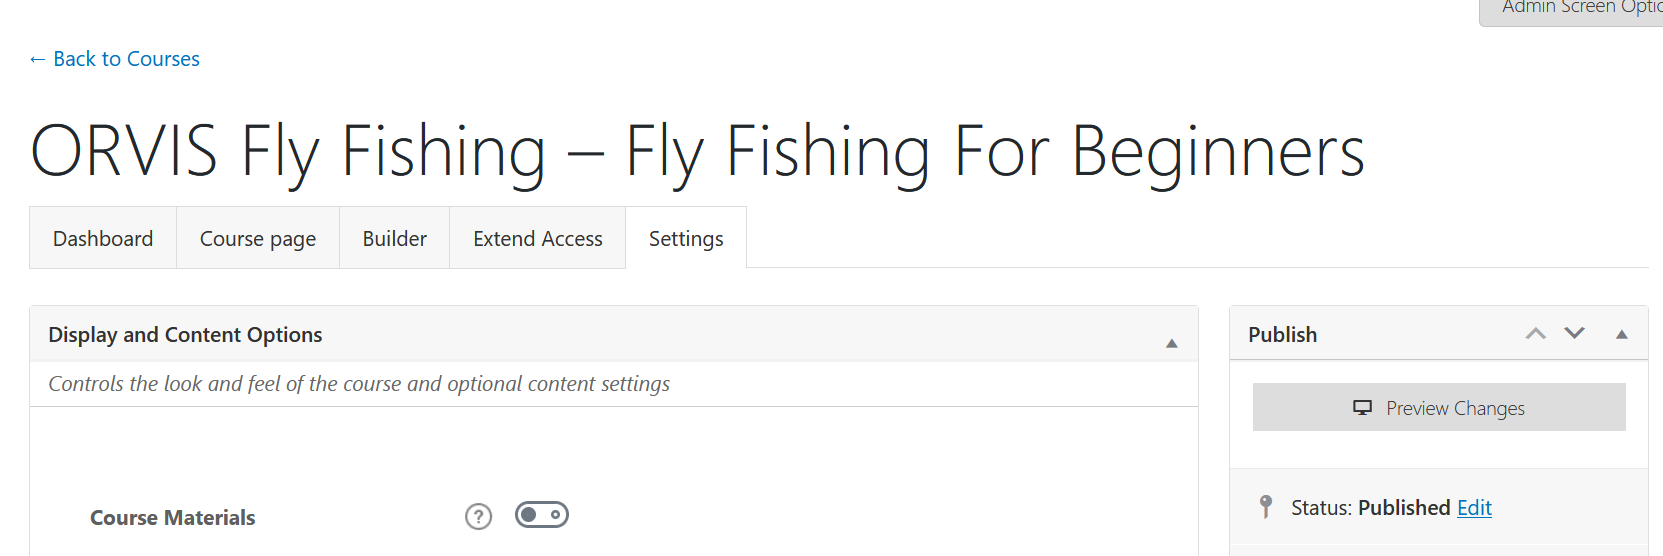
In this case we’re going to edit the “Fly Fishing For Beginners” course. After opening the course, we go to the Settings tab.
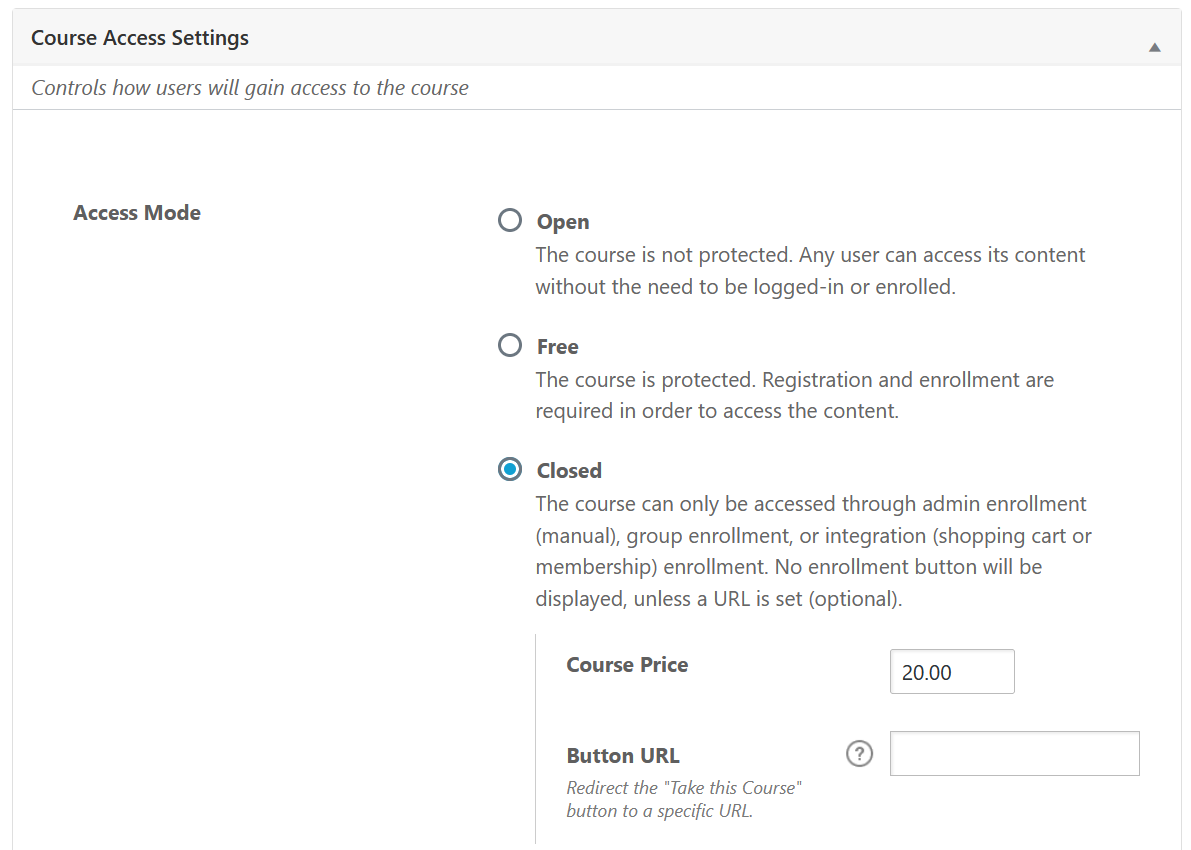
We scroll down to the Course Access Settings pane.
This is where we find the course price if we’re using LearnDash as our storefront. We can change that price here.
There is no option to highlight sale pricing here, though; for that, we’d need to go to the course page editor (accessible via the Course Page tab on this page) and change the copy to call out the sale price. Consider highlighting lower prices via a front page banner, button, popup or other eye-catching graphic to grab attention.
MemberPress
If your courses or digital products are tied to access or membership levels, you can create sale pricing through MemberPress as well. Your membership pricing is accessible through the left hand menu > Conversion > MemberPress > Memberships. Choose the membership you wish to edit.
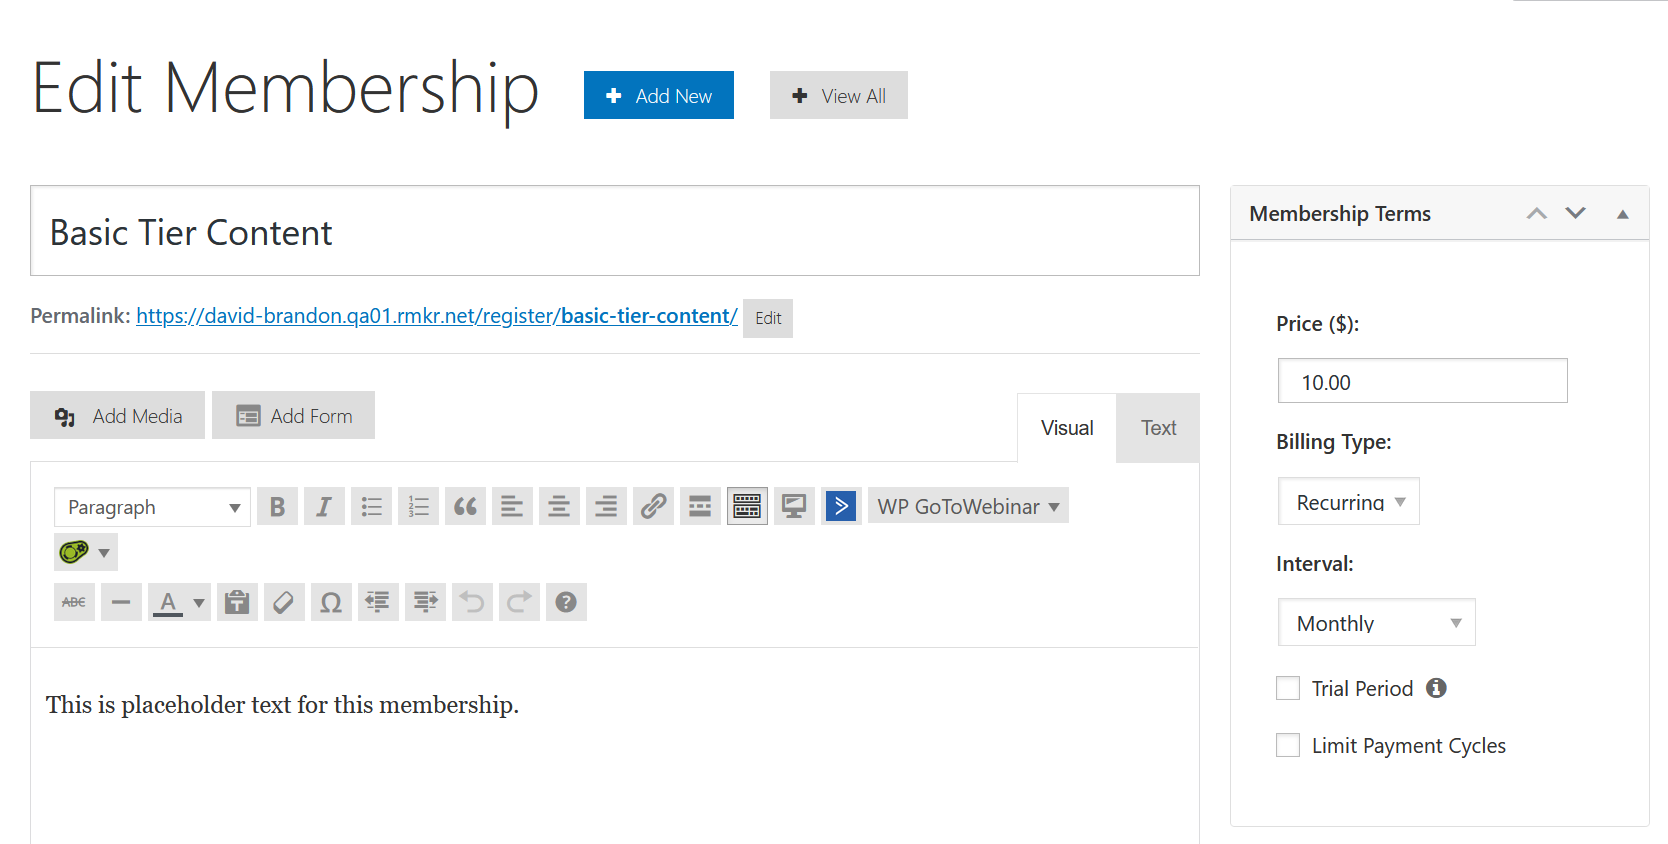
We’re going to edit the “Basic Tier Content” membership.
Once we click on the membership, it takes us to the settings and content for that membership. The pricing is on the top right of the page and can be easily edited.
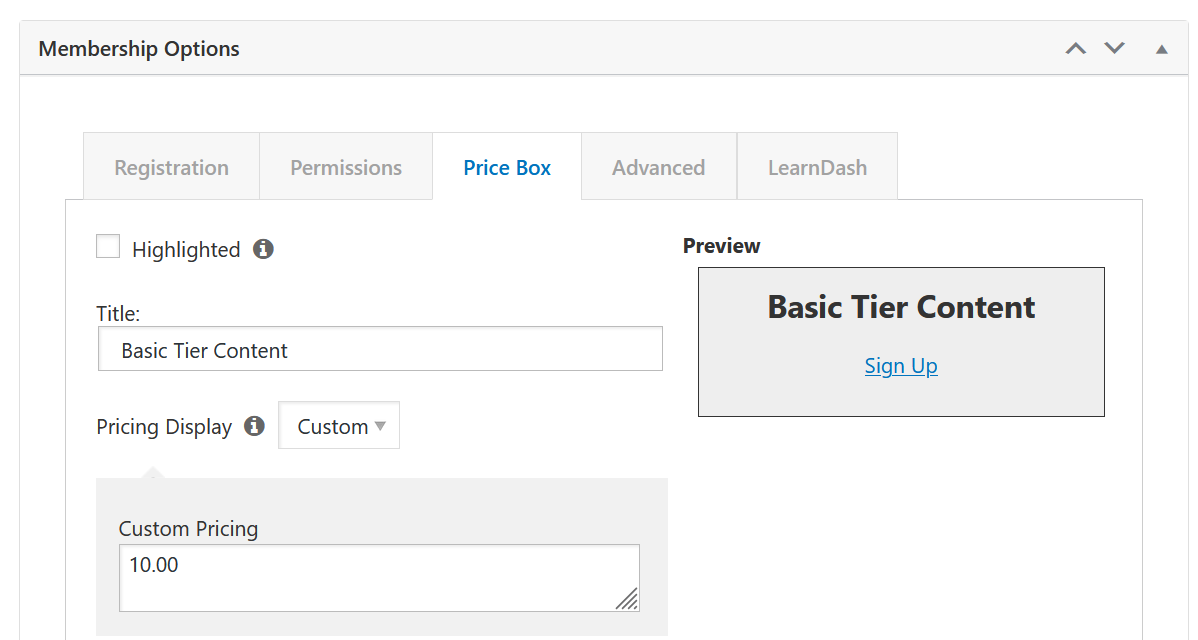
Note that if you’re using a custom pricing display, you will have to scroll down to the Membership Options pane, choose the Price Box tab and make sure the Pricing Display box matches the pricing you just set in the Membership Terms.
If Pricing Display isn’t set to Custom, you can safely ignore this field.
As with LearnDash, there’s no option here to show the price you’re marking down from, so you’ll have to rely on the membership page copy to call out the change.
WooCommerce
Rainmaker Platform’s integration with WooCommerce is the most flexible option for sales pricing, as it allows you to show a marked-down price without relying on any copy edits. In addition, if you’re selling memberships or courses through WooCommerce, you can set the pricing there without having to go through MemberPress or LearnDash.
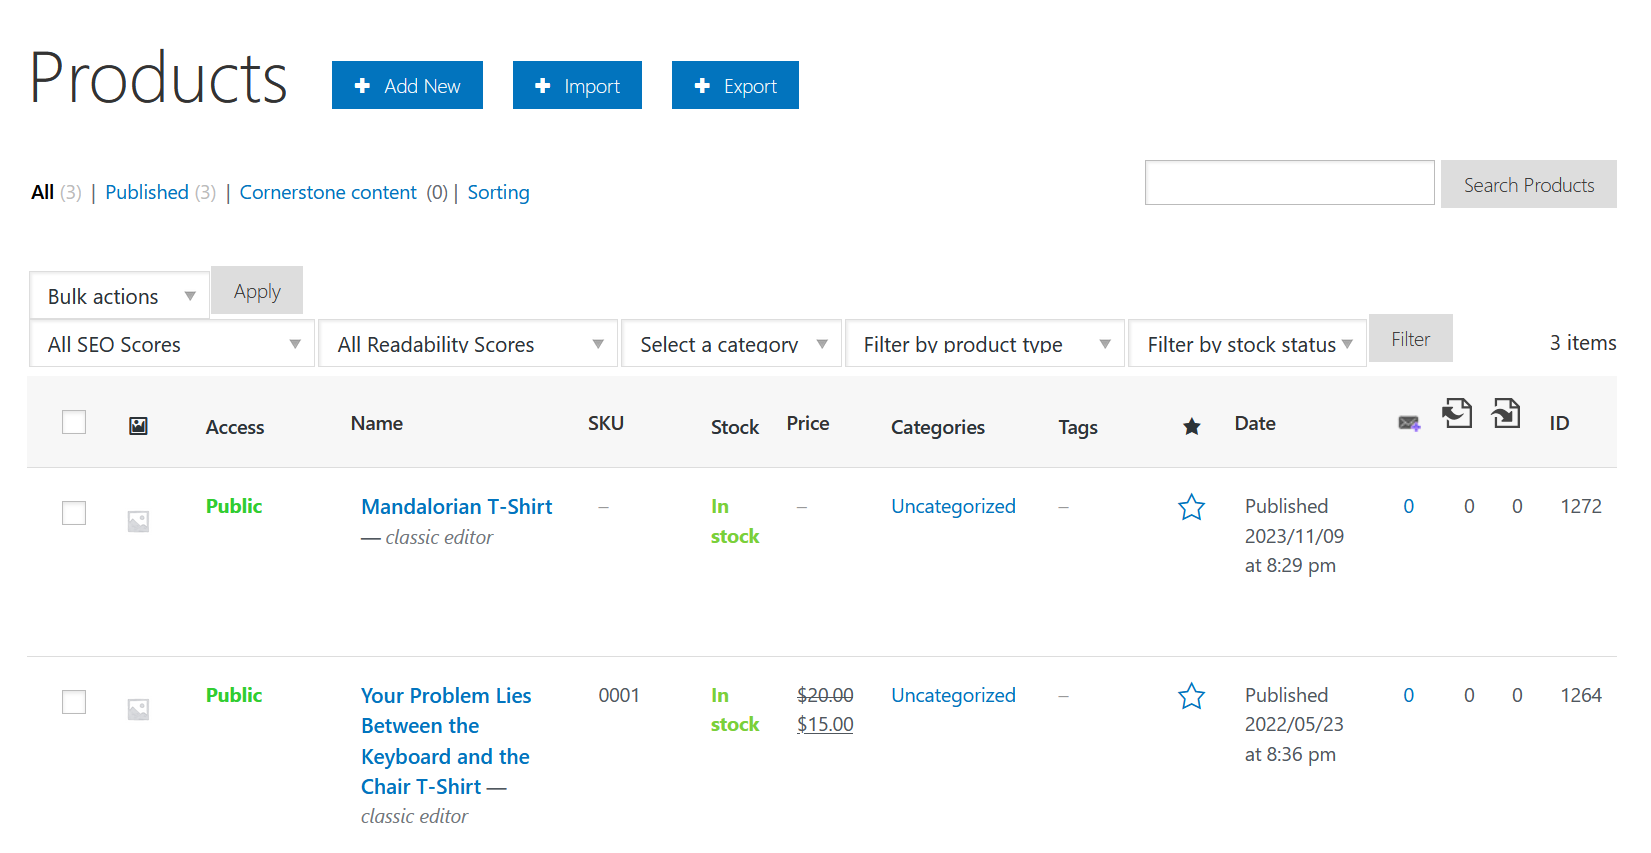
To access your WooCommerce products, go to the left hand menu > Conversion > WooCommerce > Products. From here, click the product you want to edit.
As you can see, the second T-shirt product actually has a sale price already. We’ll take a look at that one.
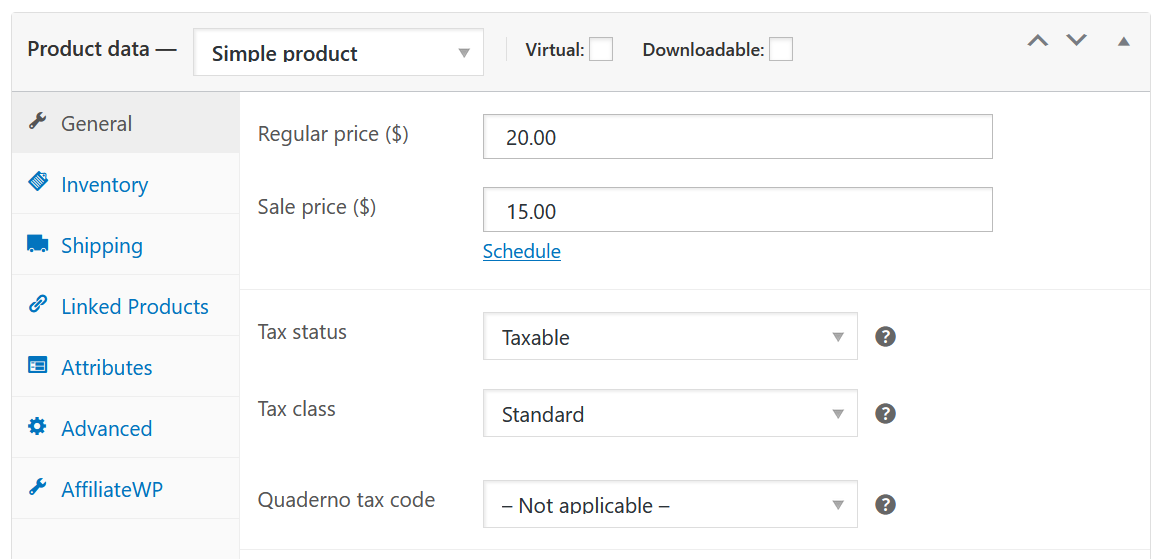
When we click through to the product, we have to scroll down to the WooCommerce settings further down the page in the Product data pane.
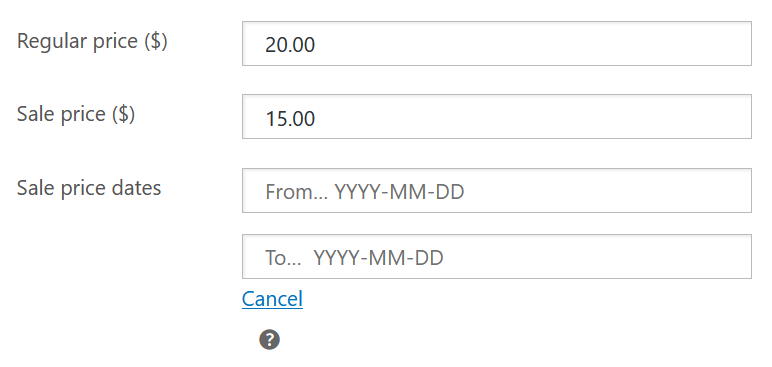
Here we can see there’s a regular price and a sale price. The regular price still shows while the product is on sale — it’s displayed with a strikethrough to emphasize the new, lower price.
You can set this pricing for any kind of product. In addition, while you can set it manually, you can also set it up to go into effect for a certain period of time by clicking the “Schedule” button below the Sale Price box.
Just enter the dates you want the pricing to be valid for and you’re all set.
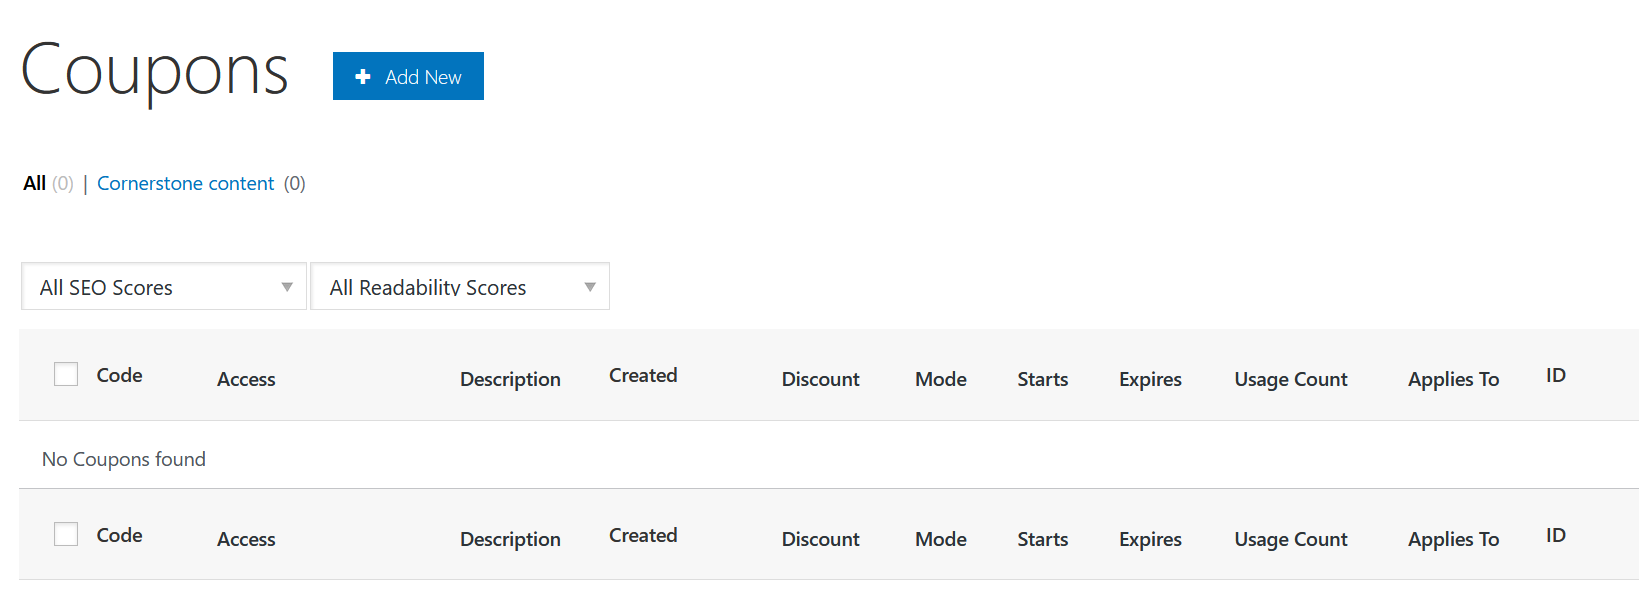
You can also create a coupon for specific membership groups (set through MemberPress). To do this, go to the left hand menu > Conversion > WooCommerce > Coupons.
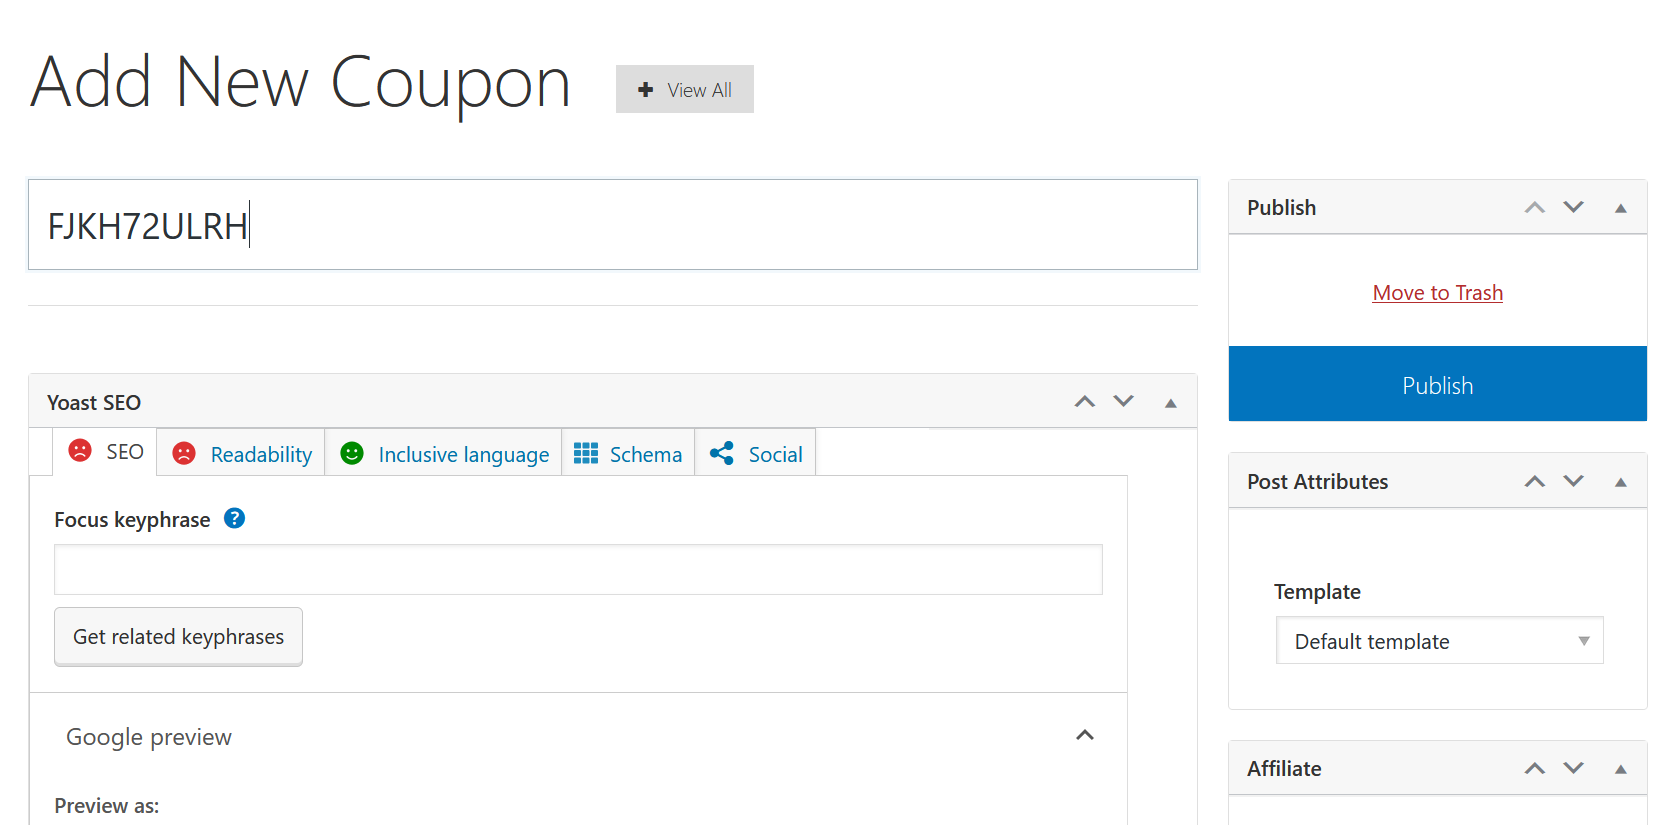
Click the blue Add New box to add a new coupon.
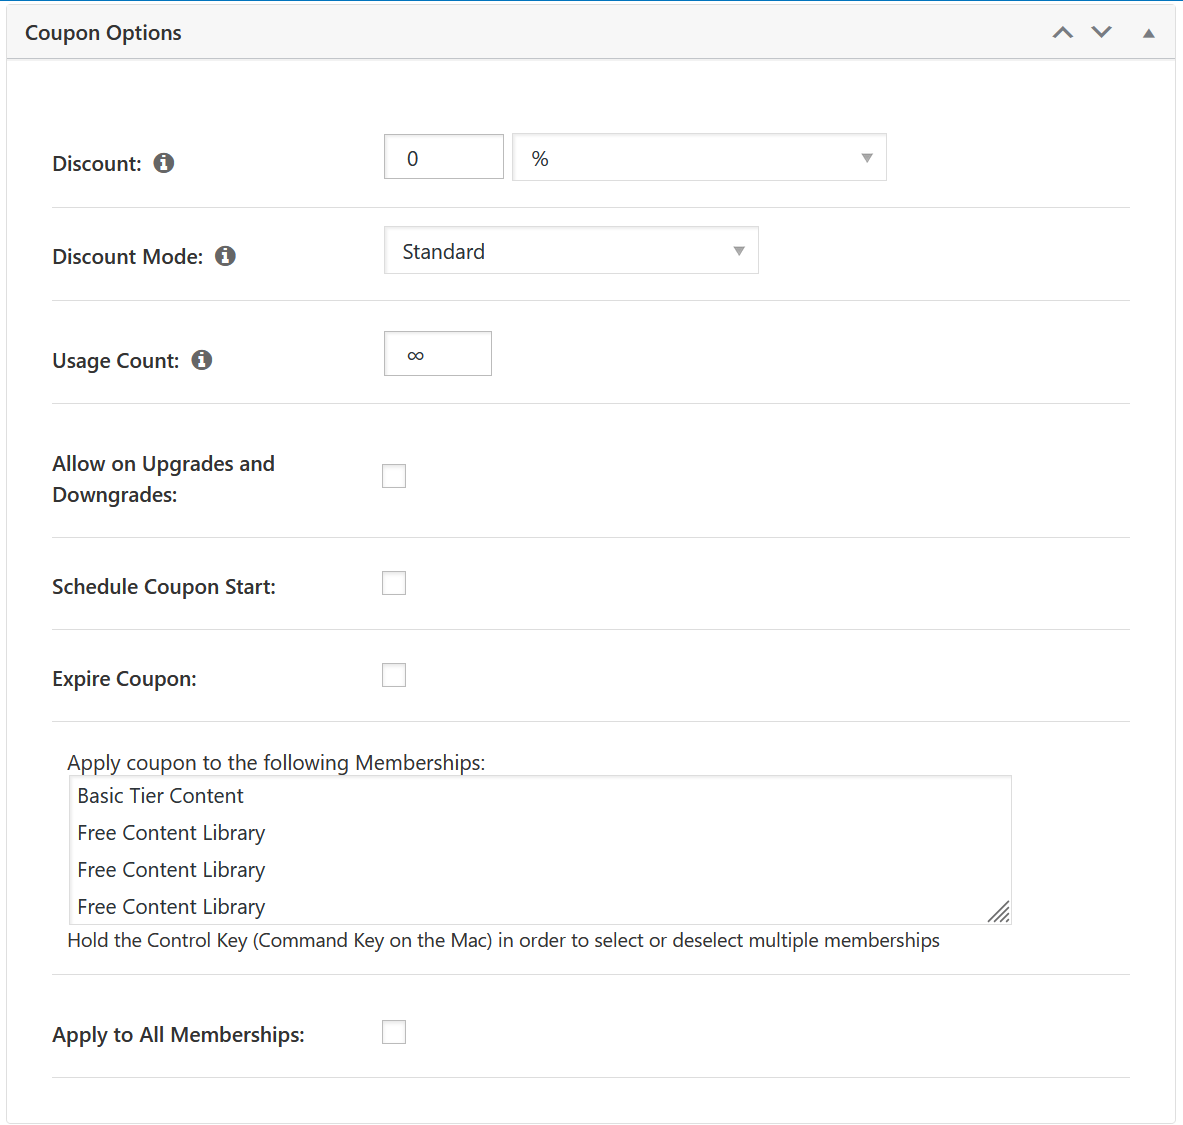
Change the title to whatever you want the coupon code to be, then scroll down to the Coupon Options pane.
Here you can set the discount, decide how many times it can be used, schedule the coupon for a specific time period and choose which memberships to apply it to.
By default WooCommerce should have coupons turned on in the WooCommerce Settings (accessible from the Settings gear menu > WooCommerce); when a member with an applicable coupon checks out, they can enter the coupon code at checkout to get the discount.
“Sales” Can Be More Than Price
These sale prices are simple changes, but if you’re looking at other specials for the winter months, discounts aren’t your only options. Here are a few ideas.
- Offer free temporary access. For a limited time, make a course or membership tier free to people who wouldn’t normally see it. This lets them “taste-test” your content.
- Add older courses to lower membership tiers. If you’re constantly creating course content, your older content may have lower sales or be seen as less important. Drop it down a tier and notify your customers that there’s more content now available at the lower price point.
- Create an introductory offer. Consider a new package of products or services at an entry-level price point to get people interested, or a new bundle of older products or services.
Everyone Loves a Sale
You’ve probably already finalized your holiday plans, but it’s never too late to add. Use sale pricing and other promotions to have a successful holiday season. And if you need a little technical help, don’t hesitate to reach out. We’re always here to help. Just drop us a line, anytime.
Best Regards,
Ed Bardwell
President
Rainmaker Digital Services
