
“Knowledge is power,” goes the old quote.
We agree – but we have a twist on that saying.
We prefer to say “knowledge is profit.”
That’s what Rainmaker Platform is built on: the idea that your business can turn your knowledge — of product, of process, of production — into real dollars.
We offer a variety of ways to do that. But one of the best and most used is course creation. With Rainmaker Platform, we incorporated LearnDash to make courses easier to create and monetize.
In this State of the Platform, we’re looking at two simple methods to sell your LearnDash courses with Rainmaker Platform: through MemberPress and through WooCommerce.
MemberPress vs. WooCommerce: The Pros and Cons
Which is best for selling your courses?
There’s no right answer here. It depends on what you need.
MemberPress alone allows you to sell your courses simply. It’s a one-stop shop: select course, pay money. But it’s limited as a checkout option.
WooCommerce allows you to use shopping cart functionality, but it takes a little more work to set up well. We’ll show you a basic integration; if you want to learn more, we have some more advanced options available.
Selling LearnDash Courses Through MemberPress
MemberPress is a powerful Module in Rainmaker Platform that allows you to protect access to your content through subscriptions or memberships.
To sell a course through MemberPress, first create a membership that includes that course.
New Membership
Go to Conversion > MemberPress > Memberships and click the big blue “Add New” button. This will take you to the new membership page. In this case, I’m showing a membership called “Basketball” which I’ve already built; the process is the same.
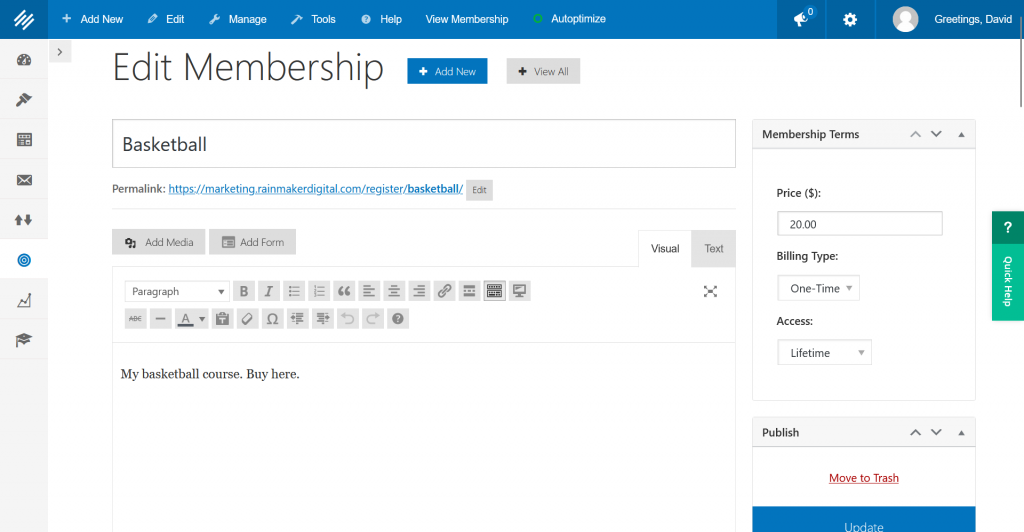
There are a number of options here. If you want to dig more into setting up a membership, you can reference some of our previous videos and articles on the subject or contact us directly.
To get started, you’re going to want to add a price, a billing type, and access in the box on the right.
Price is the price of the course.
Billing type is the type of billing: once or on a recurring basis.
Access is this course accessibility: forever or expiring.
After setting these minimum options, scroll down the page until you see a box called “Membership Options.”
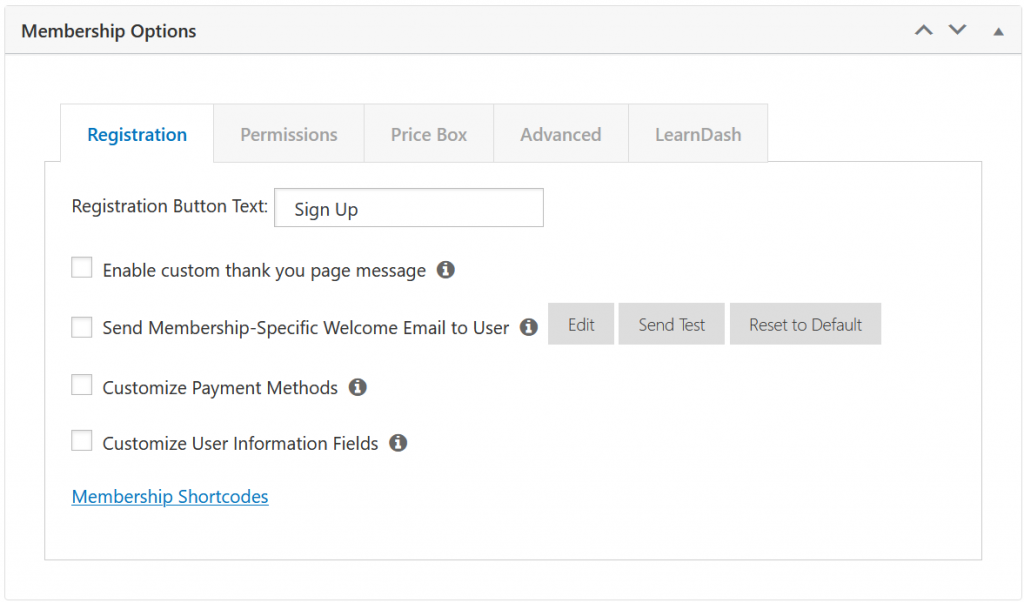
Some of these may not be necessary for you — but take a look to make sure everything is correct. You’ll definitely want a custom thank you page message and a membership-specific welcome email when you create your membership. You may also want to check “Customize Payment Methods” so you can choose your payment method.
Now click the “LearnDash” tab.
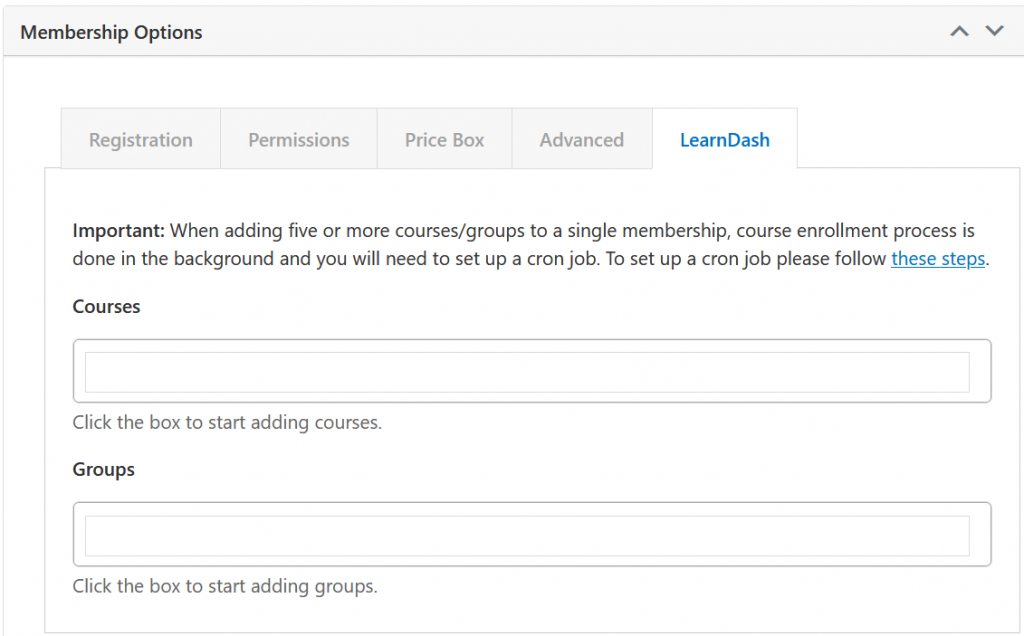
Click the box under Courses and you can add courses to your membership. If you have more than five courses to add, contact us and we’ll help you add them as a batch.
Once you’re done, click the big blue “Publish” button on the right of the screen. Then you’re going to want to create a rule for your MemberPress course.
Create a Rule
To start with, go to Conversion > MemberPress > Rules, then click “Add New.”
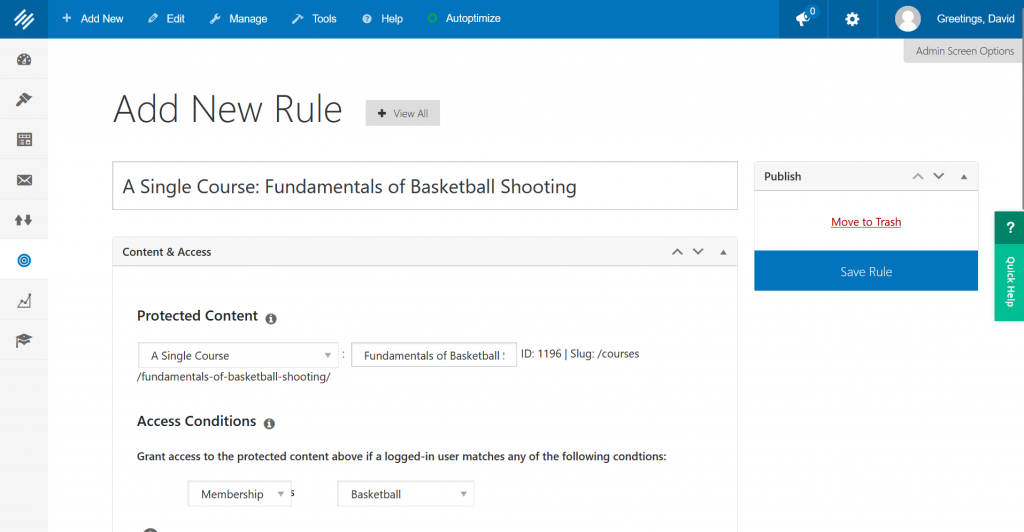
Set the drop-downs up with your course options.
For this example, we’re going to sell one of the old demo courses I created on this site: “Fundamentals of Basketball Shooting.” This method works with any individual course.
We’re going to choose “A Single Course” and select “Fundamentals of Basketball Shooting.” Then we choose the “Basketball” membership we were working on earlier and say only people logged in to that membership can access the course.
Now save the rule with the big blue button on the right.
Adjust Course Settings
Next, go to Content > LearnDash > Courses, then choose your course.
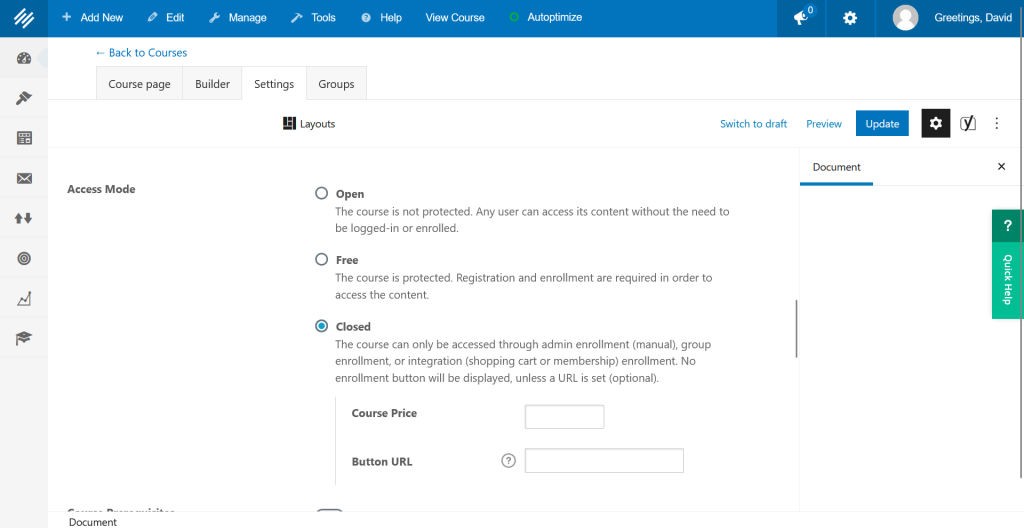
Click the “Settings” tab, then scroll down the page and make sure your access mode is set to “Closed.” Now you can choose a displayed price for the course if you want to show it here (this is only really helpful if you’re using a single course membership, as we are here; leave it blank for groups).
Under “Button URL,” add the link to your sales page (the membership page we set up to start with). In our case, it’s “https://marketing.rainmakerdigital.com/register/basketball/.”
Now go back to the “Course page” tab and scroll down on the right side of the page. You’ll see a box called “Associated Memberships.” Click “Select memberships” in that box and choose the membership you want associated.
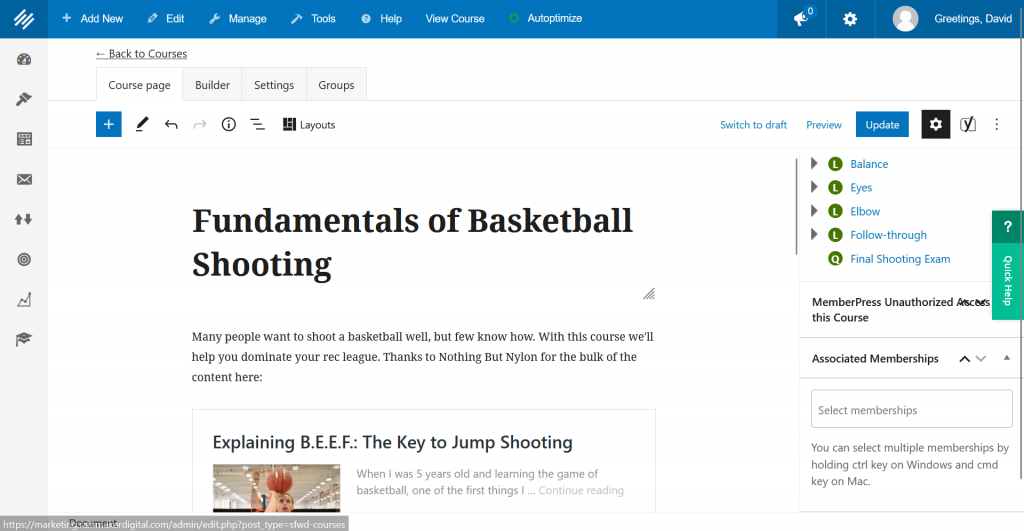
Save your changes by clicking “Update” on the top right.
That’s it. You’re done. You can click on your sales page and see the membership is set up – and it will only let you access the course once you’ve bought the membership.
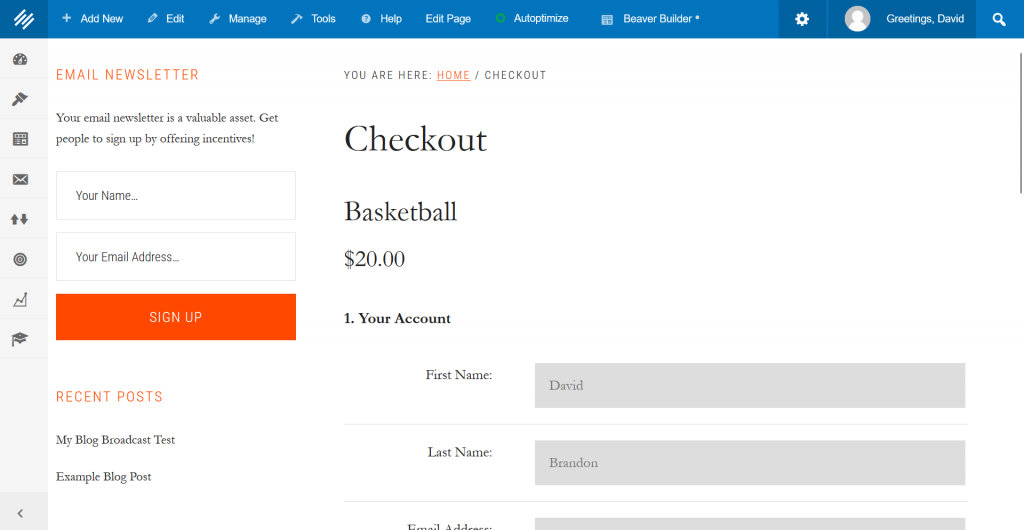
This is how you set up a sales page for your LearnDash course through MemberPress. But what about WooCommerce?
Selling LearnDash Courses with WooCommerce
You can also integrate your LearnDash courses with WooCommerce.
WooCommerce makes it very easy to add LearnDash courses to a product. Navigate to Conversion > WooCommerce > Products, then click “Add New.” This will take you to a new product page.
Scroll down to the box that says “Product data” and choose “Course” from the drop-down menu at the top.
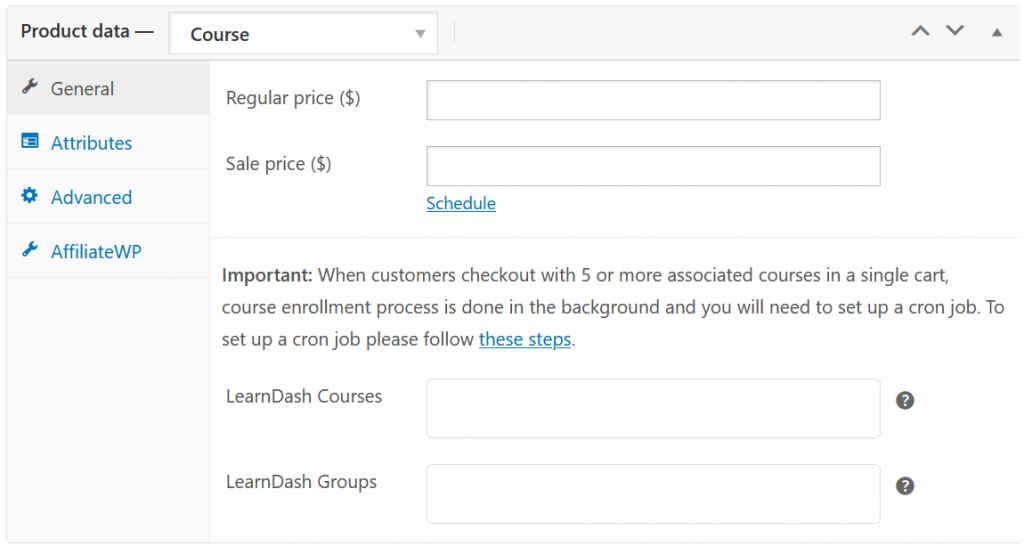
Set up all your other product information as usual, then use the box next to “LearnDash Courses” or “LearnDash Groups” to choose the course to associate with the product. When a logged-in user buys this product, they get access to that course. If you want to add multiple courses, hold down the SHIFT key while clicking each course you’re adding.
Click the blue “Publish” button on the right to publish the product.
Now you can use that product URL as the custom URL for your LearnDash course — it works exactly the same as the MemberPress example above. Just make sure your course is set to “Closed” under Content > LearnDash > Courses, then insert the product URL as the button URL next to the “Closed” setting.
When you sell a course this way, the course is tied to the user’s login. This is simple, but can be a challenge to future-proof. Tying the WooCommerce product to a MemberPress login is a better way to do it — if you want to learn more, check out this webinar where Katy Barrilleaux and I run through the details, or contact us for help.
That’s it. You’re done.
Using Multiple Add-Ons Together
Rainmaker Platform has a number of helpful add-ons that you can use separately, but many of them become far more powerful when used together. We hope this State of the Platform has inspired you to think of more creative ways to turn knowledge into profit. Need a hand? Contact us — we’re here to help.
Best Regards,
David Brandon
Copywriter
Rainmaker Digital Services