Greetings Rainmakers!
This month’s State of the Platform includes notes on a couple of platform updates, some tips and tricks from an experienced health and wellness marketer in this month’s Digital Marketing Done Right, and a how-to on implementing authorship on your Rainmaker Platform site. Let’s dive in.
Platform Updates: Improving Quality of Life
We’re committed to continuously improving Rainmaker Platform, and this month we released versions 3.3.4.2 and 3.3.4.3, two small updates aimed at improving quality of life for some of our features. Check the changelog for the latest updates.
We are currently finishing a larger development sprint that includes enhancements to design features and the web production process (particularly with Beaver Builder), as well as an updated user portal experience. Stay tuned for version 3.3.5 in the near future.
Client Spotlight: Keith Rhys
We just published the latest episode of our Digital Marketing Done Right show, featuring Keith Rhys of keithrhys.com. He’s a longtime Rainmaker Platform client who provides health and wellness marketing and consulting services. It was a great interview, and he had a lot of useful experience to share.
We covered:
- “Author”-preneurship and how the old publishing model has flipped
- The pitfalls of building an audience on public platforms like Instagram or Facebook
- How to get your audience’s attention on social media if video isn’t working
And more!
Click here to listen to the entire show.
https://rainmakerdigital.com/client-spotlight-keith-rhys/
Want us to feature your site or business? We’d love to interview you and share your story. Drop us a line at marketing@rainmakerdigital.com.
UA is Going Away
Just a reminder: Google’s Universal Analytics is going away at the end of the month. Starting on July 1, 2023, Google will only serve Google Analytics 4 data. Now is the time to get GA4 implemented.
Need a hand switching from UA to GA4? Check out our GA4 guide. And if that’s not enough, just drop us a line. We’re here to help.
Tip of the Month: Give Credit to Your Authors
What’s in a name?
Quite a lot, as it turns out. Who writes something matters to your audience — and it matters for Google, too.
Google tried to make authorship matter a while ago with Google Authorship and failed miserably, but times are changing. With AI making it easy to generate vast amounts of useful but average content, Google updated its famous E-A-T (expertise, authority, trustworthiness) search ranking guidelines with another E — experience.
We’re reading the tea leaves here, but we’re pretty comfortable saying authorship will matter more in the future than it does now. Some of you are already using this for your personal writing and broader contributor network, but if you aren’t, now’s the time to get it set up on your Rainmaker Platform site.
Setting Up Authorship For Your Site
To build author credit with your site, you need to turn on and adjust the authorship settings for your users. When you do that, every post from a user registered on your site will include an author biography that links to an author page with all of their posts and personal information.
Let’s break down how to do it.
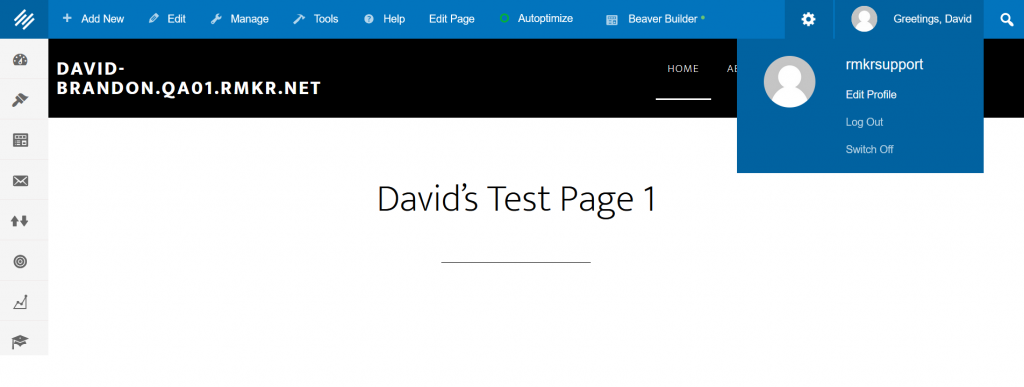
You need to adjust these settings in your user administration. For your own profile, you can just click on your name in the top right corner.
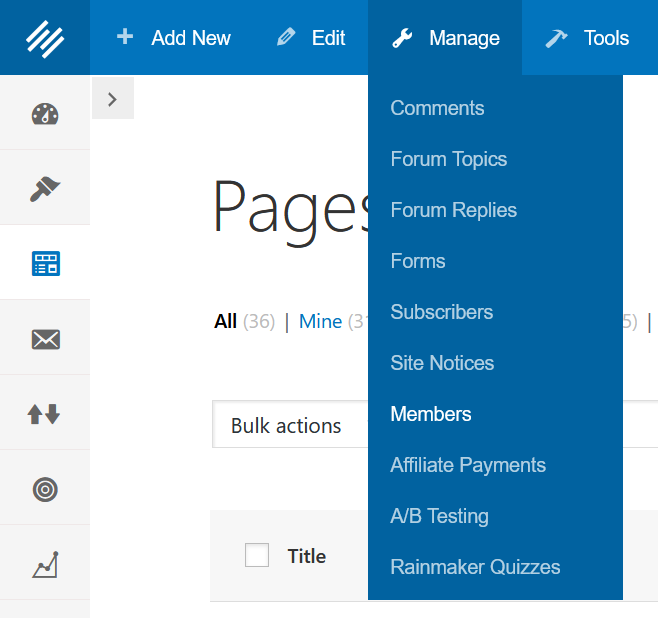
All other users can be found in the Members listing (Top Menu > Manage > Members).
When you click on “Members,” you will see a list of all members registered on your site. Hover over the member’s name and click “Edit” to get to the profile editor for that member.
If you clicked on your own profile in the top right, you’ll come directly to the edit screen for your profile instead of having to choose a profile to edit from all members.
From here, you can set up:
- Display name
- Biographical information and profile picture
- Socials
- Author archive settings
You’ll see all of these as you scroll down the page.
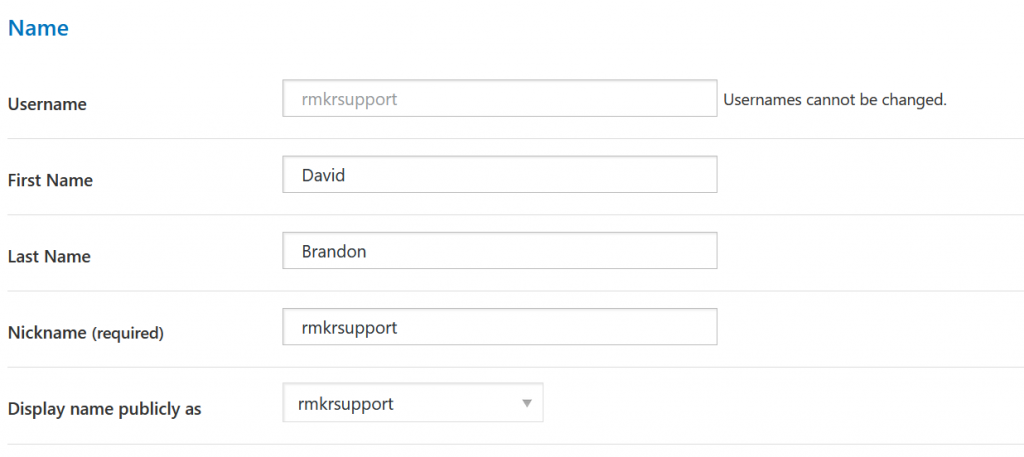
Display Name
Here you’ll see all the names associated with the account. You can change the first and last name and the nickname, then choose what you want for the display name from the drop-down. The display name is the name that shows up in the author biography at the bottom of any post this author creates.
Socials
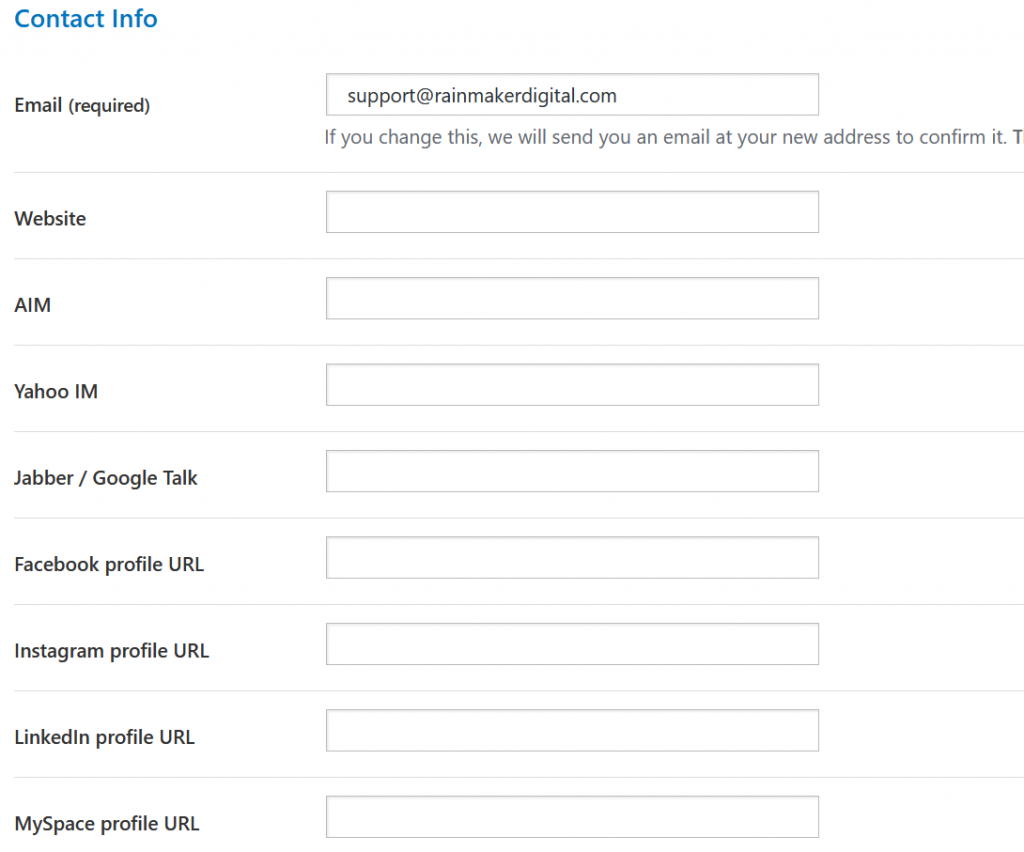
Under “Contact Information,” you can add whatever socials you would like to include on the profile page.
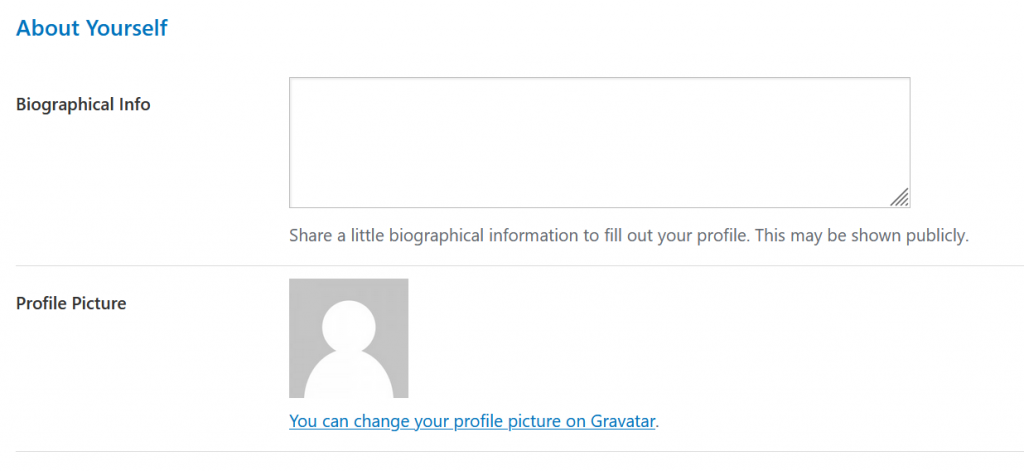
Biographical Information and Profile Picture
Here you can enter information about the author (in this case, yourself).
The profile picture is tied to Gravatar. Click the link and it will take you to Gravatar, which will allow you to upload an image.
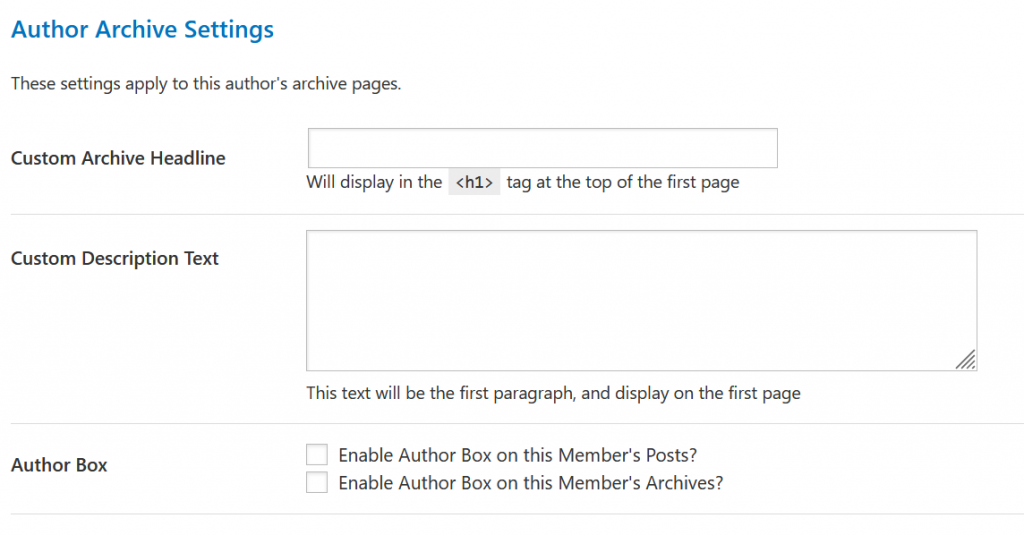
Author Archive
This is the final and most important step. Without this, there will be no author biography or archive page.
If you want a custom headline for the author page, you should add it in “Custom Archive Headline.” The same applies to the custom description text, which will display just after the headline.
Finally, check the author box to add the biography information to all this author’s posts. You can also add an author box on post archives too if you’d like.
That’s it. Click the “Save” button at the bottom of the page and all of the posts associated with this user will automatically have an author biography added at the bottom — both for posts that already exist and for posts that will be created in the future.
There are other ways to add an author biography through Beaver Builder, but they’re more complex (and they don’t work automatically). If you need to set up the manual option, reach out to us and we’ll help you put it together.
Give Your Authors Credit
With this tip, you can make sure your authors get credit for everything they’ve published — whether you have a large contributor network or just you. Use authorship to build reputation and prepare for a world where Google cares about personal experience, not just information.
Thanks for reading this State of the Platform. We’re here to help with anything you need, be it authorship, marketing knowledge or general platform assistance. Just drop us a line, anytime.
Best Regards,
Ed Bardwell
President
Rainmaker Digital Services
