Greetings, Rainmakers!
Google Analytics is switching from Universal Analytics (UA) to Google Analytics 4 (GA4). This is a bigger deal than it sounds.
The UA to GA4 change is more than just a version number. Despite the fact that both are under the Google Analytics umbrella, the way GA4 measures data is changing — you won’t be able to port your current analytics over easily. And if you haven’t set up Analytics before, it might be intimidating trying to jump in right now when a changeover is happening. We’re here to help.
We’ve added a native GA4 integration to Rainmaker Platform so you can see your web statistics within the platform, just as you can with UA. This month’s State of the Platform explains how to set up (or update) your Google Analytics account, connect it to your Rainmaker Platform site and view data on either Google Analytics or on the platform.
Starting From Scratch With GA4
The first step is to create a Google Analytics account if you don’t have one. If you have an Analytics account already, you can skip down to “GA4 is No Longer a Choice.”
If you’re starting from scratch, go to analytics.google.com. You will need a Google account to use Google Analytics. Here’s a guide on how to create a Google account.
Creating an Analytics Account and First Property
Once you’re logged into a Google account, this is the splash screen you’ll see:

Click “Start Measuring.”
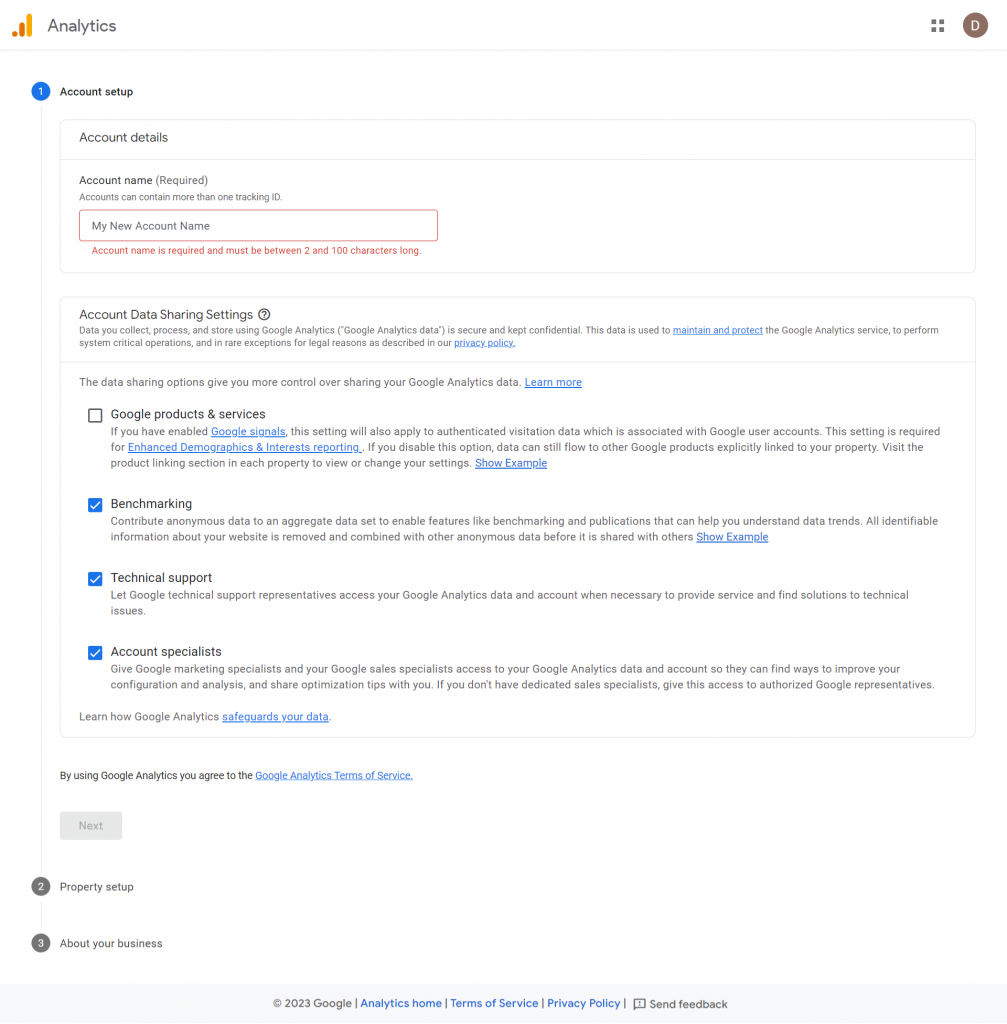
Then you’ll pick an account name and choose your data sharing settings. Read these carefully, as they describe what information you will be sharing with Google and how they can use your data to help you. Then click “Next.”
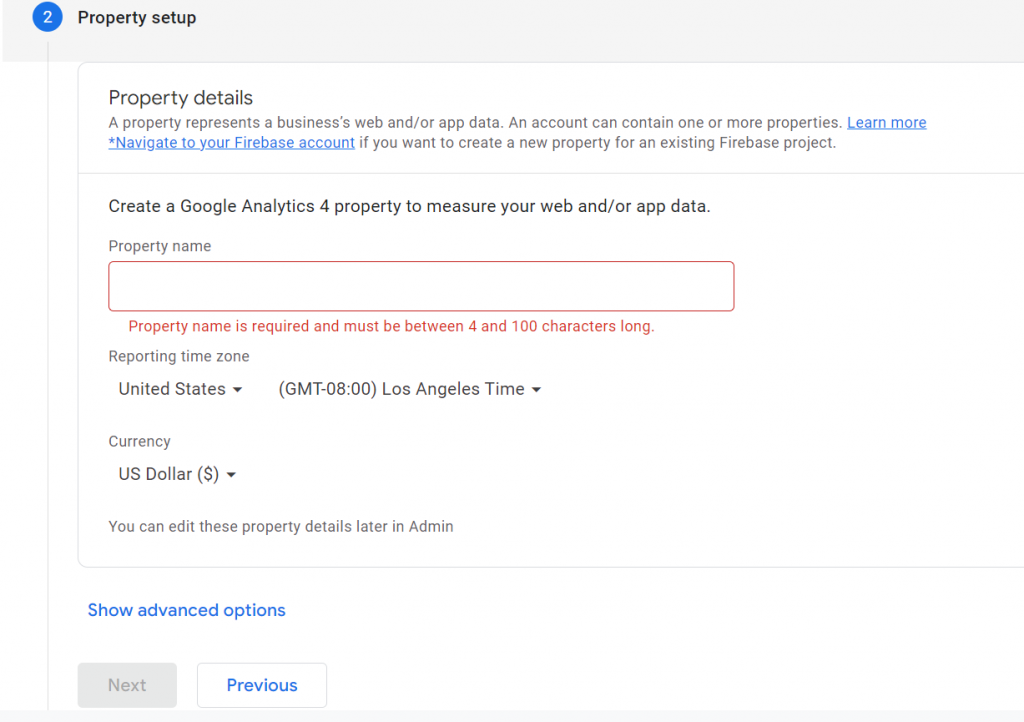
You’ll now set up a “property.” A property is Google’s container for all the information from an app or website that flows through Google Analytics. Add a name, then select the proper time zone for reporting (this may not be the same as your time zone) and the currency you’d like monetary measurements in. You’ll notice an “advanced options” feature here — this currently allows you to set up a UA property, but we’re not going to do that since UA only has 4 months of lifespan left. We recommend you focus on GA4 exclusively. Click “Next.”
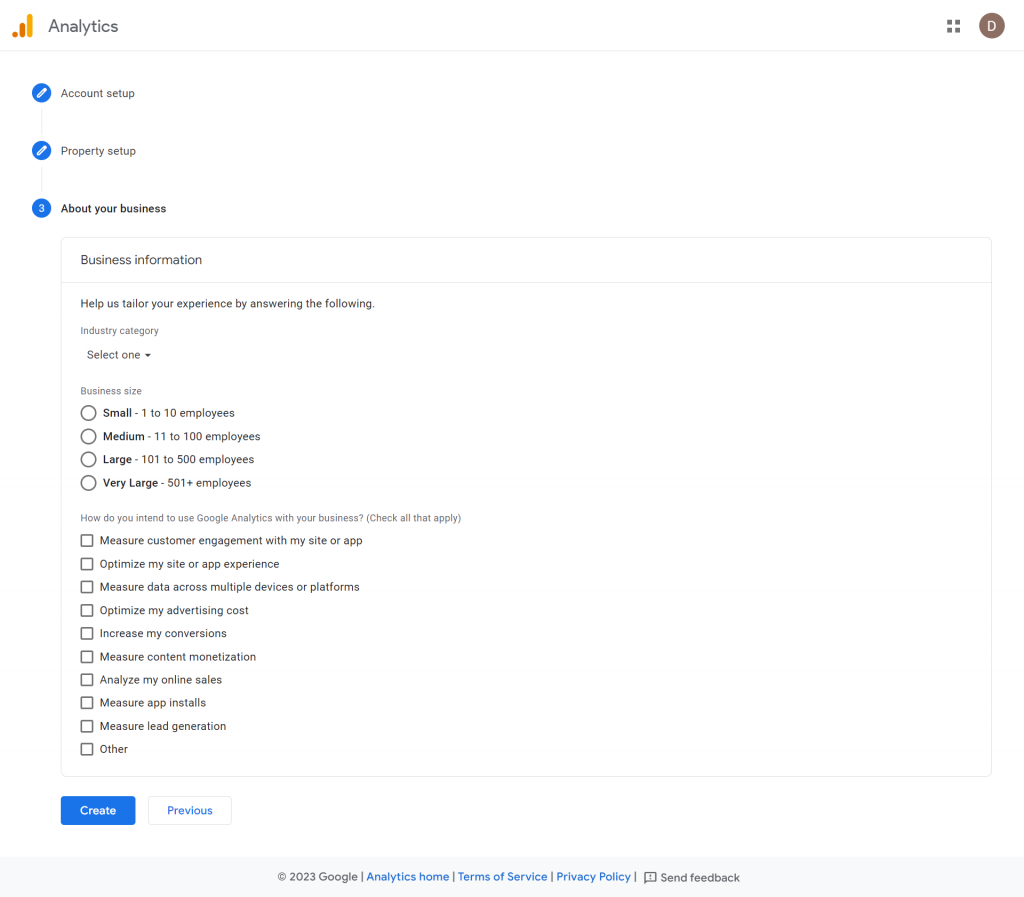
Here you can pick all the details about your business. Decide what you’re most interested in measuring. Then click “Create.” Accept the service agreement for your area (look at the drop-down box if you’re not from the United States) and check the GDPR box.
Google will prompt you for your email update settings; choose what you want to receive and click through.
Setting Up Your First Data Stream
When you click through, you’ll be sent to your dashboard. The first time you visit, Google will offer you a brief tour; go ahead and review it. It’s a great way to familiarize yourself with the new options available. Once you’ve finished the tour, you’ll be on the “Reports” screen, and you’ll notice an error message at the top of the screen: “Can’t find any data streams.”
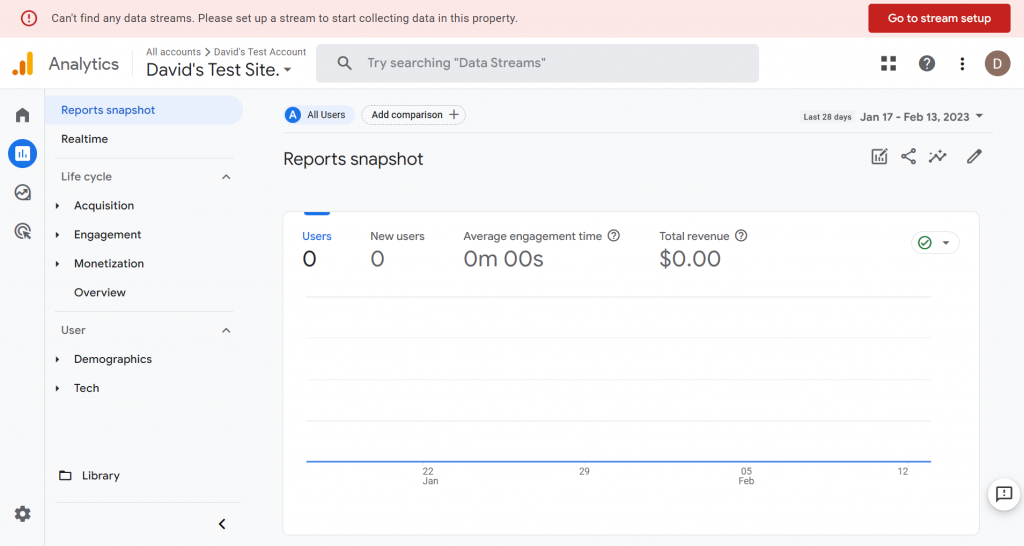
Click the button that says “Go to stream setup” at the top right of the screen. You’ll now be able to set up your first data stream. A data stream is a source of data you can feed to Google Analytics to get insights. You can also reach the Data Streams option through the Admin Menu > Data Streams at the bottom left of your screen (the gear icon).
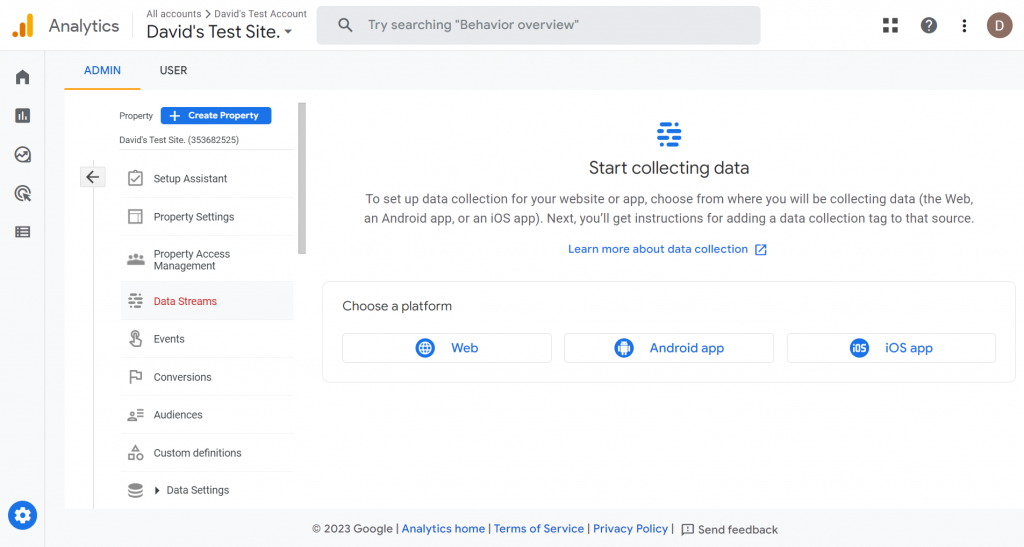
Since this is for a Rainmaker Platform site, choose “Web.”
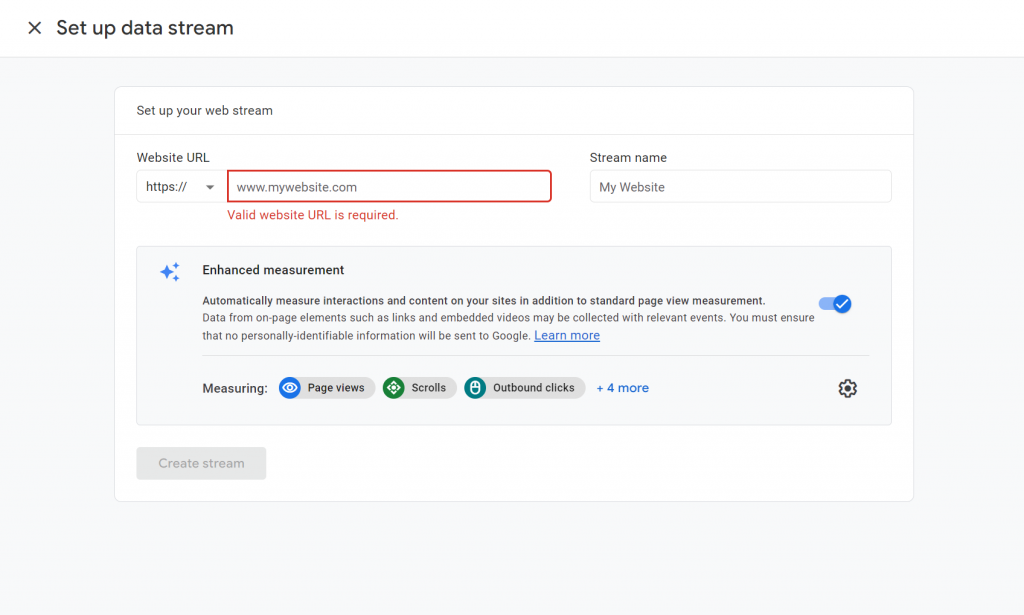
Add your Rainmaker Platform website URL and the name you want for the stream. Then make sure enhanced measurement is turned on (it should be by default).
Once you’ve done that, click “Create Stream.” You’ll be taken to a page where you can set up your website tags.
GA4 Is No Longer a Choice
Google recently sent out the following email to Universal Analytics users:
Subject: We’ll soon configure Google Analytics 4 for you
Hello.
Universal Analytics standard properties will stop processing data on July 1, 2023. To maximize historical data and to ensure that Google Analytics 4 (GA4) meets your specific needs, we recommend you make the switch to Google Analytics 4 now. This will give you the opportunity to customize the setup including using the latest site tag.
For any customer who does not set up a GA4 property with basic settings, starting in March, we will configure one with a few basic settings consistent with the existing Universal Analytics property; this includes certain conversion events, Google Ads links, and existing website tags.
For Universal Analytics customers whose websites are tagged with gtag.js or analytics.js (including through tag management systems like Google Tag Manager), we will create a connected site tag that will reuse existing tags when possible to send traffic to the new GA4 property. If you do not wish to have a GA4 property created and configured based on your Universal Analytics property and existing tags, you may opt-out.
In other words: make a GA4 property for your UA sites or we’ll do it for you.
NOTE: you will not be able to see UA data (historical or current) inside your GA4 reports in your Google Analytics account or in the GA4 Reports within Rainmaker Platform. Regardless of whether Google or you generate your GA4 property tag, you will still need to integrate your GA4 tag into your Rainmaker Platform site to see GA4 data in your Rainmaker Platform site.
The first step is to set up your GA4 property tag. To do so, from your Google Analytics dashboard, click the “Admin” menu (the gear icon) at the bottom left of your screen.
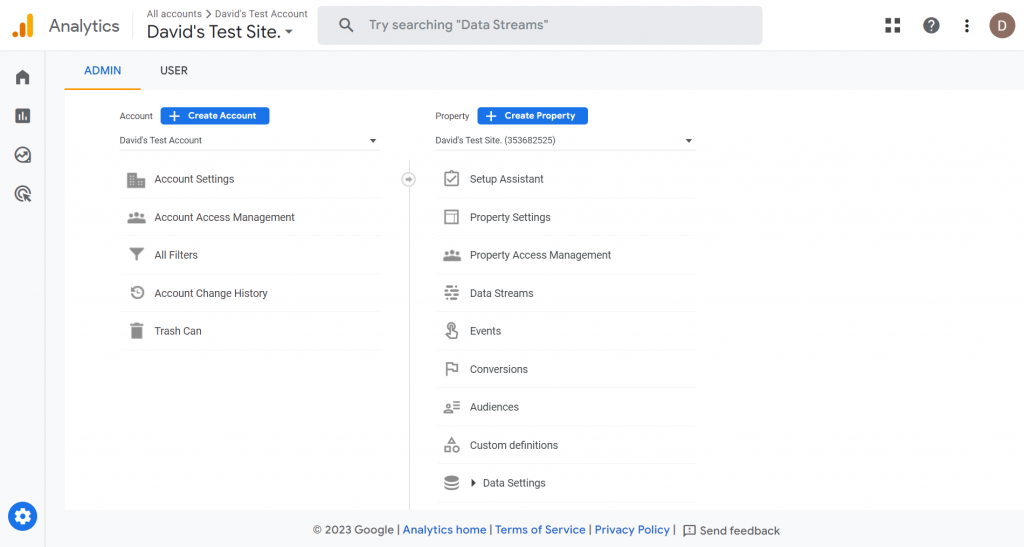
From here click the blue “Create Property” button in the middle of the screen and follow the on-screen prompts; refer to the section above for more guidance.
If you have UA set up already and don’t want to lose your UA data stream while switching to GA4, you can set your new GA4 property up based on a current UA property; see this Google Knowledge Base article for more.
Adding GA4 to Your Site
Now that you have GA4 set up in Google Analytics, you need to add it to your Rainmaker Platform site. This will allow Google Analytics to collect data and let Rainmaker Platform display analytics in the Results menu.
First, go to your Rainmaker Platform dashboard. Mouse over the Settings gear icon in the top right admin toolbar, then click “Features.”
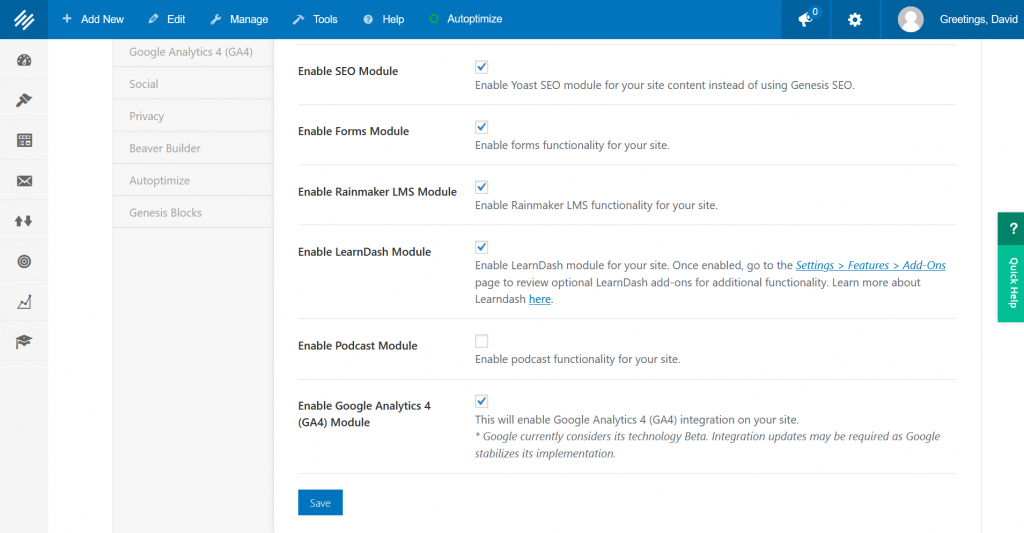
Click the checkbox next to “Enable Google Analytics 4 (GA4) Module” if it’s not already checked and click “Save” at the bottom of the page.
Now mouse over the Settings gear icon on the upper right side of your screen again and click “Google Analytics 4 (GA4)” in the menu that drops down.

Click “Setup Google Account” and log into your Google Analytics account. Allow access to Google when prompted and you’ll be returned to the GA4 page.

Now that your account is connected, you need to choose the GA4 property that you created in Google Analytics. Click the drop-down box next to “Select Web Property” and choose the property you set up for this site. Then click “Save.”
Go to Google Analytics over the next few hours and check your property in there — is the data flowing? If not, reconnect your account through the GA4 screen in Rainmaker Platform. It can take up to 48 hours for the connection to work (though it’s usually much less time), so be patient. Double check that you allowed access when you authenticated your Google account if you have to reconnect.
Finally, you can now review your GA4 data in Rainmaker Platform by going to Results > Google Analytics 4 (GA4) Reports in the left menu.
Congratulations. Your Google Analytics is set up and connected to Rainmaker Platform.
Manually Set Up GA4 Tracking
If you’re looking to add GA4 to a non-Rainmaker Platform site or have special configuration needs, you can manually set up a site to allow Google Analytics to collect data. NOTE: If you manually set up Google Analytics on Rainmaker Platform, you will NOT see any results within the platform and will need to go to analytics.google.com to review results.
To do this, go to Google Analytics and click the gear icon on the bottom left to go to Admin. Then choose the property you want to use for your site. Click “Data Streams” in the menu that shows for that property.
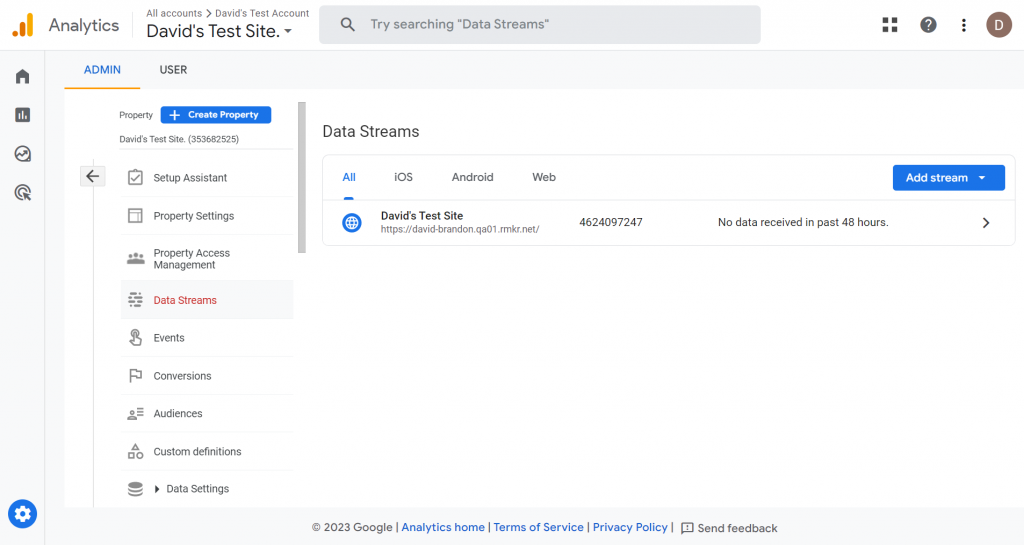
From this screen, click the appropriate data stream (usually there will only be one). Scroll down to the bottom of this next screen and you’ll see an option called “View tag instructions.”
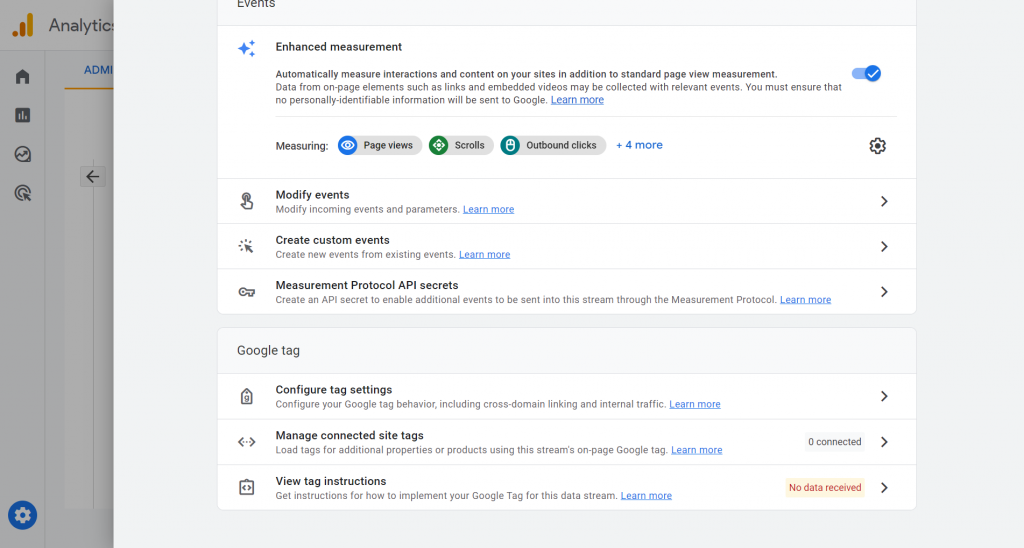
Click this option. You’ll be taken to the tag instructions for this page.
To actually get data from your site, Google requires that a script be inserted into the website’s header section.. You’ll automatically be on the “Install with a website builder or CMS” option when you click through to the tag instructions; we’re going to do this manually, so click the tab that says “Install manually.” This is the screen you’ll see:
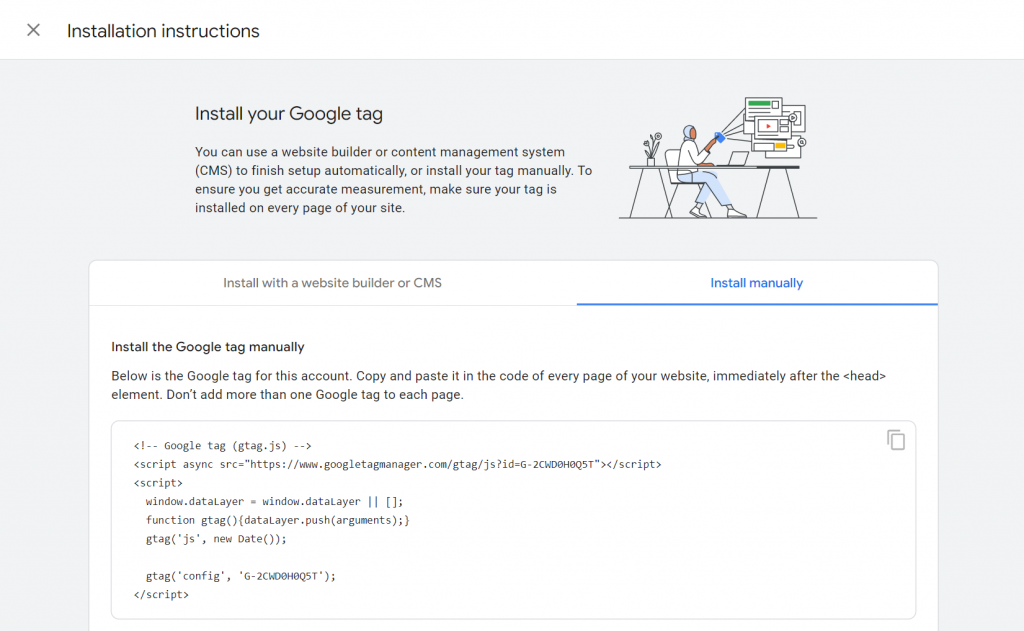
Click the gray box with an extra corner in the code field; that will copy the text. Then go to your Rainmaker Platform site.
From your Dashboard, go to Design > Appearance.
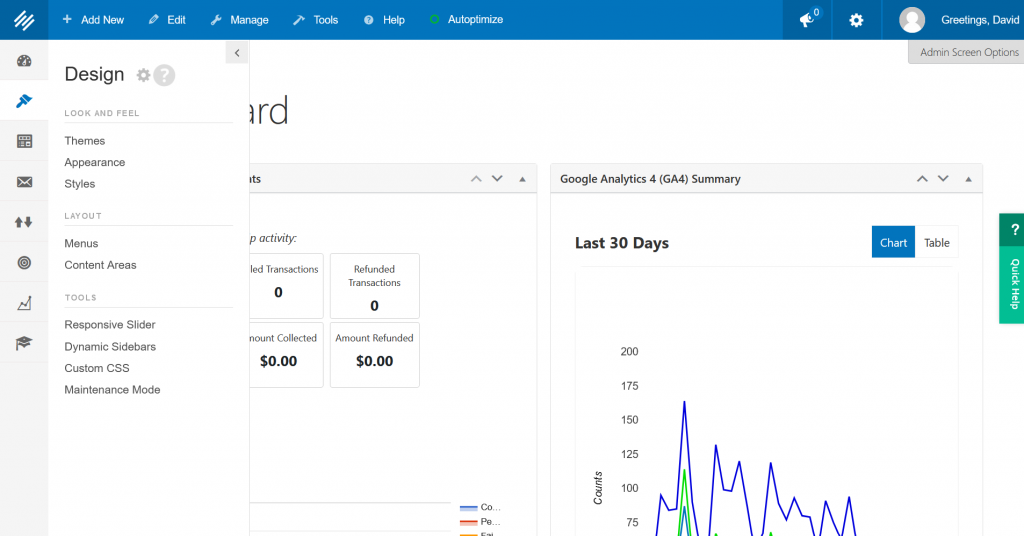
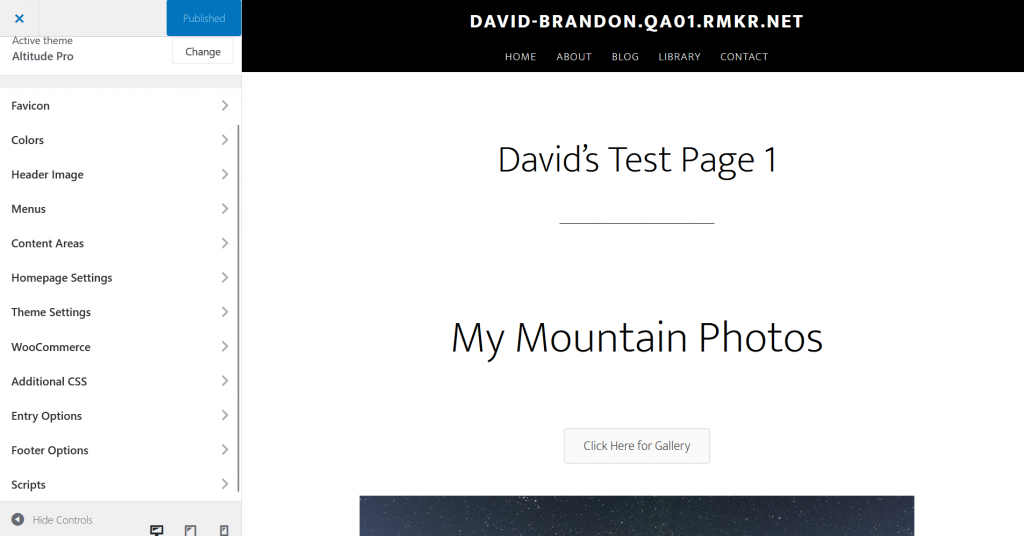
Scroll down slightly in the left menu till you see “Scripts” at the bottom. Click it.
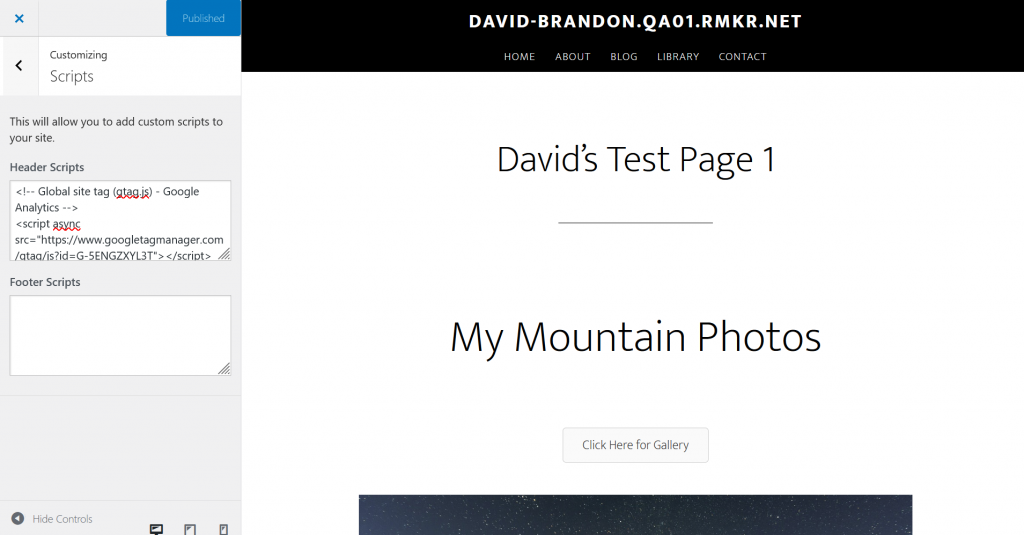
Add your Google tag in the “Header Scripts” field like in the example above. Publish your changes by clicking the blue “Publish” button.
Your site is now feeding data back to Google Analytics 4. You’ll be able to look at all that data through Google Analytics’ dashboard, but you won’t be able to see it in Rainmaker Platform.
Stay Current With Google Analytics Changes
Google’s plans for Analytics are up in the air due to regulatory pressures and privacy concerns, and we’re monitoring what happens so we can give you the best possible support for your Rainmaker Platform site analytics.
We’ve been working hard to make the transition from UA to GA4 seamless for your Rainmaker site. We hope this State of the Platform helps you get GA4 set up right on your website. And if you need a hand, reach out. Contact Support — or drop us a line, anytime.
Best Regards,
David Brandon
Copywriter
Rainmaker Digital Services