When I first started playing around with HTML back in the early 2000s, there were “what you see is what you get” (WYSIWYG) editors around, but code was still a huge part of the design. You couldn’t really create a great website without it. Cascading Style Sheets (CSS) weren’t fully supported yet, so each page needed individual inline styles.
Technology has come a long way from those days. Between theme editing, Beaver Builder, and various drag-and-drop editors, you can do a lot with Rainmaker Platform without knowing a single line of code.
But if you do know a bit of code, you’re way ahead. Understanding how CSS works will let you make your site a lot more flexible. Here’s how you can use CSS on your Rainmaker Platform site.
Using Site CSS
Cascading Style Sheets (CSS) are an extension of HTML. HTML is the language most web pages are written in, but the design controls in HTML are limited. That’s where CSS comes in.
CSS controls the appearance and styles on your website. When CSS launched, it was not fully supported by most browsers; full support didn’t really kick in till the mid-2000s. It is now the standard for website design — HTML content is molded by CSS.
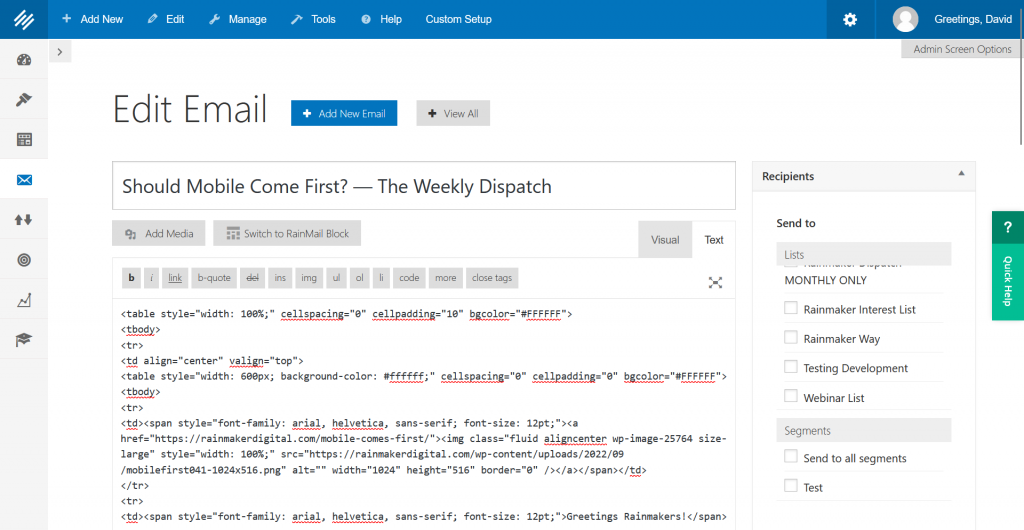
CSS can be used in a variety of places on your Rainmaker Platform site. First, you can use it “inline” on almost every individual piece of content, like this email:

All those “span style” tags you see have CSS elements that modify the appearance of this email.
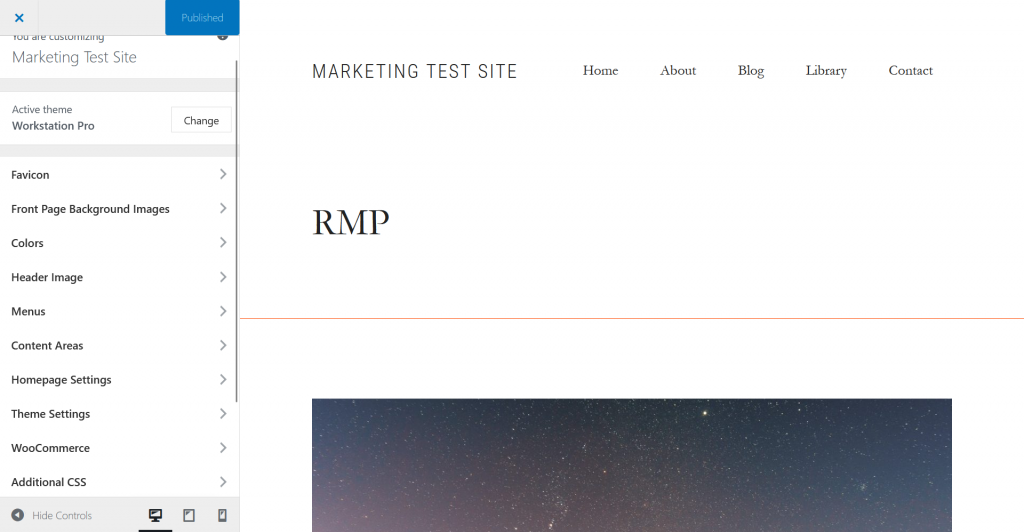
You can also add CSS to a theme under Design > Appearance. Notice the “Additional CSS” menu in the panel on the left side of the screen.

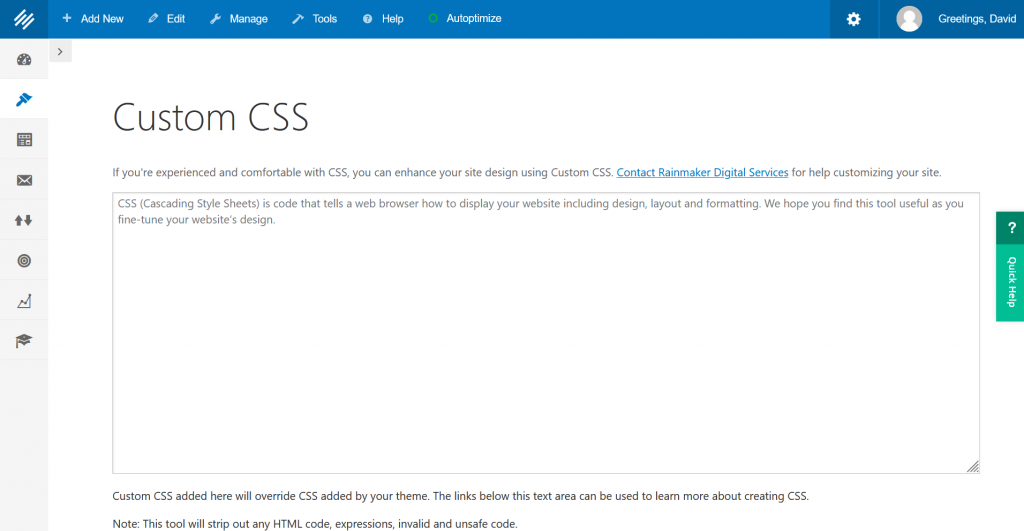
Finally, you can override aspects of your theme with whole-site custom CSS. You can find this under Design > Tools > Custom CSS.

It’s very easy to break the design of your site when adding CSS here. Use it with care, and if you’re not comfortable with CSS but want to override some aspects of your theme, contact us.
Inline CSS is very common; whether you’re looking at the code in the editor or not, every post, page or email you create will have CSS. Theme CSS and site CSS are less common but affect far more of your site.
Ready to give it a try? CSS is very complicated but here is a basic primer so you can:
- Understand what CSS does on your Rainmaker Platform site.
- Understand how specific CSS elements work.
- Edit the basic CSS elements.
Understanding CSS
Syntax
CSS consists of two parts: the selector and the declaration.
Let’s use the example of a house painter. If I owned a house painting company, I might tell one of my workmen, “Go to this address and paint this house blue.” The selector is the address of the house: it tells the workman what element we’re modifying. The declaration is the style I want to apply to it: it’s the blue paint.
For example, in the email example we looked at, you’ll see this:
![]()
In this case, we’re saying anything within this span (the section of content contained between the span tags) is set in Arial, Helvetica or another sans-serif font, depending on browser compatibility. Then we’re saying the size of the text will be 12 point.
The span tag is our selector here. Our declaration includes all the information inside the quotes. You’ll notice there are two declarations here, separated by a semicolon. You can tie more than one individual declaration together to a specific element this way.
All declarations consist of a property name (“font-family”), a separator (the colon), and a value (“arial, helvetica, sans-serif”).
Every CSS element follows this same principle. You say the “address” of the element you’re modifying first, then say what kind of modification you want to happen at that address.
External vs. Internal vs. Inline
There are three ways you can use CSS: external, internal and inline.
External CSS is a separate file with CSS. It cannot contain HTML, only CSS. This is what your theme CSS or custom CSS is — you’ll see syntax like this:

You may also see this at the very beginning of a page. This is internal CSS, and it is contained within the header section of an HTML page within style tags. Internal CSS defines specific styles for the page that overrides any site-wide styles.
Finally, if you want to edit particular elements on a page, email or post, you’d use inline CSS. Inline CSS is included around the element it modifies, not in the site files or at the top of the document. The example we used first is inline CSS, where we defined a specific style for the span element:
![]()
Specific CSS overrides general CSS. Inline overrides internal style, which overrides external style. Think of it this way: your external stylesheet for the site sets the way the whole site looks, and your internal and inline CSS define exceptions to that.
The Five Basic Selectors
There are a ton of selectors, but these are the five you’re likely to see the most of on your Rainmaker Platform site:
- h1, h2, h3, etc.: Your header elements.
- p: Your paragraph elements.
- div: A section you define.
- body: The body of your document.
- *: Everything on the page.
For example:

We’re using “p” to set our paragraph style. If we wanted to do this for our headers, we would change to this:

We can affect multiple elements by using multiple selectors and separating them with commas.
The Ten Basic Declarations
There are ten basic declarations we need to know.
- font-size: The size of our font, defined in points. For example: “font-size: 12pt”.
- font-weight: The weight of our font. For example: “font-weight: bold;”
- text-align: How your text is aligned, defined as left, right, center or justified. For example: “text-align: left”
- color: The color of an element. For example: “color: blue”
- border-style: The type of border to display. Various definitions; most useful are “none,” “solid.” For example: “border-style: none”
- outline: A line drawn outside the border to make an element stand out. Uses the same style language as borders. For example: “outline-style: solid, outline-color: lightblue”
- margin: The space around an element, defined in pixels or percent. Includes top, bottom, left and right. For example: “margin-top: 100px”
- padding: The space around an element’s content, inside the border and the margin, defined in pixels or percent. Includes top, bottom, left and right. For example: “padding-bottom: 100px”
- height/width: The height and width of an element. Can be defined a few different ways; most useful are pixels and percent. This does not include extra elements such as padding, borders or margins. For example: “height: 100px; width: 50%”
- background: The background of a page. Several different options here, but our most useful is “background-color” (defined by a color name, hex code or RGB value). Often modified by “opacity” in decimal points from 0 to 1. For example: “background-color: red; opacity: 0.5”
Some of these CSS terms might be familiar to you already if you’ve used Beaver Builder in depth — Beaver Builder’s advanced options let you adjust these declarations and see what happens in real time without actually having to write the CSS yourself. Take a look there if you want to play around with these declarations and understand what they look like on a page.
The Power of CSS
CSS is a massive topic, and we’re only scratching the surface here. We’ve covered five basic selectors and ten basic declarations. There are many more.
You can build a great Rainmaker Platform site without ever knowing a single thing about CSS. But if you do understand it, you unlock options you would never have had. If you want to learn more, W3 Schools has an excellent primer.
Now that you know a little bit about CSS, you can understand the back end of your site better and perhaps make (careful) changes. And if you want a hand with some CSS, feel free to reach out. Just drop us a line, anytime.
Best Regards,
David Brandon
Copywriter
Rainmaker Digital Services