
Greetings Rainmakers,
Right now we’re working on a number of new integrations with clients, including SMS (text) messaging and AI integration. We’re in a limited rollout of the SMS feature — if this is something you’re interested in, please contact us.
In addition, we’ve been building an AI Assistant/OpenAI integration with Rainmaker Platform for one of our clients. You’re probably aware already that we do custom development, but you may not be aware that we’re doing AI now. Contact us with your questions on how AI can help your business and let us know if you’re interested in something similar.
In the meantime, in this State of the Platform, we’ve got an update to Rainmaker Platform to share and a look at how you can adjust your menus for better user experiences. Let’s dive in.
Rainmaker Platform Update 3.5.2.1
Our latest update mostly covers maintenance, with some small bugfixes to GA4, MemberPress and Ninja Forms. We have a bigger update coming very soon for payment processing; stay tuned for Apple Pay and Google Pay in just a little while. We’re very excited to launch this one and we’re hoping you are too. For more information, check the changelog.
Make Menus that Work
Just about every website has menus, including yours. But do you actually understand how they work on your site?
Many Rainmaker Platform users never get beyond just adding new labels to the menus that come with their themes. Yet there’s so much more you can do. You can move menus, display them in multiple areas, add them in new locations and even add your own flair to the design. Here’s how.
Your Basic Menu Options
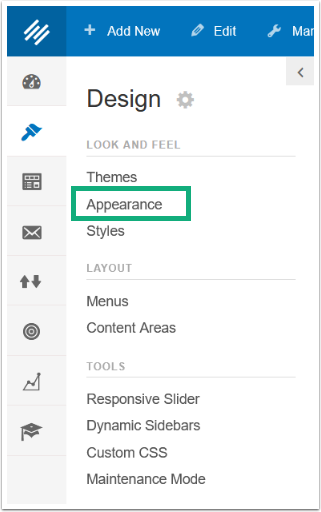
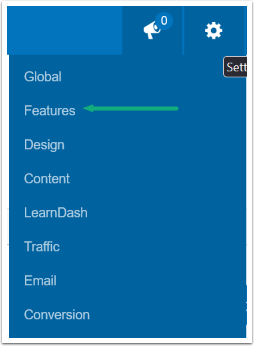
Every theme that you use on Rainmaker Platform will have options for menus. You can access these by going to the left hand menu > Design > Look & Feel > Appearance.
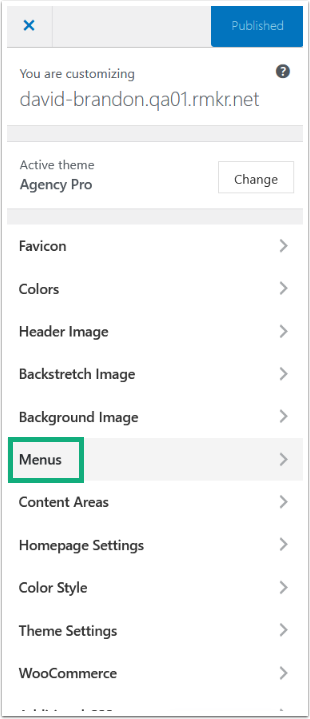
From here, click Menus.
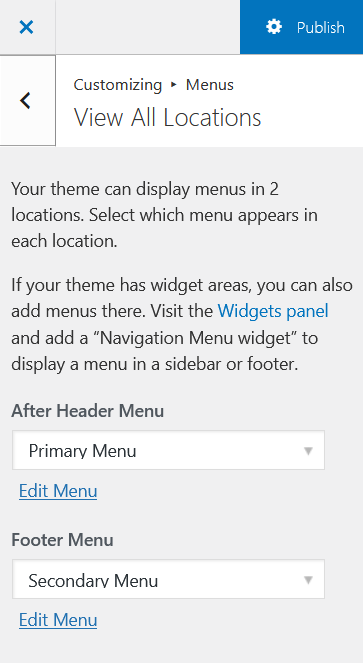
From Menus you’ll see options for placement based on the theme you select. In this example, there are two areas:
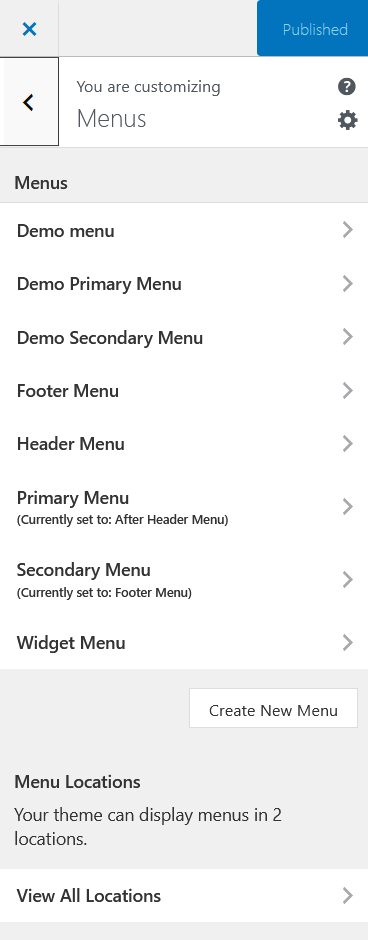
At the top of this you’ll see the “Menus” section, which is where you can view all currently created menus. That does not mean that these menus are currently displayed. Any menu that’s currently displayed will have text that says “Currently set to:” under it, as above for the Primary and Secondary menus.
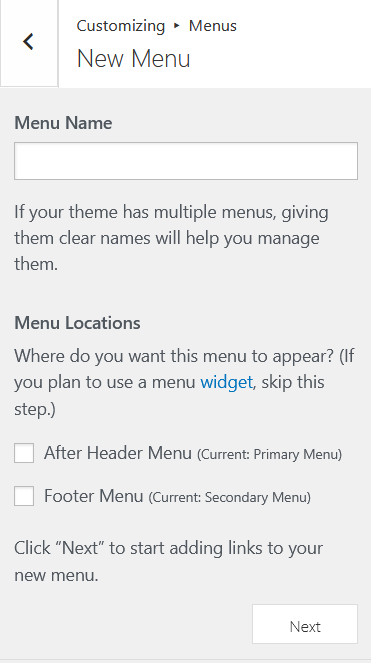
You can create a new menu from scratch by clicking “Create New Menu.” This will open a new dialogue that allows you to name the menu, then click “Next” to add your menu items.
Let’s go back to the original Menus dialogue again.
At the bottom of this panel you can see all your current menu locations. Click “View All Locations” to see every location where you can put menus by default in your theme.
You can choose a menu to display in those locations from the drop-down, and you’ll be able to see the changes live on your site in the preview pane.
This is the most basic level of editing your menus: you can keep the current theme options, add a new menu or menu item, and change which menu displays where. But there’s much more to it than that.
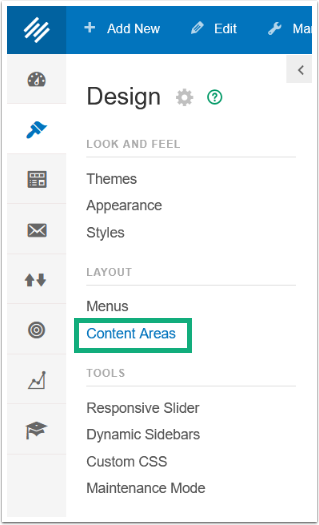
Content Areas
You can add menus to other areas of your site as well by using Content Areas. Go to Design > Layout > Content Areas to adjust where content is displayed on your site.
This will open the Content Areas menu, where you can see where all the default display areas for content are on your site.
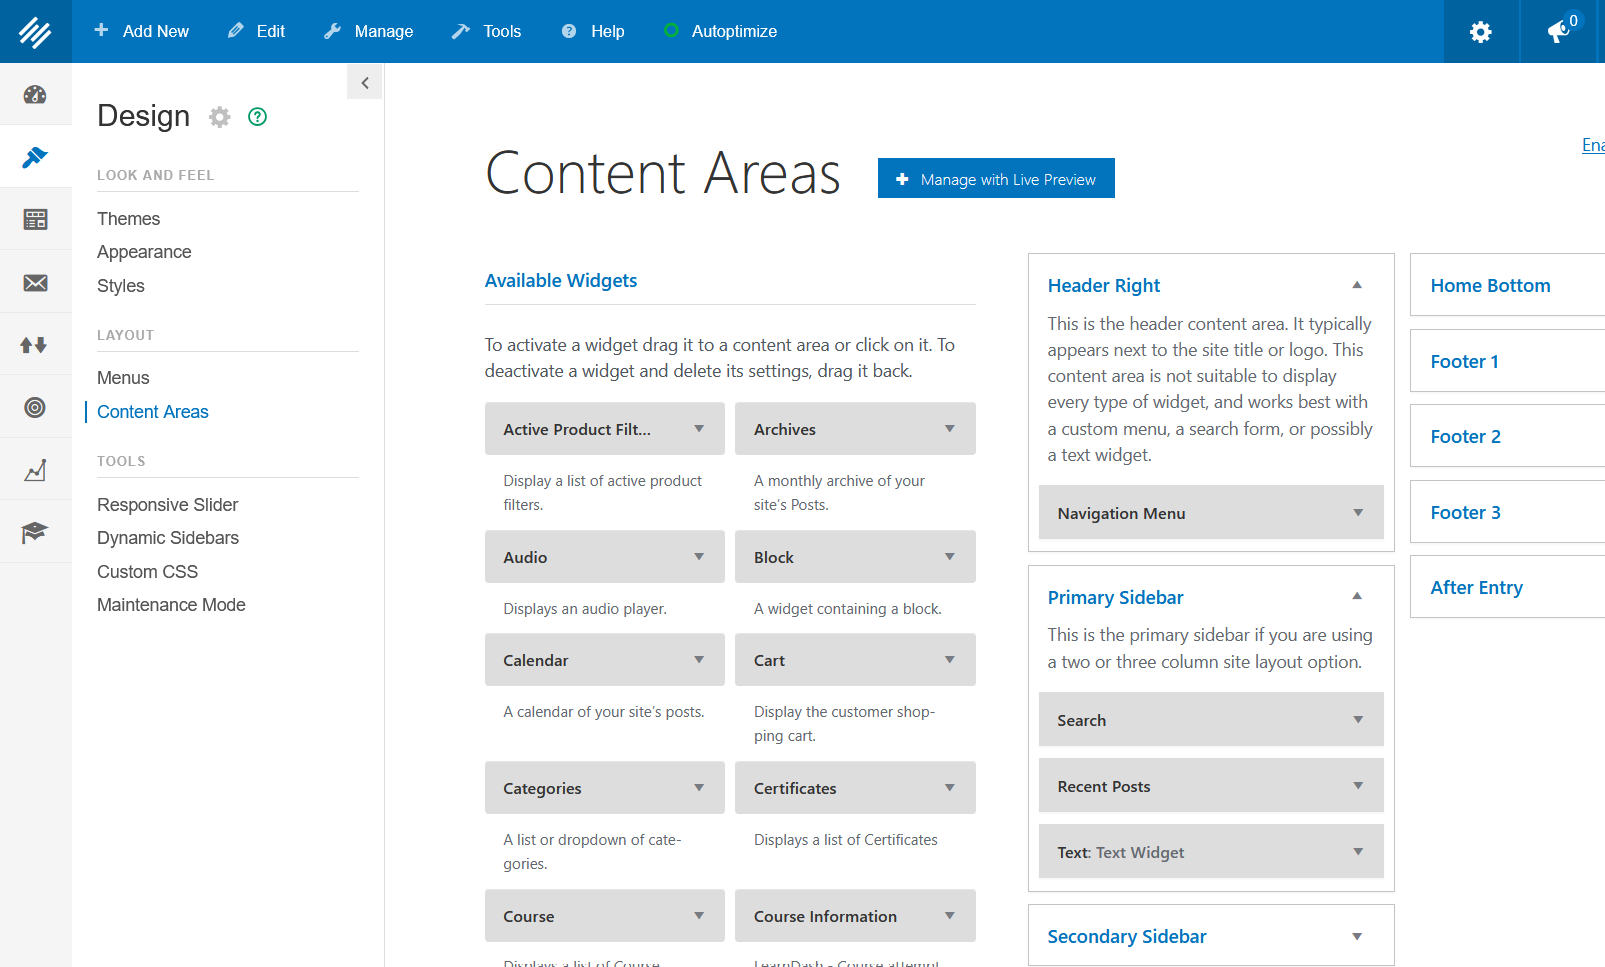
Scroll down through the “Available Widgets” section in the middle till you come to “Navigation Menus.” Click it. You’ll see a drop-down menu where you can choose a menu to add to the widget of your choice.
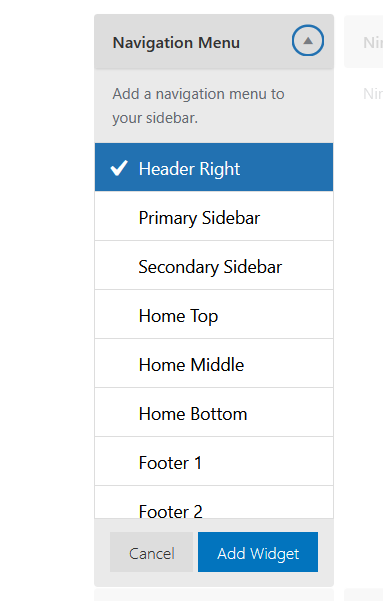
This is a way to add menus to areas you wouldn’t normally find menus on your site.
You can also access all of your menu settings from Design > Layout > Menus in the left hand menu. However, this option won’t have the live preview.
Adding a Menu Through Beaver Builder
You can add a menu in Beaver Builder too. Normally you would do this as you’re building a header or footer using the “Header Footer for Beaver Builder” Add-On.
To activate this Add-On, go to the Settings Gear Icon and choose Features.
Then click the Add-Ons tab at the top of the page.
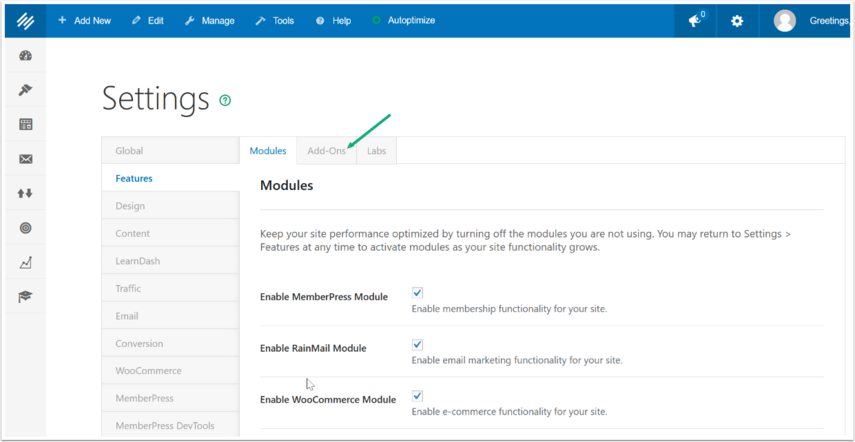
This will take you to your Add-Ons. Make sure that both “Beaver Builder Plugin (Standard Version)” and “Header Footer for Beaver Builder” are checked. If you do not see the “Header Footer for Beaver Builder” check box, make sure “Beaver Builder Plugin (Standard Version)” is checked, then click the blue Save button at the bottom of the screen. It should be visible now.


Be sure to click the blue Save button (not pictured) at the bottom of the page.
From here, you’ll need to build a new header or footer. Follow the steps outlined in the “Using the Header Footer for Beaver Builder Add-On” article in the Knowledge Base to build your header or footer. In this case, you’re replacing any menus that would normally be in those sections of your theme, so you’ll need to add them back.
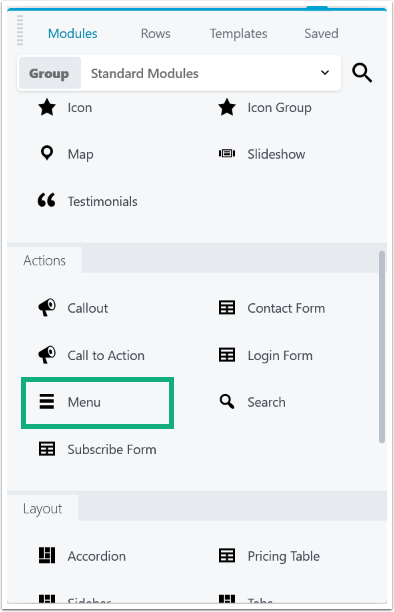
To add a menu to a header or footer, drag it from the menu to the main Beaver Builder content area.
Click the Menu Settings icon (the wrench) on the menu box you just dragged to the page.
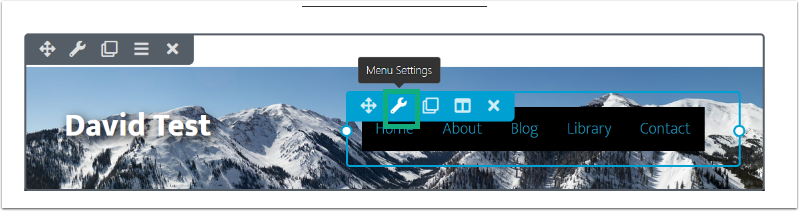
From here, choose the menu you want to use from the Menu section under the General tab. Usually you’ll want to choose “Primary Menu.”
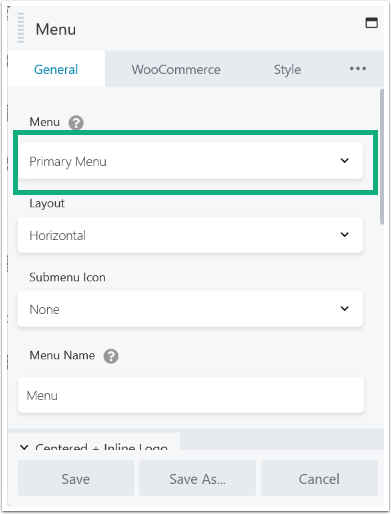
Adjust the settings to your liking, click the save button, and make the rest of the edits to your header.
Changing Menu Appearance
There are two major ways to change the way your menus appear on your site.
First, some themes allow you to change the settings of the area in which the menu appears on your site by navigating to the left hand menu > Design > Look and Feel > Styles. Then choose the Navigation Areas section.

This lets you change colors, fonts and menu spacing.
Alternatively, if you’re comfortable working with CSS, you can add styles to the menu in the Appearance Menu > Additional CSS.
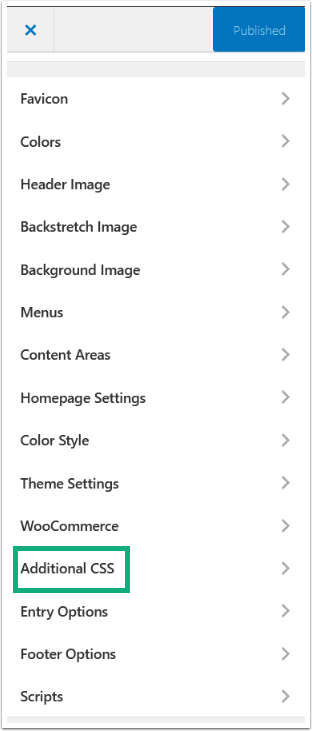
Copy and paste any code you want to the dialogue box that pops up. Be sure to preview your changes, regardless of how you make them, before you publish. Changing the menu styles will change the user experience. Make sure you’re creating the experience you want your users to have.
The Power of a Menu
Menus allow you to direct users to content from anywhere on your website. They make your navigation simple. You’re almost certainly going to be using one in your site’s header or footer, and understanding how to adjust it will make your site far more useful and interesting. Use these tips to adjust your menus and build a site that serves your audience’s needs. Need a hand? We’re here to help. Just drop us a line, anytime.
Best Regards,
David Brandon
Copywriter
Rainmaker Digital Services