Greetings Rainmakers!
Rainmaker Platform offers you easy customization across every section of your website. One of the biggest customizations you can make is choosing a theme. This month’s State Of The Platform explores how the theme affects everything — the look, the feel, the colors, the fonts. We answer the question “so how do you change your theme in Rainmaker Platform?”
Changing Themes in Rainmaker Platform
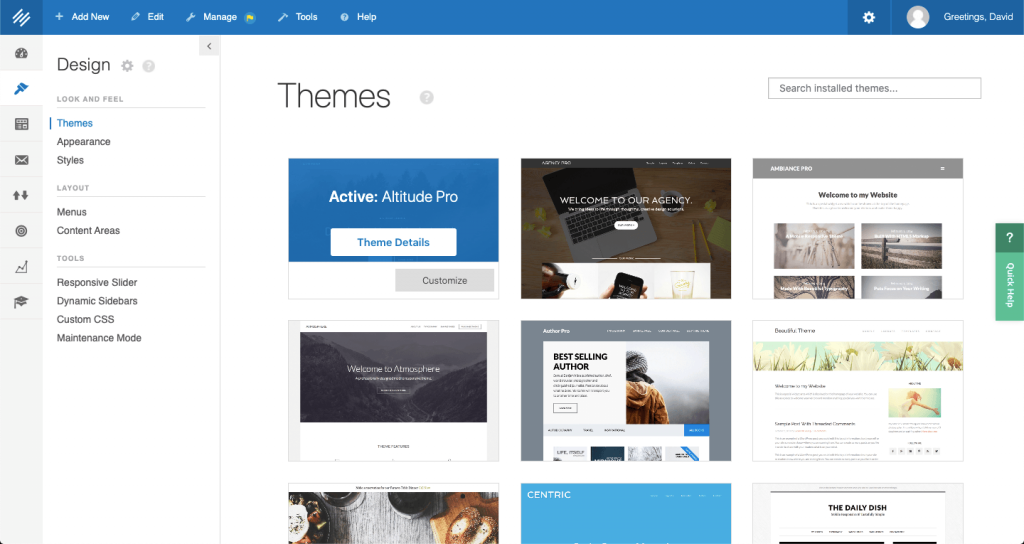
Changing a theme in Rainmaker Platform is simple though it may take some formatting work once it’s changed. Click on the stylized paint brush icon on the side of the screen in your Dashboard. Choose “Themes” from the menu that opens up. On this screen, you’ll see a list of all 40 included themes plus any custom themes you have loaded. You can click on any theme to see a list of options and hit the green button to activate it.
After you change the theme, you’ll see a button that says “Import Theme Demo Content.” It can import sample pages, widgets, posts and menus that will put the theme in its “out of the box” configuration if you want. Then you can just add your content.

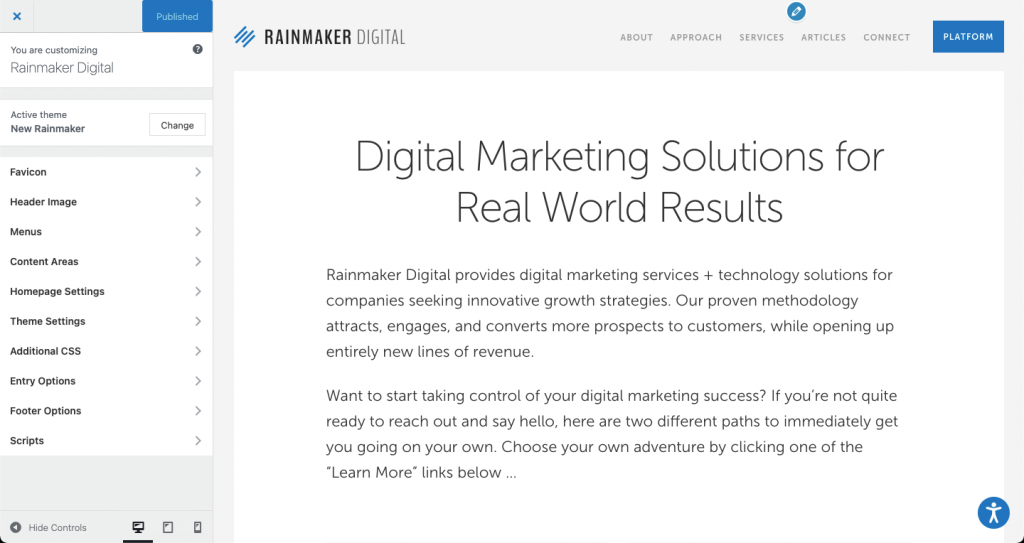
Every Rainmaker Platform theme is vetted first to make sure it’s mobile responsive and compatible with HTML5. Each theme can also be heavily customized to fit your specific goals. From the themes listing, click on the theme you want, then click the resulting button that says “Customize.” You can also click “Appearance” from the left menu. Both links will take you to the Appearance Customizer, where you can access a variety of settings.

Making Smaller Changes
Each theme can also be customized with CSS. You can customize the CSS for the whole site through the “Custom CSS” option on the same left menu you used to open the “Themes” page. To do smaller edits, you can add CSS from the “Customize” screen to edit the specific theme or a page. Note that any code in the “Custom CSS” page will override the theme CSS.
You can also create custom media queries to make your site compatible with odd mobile screen sizes or change elements for better user experiences. We only use responsive themes on Rainmaker Platform but media queries can help you smooth out any lingering issues by overriding the regular theme styling.
If you want to change individual pages easily, Beaver Builder can help. It’s our integrated drag and drop editor that allows you to manually move items around on the page instead of using CSS and HTML code. Beaver Builder comes with every Rainmaker Platform Andromeda site and makes editing a breeze for even people without much experience in web development. It’s particularly useful if you want to set up a page that will be changed regularly by people who aren’t well-versed in web production. It’s more intuitive than some of the other options.
Many of these smaller changes can be taken care of without enlisting the aid of a Rainmaker pro. But there are some larger changes that might need a little more hand-holding. If you need help, just let us know.
Creating a Custom Theme
You may find that modifying an existing theme with CSS, Beaver Builder and our built-in customizations is enough. Our customization options will work out of the box for many sites.
If you find that you want to personalize your site even more, consider a custom Child Theme. We have a team of web producers that can create a theme that is uniquely yours and that will set your branding apart from everyone else.
Rainmaker Platform is compatible with Genesis Child Themes. You can submit a custom Genesis Child Theme to us to upload to your site for testing. If you want to design one from scratch, you’re going to need to bring our team on board. We can help you adjust an existing theme or put together a new one that will allow your content to shine.
Adjusting a Theme in a Live Environment
There’s one good rule for adjusting a theme while your site is live: don’t do it.
If you’ve never adjusted anything and your site is straight out of the box, adjusting a live site may be possible. Hardly any site falls in that category, though. You can break elements of your design if you’ve done much customization, and if the site is live your users will be dealing with that while you fix it. You can put your site into maintenance mode (via “Settings > Design > Maintenance Mode”) and put up a placeholder while you work on it. But this may not be a great solution. The better option is to make major site changes on a separate server.
Every new Rainmaker Platform site begins life as a preview site. Once you’re satisfied with the way it looks on the preview platform we transfer it to a production server and it will go live on your domain. But if you want to make significant changes to the look and feel, you’re going to want to test them in a preview environment first.
Talk to us before you make any significant changes so we can set up a preview site for you. It will cost a little bit but it’s worth it to make sure you don’t break anything before you push your changes to production or lose out on potential sales while your site is in maintenance mode.
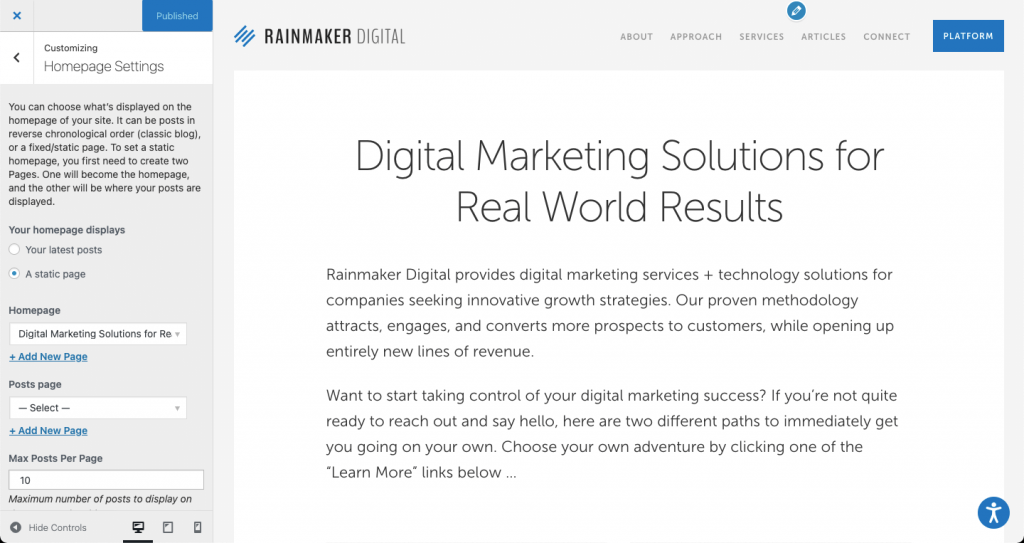
There is an option you can use while your site is still live. You can create a front page with Beaver Builder that’s unaffected by your theme. This is a useful way to do something that looks different from the rest of your site. It’s easy. Simply create a regular page through the “Pages” section of your site and then go to the “Design > Appearance” menu we mentioned earlier. Choose “Homepage Settings” from the left menu and choose the new page as set as your homepage.

You can customize the look and feel of your Rainmaker Platform site easily. For more extensive changes, lean on us — we can tell you what’s feasible to do by yourself and where you might need a hand. We want to be your digital marketing partner and no one wins when your site is offline or not delivering as expected. If you have questions about how to change themes on your site, build a new custom theme or set up a test server to preview your changes before they go live, reach out. We’re here to help.
Best Regards,
Andrés Villarreal
Technology Director
Rainmaker Digital Services