RainMail is Rainmaker Platform’s integrated email client — and if you don’t know how to use it, you’re missing out.
RainMail was originally conceived as a barebones email platform for people who didn’t want to use an outside service. When we released the Andromeda version of the platform in 2019, we reworked RainMail to make it more user-friendly and feature-rich. Many of our clients are now able to take care of all their email needs with RainMail.
You need to understand how to use this critical component of Rainmaker Platform and harness it to drive your business forward. We’ve compiled a list of answers to common RainMail questions to get you started.
How Do I Create a List?
Emails don’t do you any good unless you have a list to send them to — so how do you create one?
To get to the lists screen from your Rainmaker Platform dashboard, mouse over the left-hand menu. The fourth icon from the top is called “Email” and looks like an envelope (if you have RainMail turned on). Click on it, then click the “Lists and Segments” menu link.
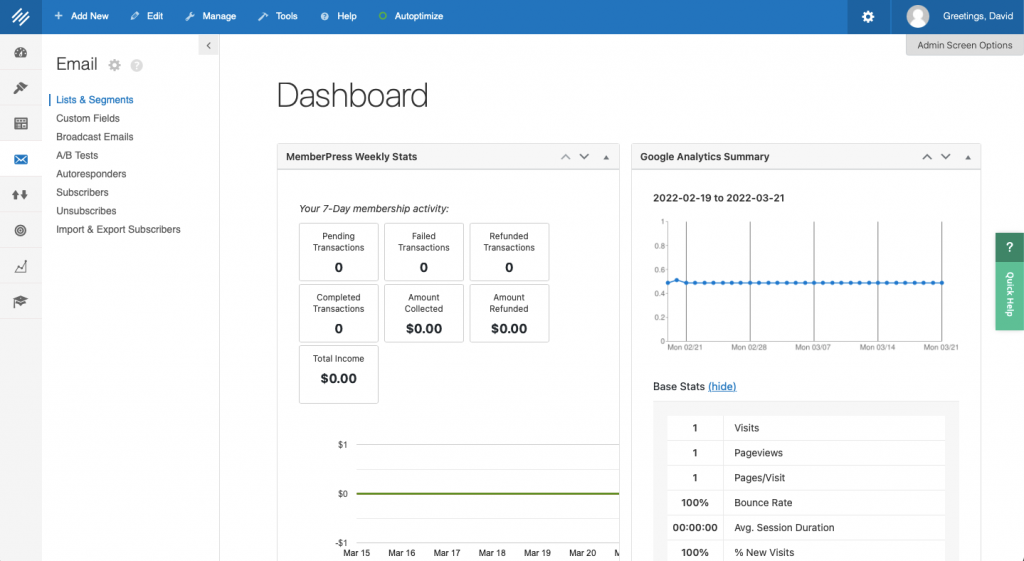
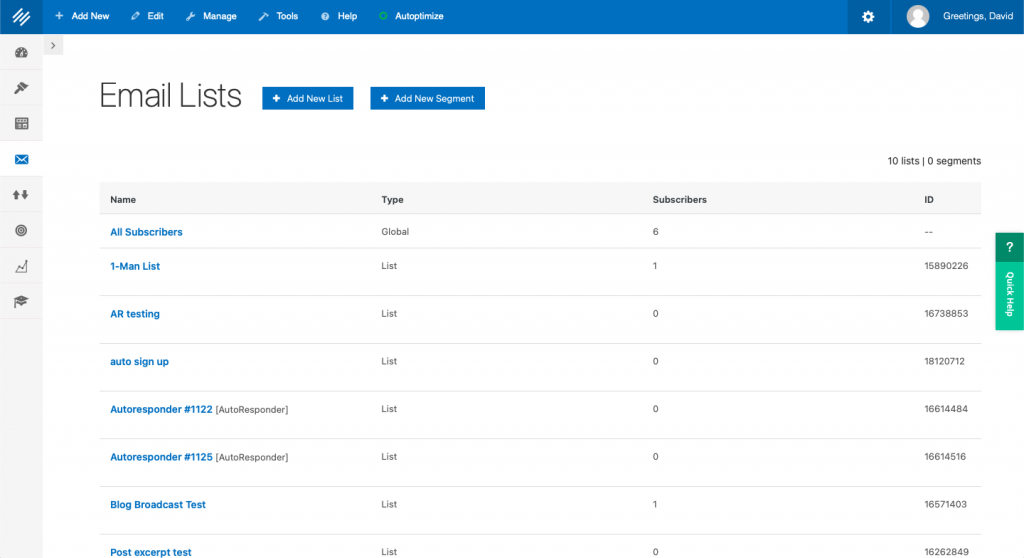
Here you’ll find your email lists. You can add a new list by clicking the blue button that says “Add New List” at the top of the page.
On the next screen you’ll see all of the options for your new list.
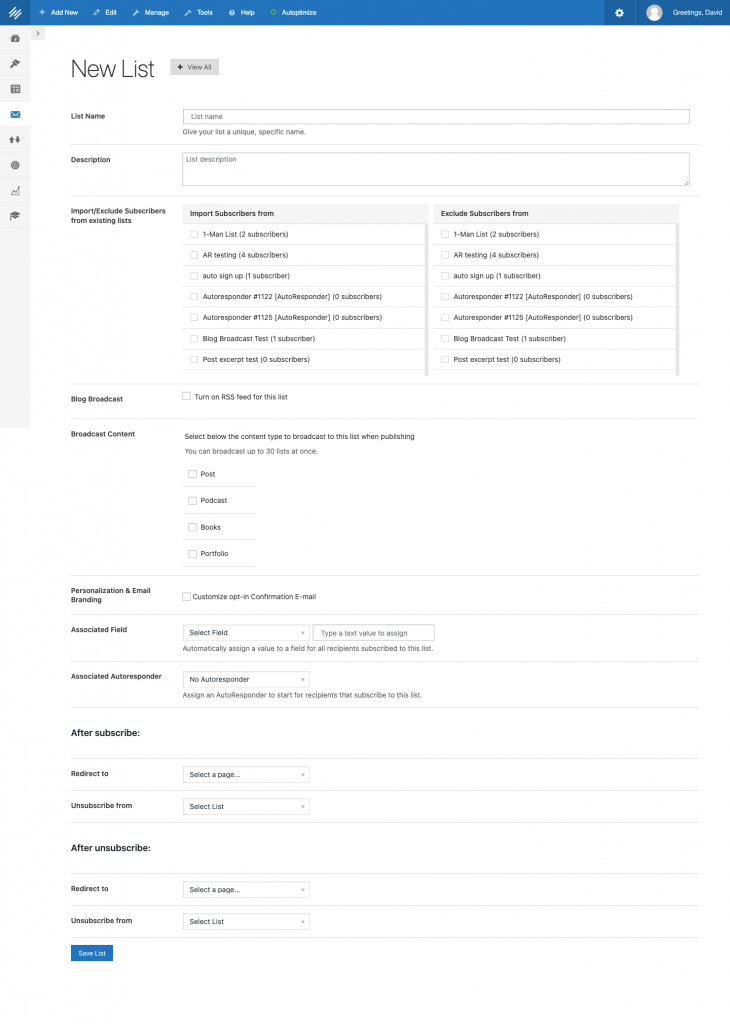
You can add a list name and description, import and export subscribers, add RSS feeds and more here. You can actually broadcast different types of content to your list with the Blog Broadcast feature — you can select Posts, Podcasts, Books and Portfolio and that content will go out automatically. This is a really useful feature.
The other options you’re probably going to care about the most are the customizable confirmation email, the associated auto-responder, the redirects and the unsubscribes. You should make sure that the confirmation email, the email sent after people submit their opt-in, has the content you want. And if you want them to receive emails from an auto-responder sequence, you need to select that here.
Once you’re finished adjusting the options, click “Save List.”
Now that you have a list, you need some way to add people to the list. You’ll need to create a signup form. To get to the Forms screen from your Rainmaker Platform dashboard, mouse over the left-hand toolbar. The third icon from the top is called “Content” and looks like a screen with icons on it. Click on it, then scroll down in the menu and choose “Forms.”
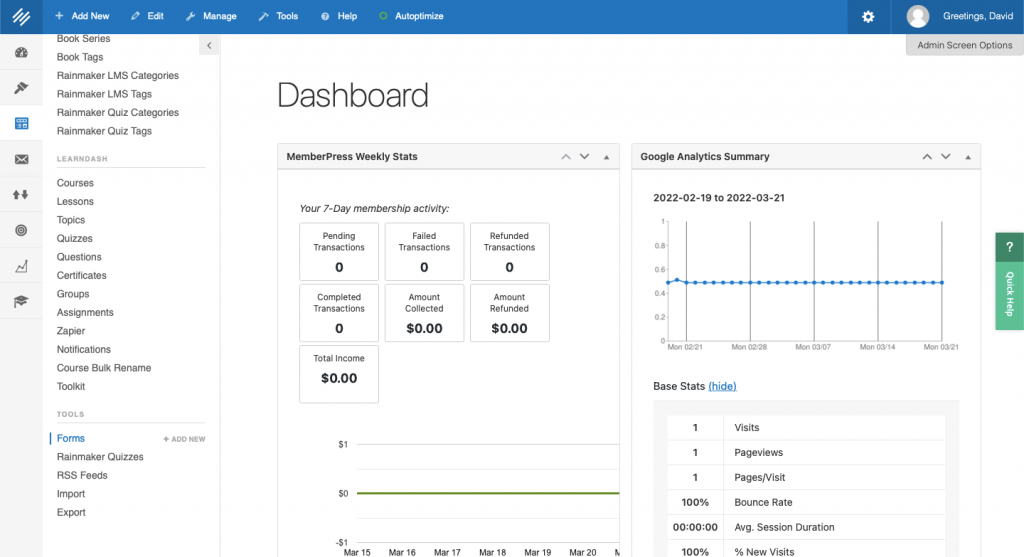
Once you’re in the Forms section, click the giant blue button that says “Add New.”
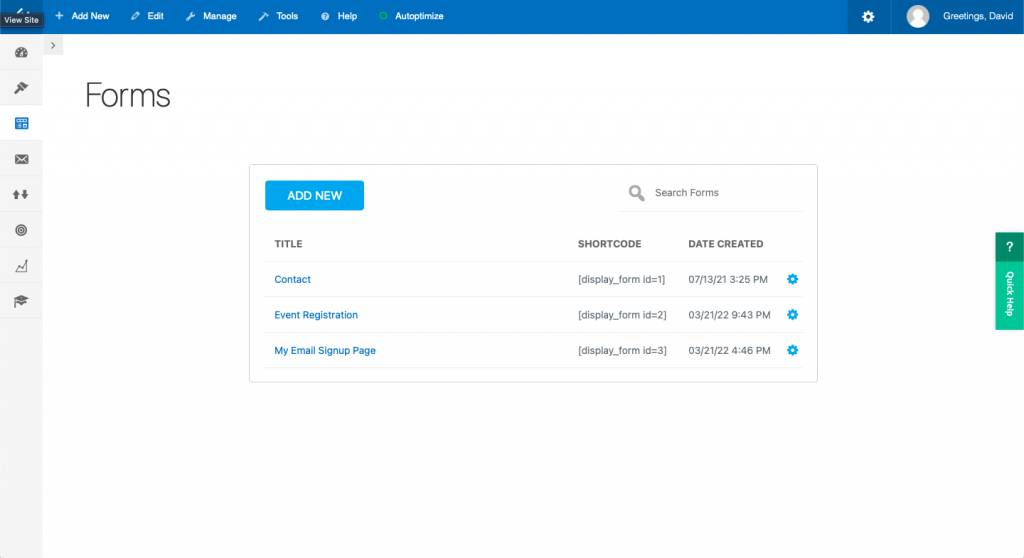
You’re going to see a screen with a number of options — we’re just going to choose the blank form. This will let us add our fields easily.
We’re going to drag and drop three fields into the “Add Form Fields” area: First Name, Last Name and Email.
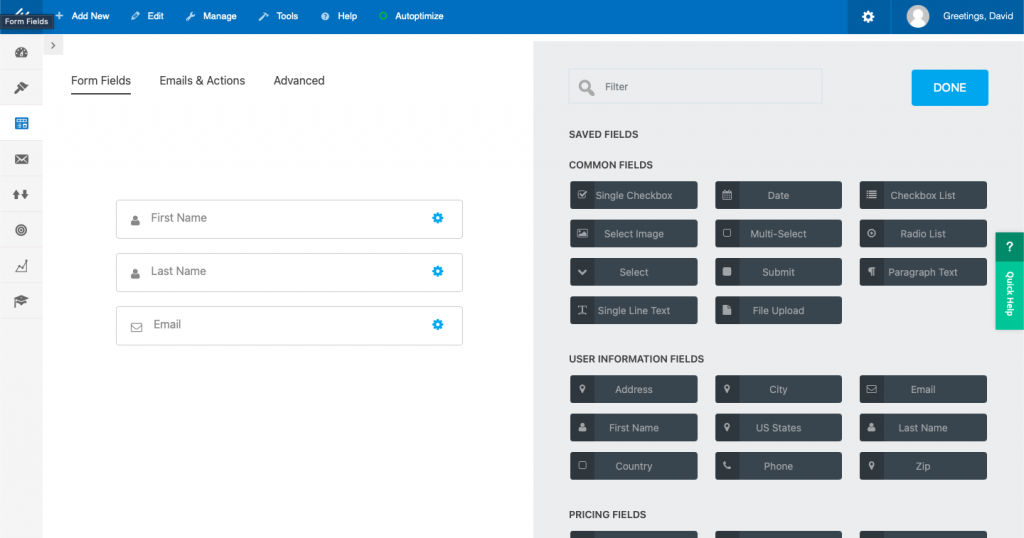
There are several options we can access by clicking the gear icon on the right of each field, but the defaults are usually fine for email. You can adjust the automated email responses in the “Emails and Actions” section, but again, the default will work just fine if you don’t want to customize.
Now we’re going to click “Advanced.” This will open a new section. Click “Email Marketing” and you’ll see the screen below.
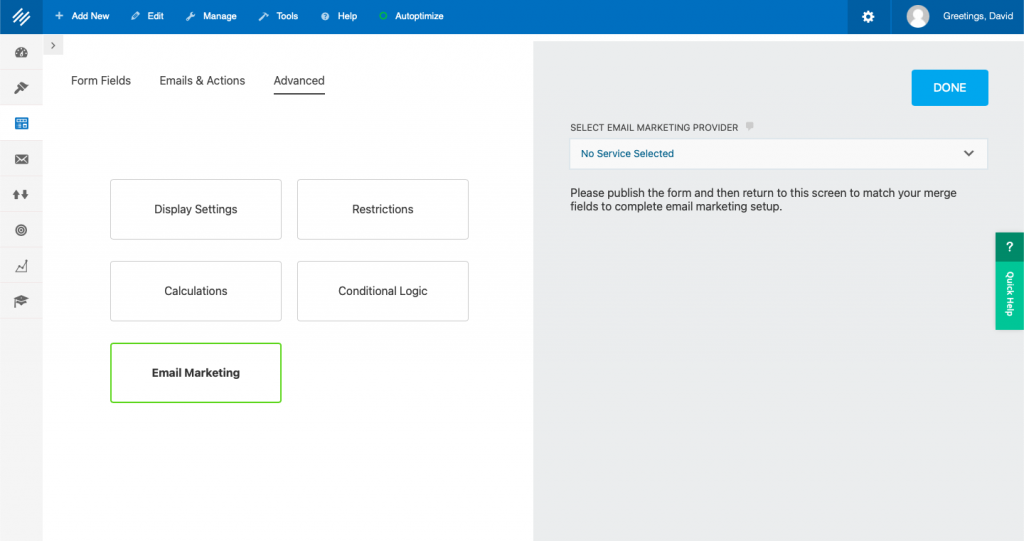
Choose your email service from the dropdown (in this case, RainMail). Then select a list. Click the blue “Done” button in the upper right, then the “Publish” button that appears in the same place.
Title your form and let it automatically add a “Submit” button, then publish.
Now that the form is published we’ll have access to a few more options under “Email Marketing.”
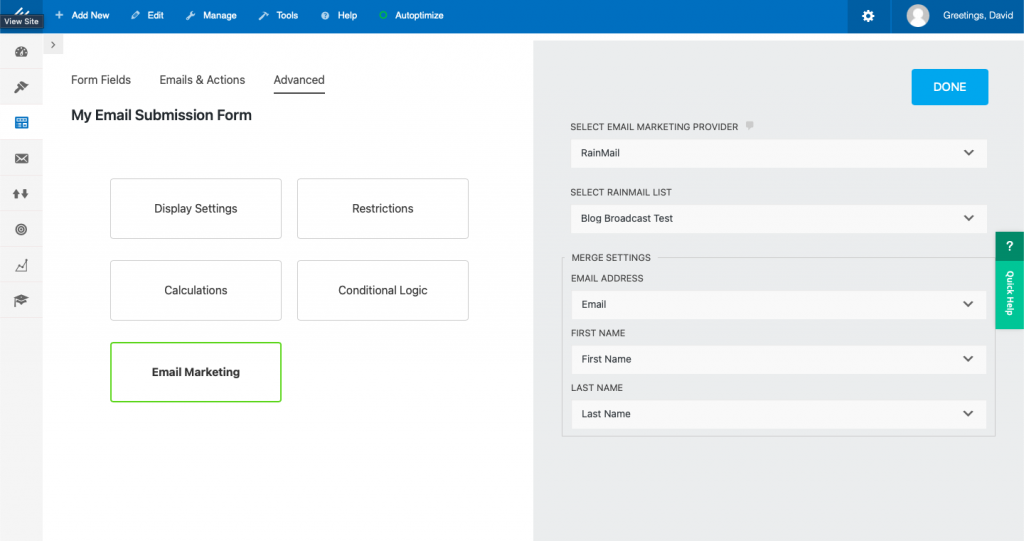
All you need to do now is edit the “Merge Settings” section so the fields match up (email with email, first name with first name, etc.). Click “Done” and “Publish” again, same as before.
Now you can build a landing page with this form or add the form to a widget — it’s hooked up to your list, so anyone who signs up will be signed up for your chosen mailing list. You can add it anywhere through Beaver Builder or the Rainmaker Platform block editor.
Can I Import a Subscriber List?
Absolutely. Here’s how.
Make sure your list is clean and in the correct format first. Save it as a .csv format (any spreadsheet program should offer you this option.) Label your columns clearly and make sure the labels are all on the first row.
Now go to Rainmaker Platform and in the left-hand menu, click the Email icon (we’ve already been there once). Click “Import and Export Subscribers.”
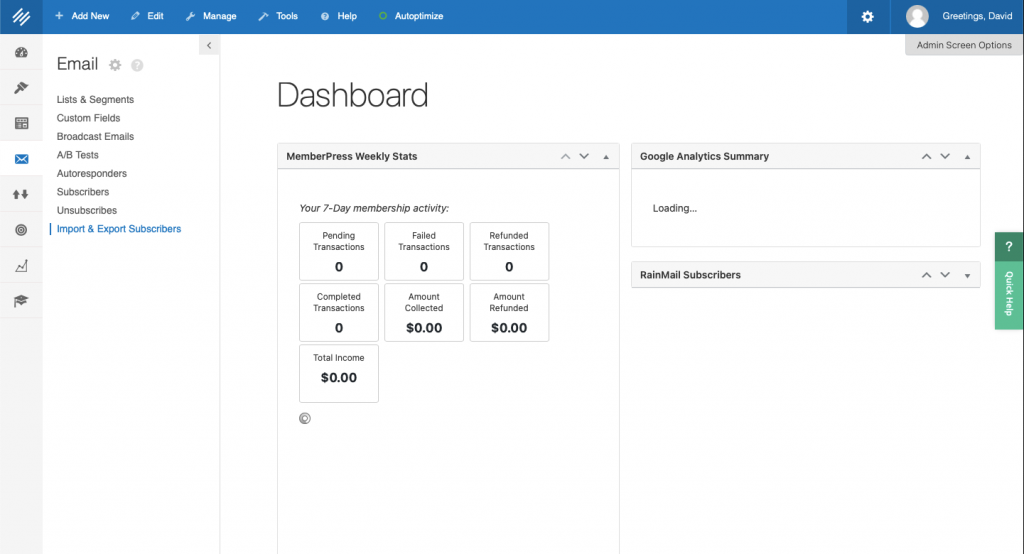
You can import to an existing list — if you don’t have a list yet you want to import to, you can use the process outlined above to create one before going to the Import and Export screen.
Scroll down to where it says “Import.” Click “Choose File” and find the spreadsheet with your mailing list. You’ll see it show up next to the “Choose File” button.
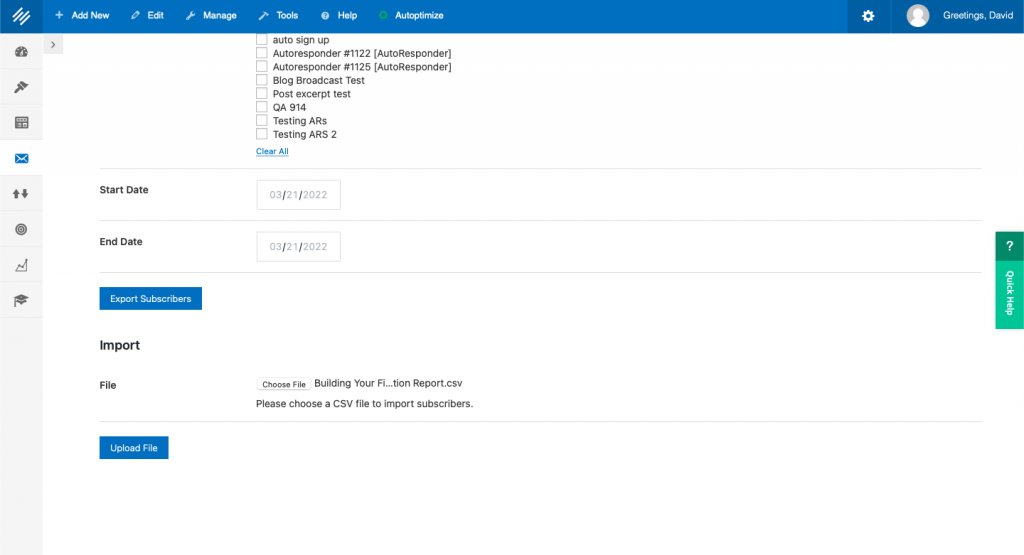
Click the blue button at the bottom of the page that says “Upload File.”
Now you’ll see a number of options. Choose the list to import to from the dropdown box. Then match the fields up. Finally, click “Import Subscribers.”
That’s it. You’re done.
It comes in handy if you’re trying to import a list from another site. In our case, we do it with our webinars — webinar mailing lists are stored on our webinar client, so we have to export the lists and import them to Rainmaker Platform.
Can I Manage My Subscribers Manually?
Definitely.
You know the drill by now: go to the “Email” section in the left-hand menu. Now click “Subscribers.”
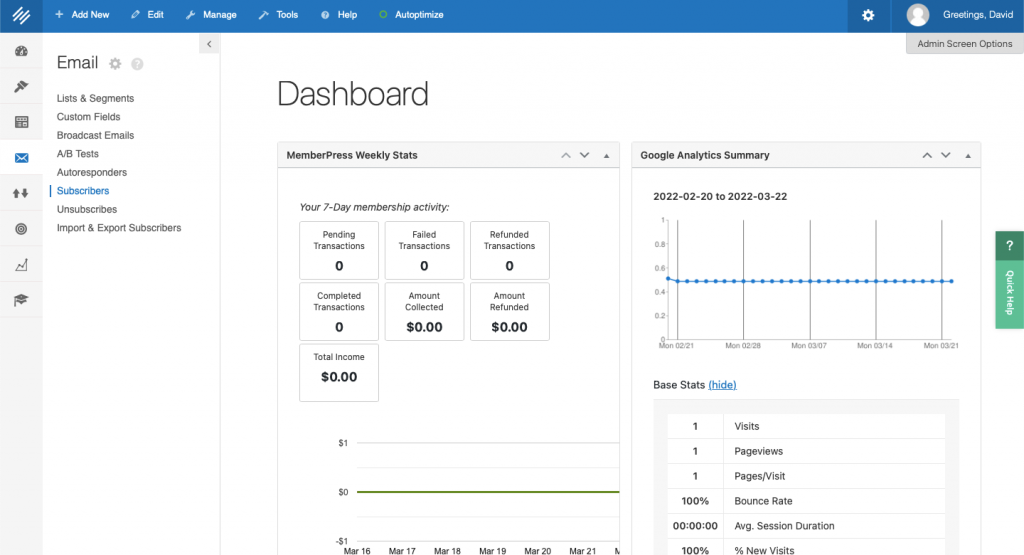
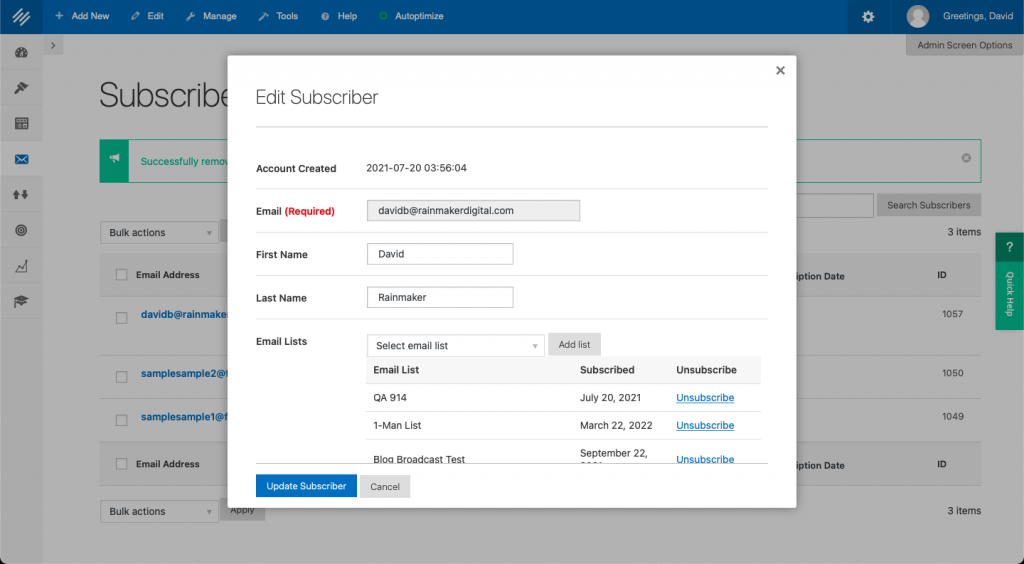
From the “Subscribers” screen you can click on any subscriber’s name to view and edit their data. You can search for a particular person using the search box on the upper right. Once you have their record open you can edit their name, add or remove them from mailing lists and add notes to their account.
Click “Update Subscriber” when you’re done.
How Do You Schedule an Email?
You can set up an email to send later instead of sending it immediately.
Start by clicking on the “Email” icon in the left-hand menu, then clicking “Broadcast Emails.”
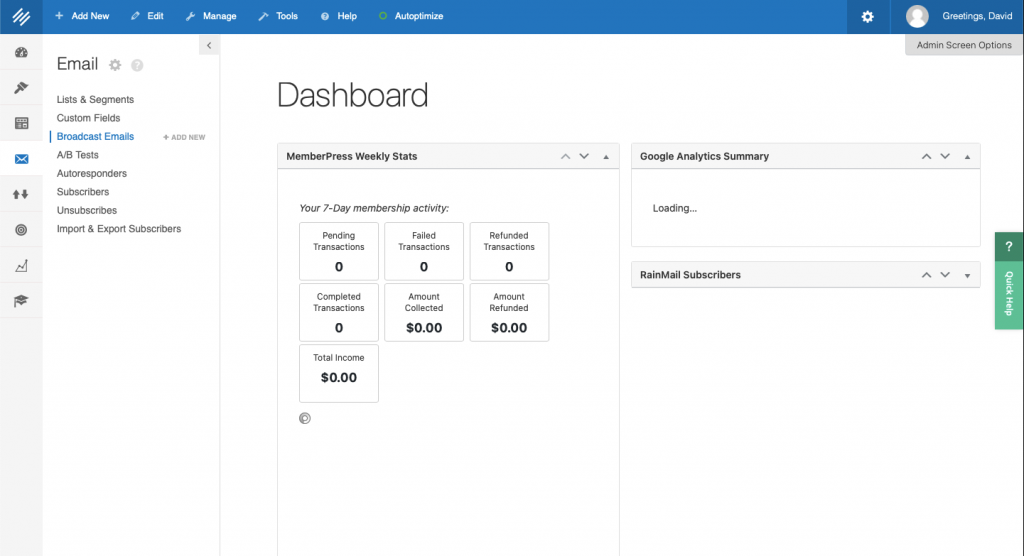
From the “Broadcast Emails” page, click on the email you want to send (or create a new one in the editor). When it’s done, you’ll be able to set up your scheduling.
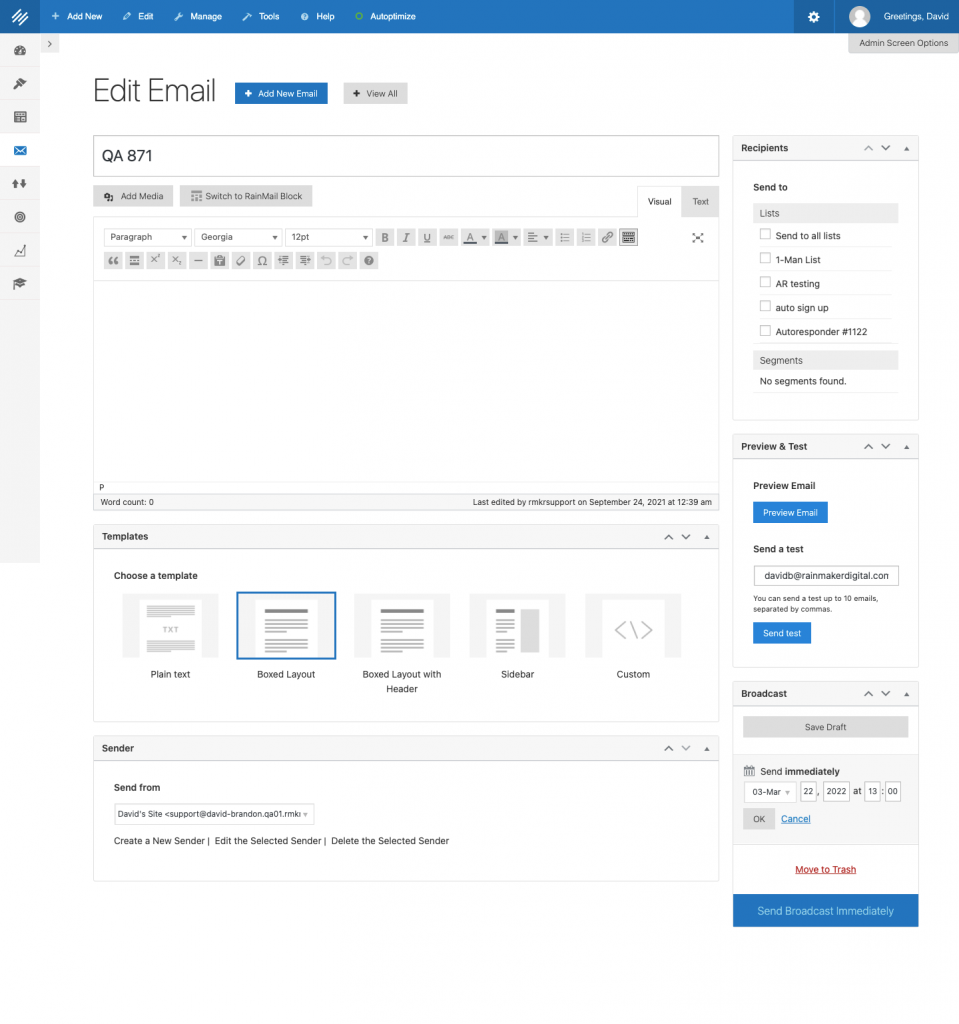
At the bottom of the page, you can use the drop-down box to change the sender.
On the right side you can see your recipients. Check the boxes next to the lists you want to send to.
You can also preview and send a test to any email address you like from that pane on the right side. Be aware — once you send a test, it will remove any lists from the “Recipients” section to prevent erroneous sending, so make sure to select your lists last (or redo it after testing).
Down at the bottom right you’ll see something that says “Send immediately.” Click the “Edit” button next to it and you’ll be able to access the calendar that’s open in the screenshot. Set it up for your preferred send time and date (in 24-hour time) and the blue button on the bottom right will change to “Schedule Broadcast.” Click it and you’re done.
How Do I Set Up an A/B Test?
An A/B test is one of the hallowed traditions of marketing — they’re great for figuring out what really works for your audience. RainMail supports this feature as well.
Again, from the left-hand menu, open the “Email” section.
Click “A/B Tests.” Then click the big blue button on the next page that says “Create New A/B Test.”
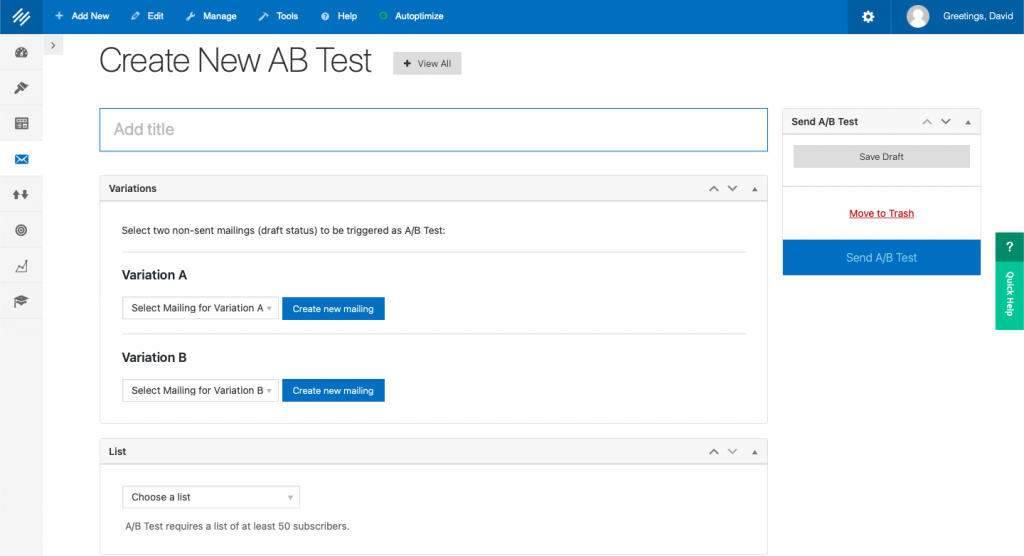
Add a title. You should have two different drafts set up already (or you can click “Create new mailing” to build one.) Choose your A and B from the dropdown menu.
Now you need to choose a list from the dropdown at the bottom of the page. Your email will send to this list.
You can save it as a draft on the right side or send your A/B test. You’ll need a list of more than 50 subscribers.
When you send your test, it will send each email to a portion of the list. It will collect metrics and then you can declare a winner from the next screen — we recommend you wait at least 6 hours. Once you declare a winner that email will go to the rest of the list.
RainMail: For All Your Email Needs
If you haven’t been using RainMail, take another look. There’s a lot you can do. And if you want to learn how to build an email out from scratch, start to finish, sign up for our webinar on Thursday, April 7 at 1 p.m. Central Time.
And if you have any questions about RainMail and your Rainmaker Platform Andromeda site, reach out. We’re here to help.
Best Regards,
David Brandon
Copywriter
Rainmaker Digital Services