Welcome to this month’s State of the Platform. This time around, we’re focusing on memberships. MemberPress is a key part of Rainmaker Platform Andromeda, and we’re going to walk you through how to use it.
We also have some exciting news to share with you. Beginning in February, we’re going to be hosting webinars based on the previous month’s State of the Platform. We’ll give you advanced tips and tricks with video explanations and answer any questions you send in for our Q&A. Webinars are free; please plan to join us on February 9.
Memberships are everywhere. From your gym to your Netflix account to your Substack subscriptions, you probably have dozens of memberships. The concept is fairly simple — you pay money, you get access to benefits. And you can use the same strategy on your Rainmaker Platform.
The Rainmaker Platform Andromeda license comes with MemberPress. This feature opens new opportunities to engage with your audience, allowing you to sell courses, create members-only posts and more. Here’s how.
How to Get Started with MemberPress
MemberPress is part of your Rainmaker Platform Andromeda installation and is active by default. If for some reason MemberPress is not active on your site, you’ll need to turn it on in the Universal Settings.
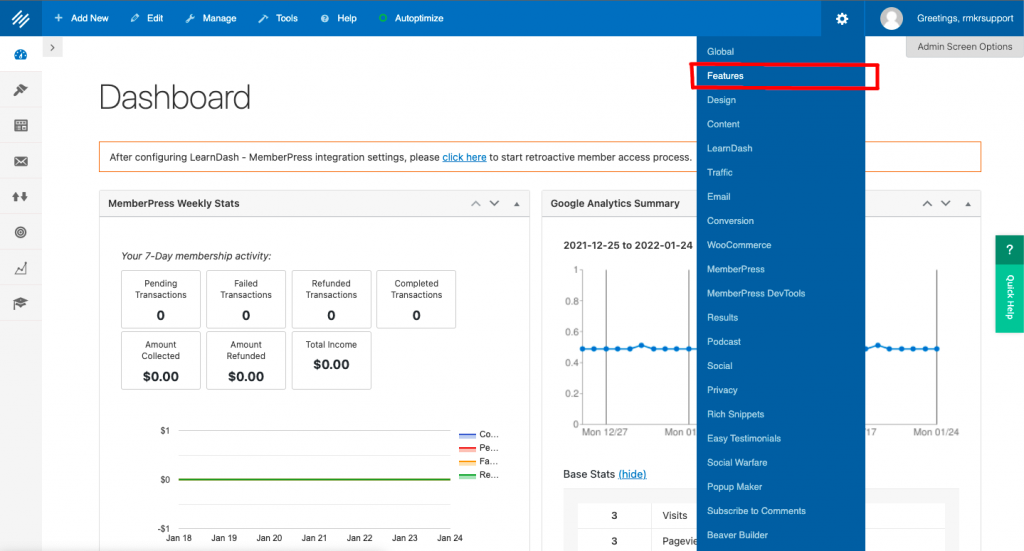
From your Rainmaker Platform dashboard, move your mouse pointer over the gear icon on the upper right of the top Admin Toolbar. In the drop-down menu that opens up, click on “Features.”
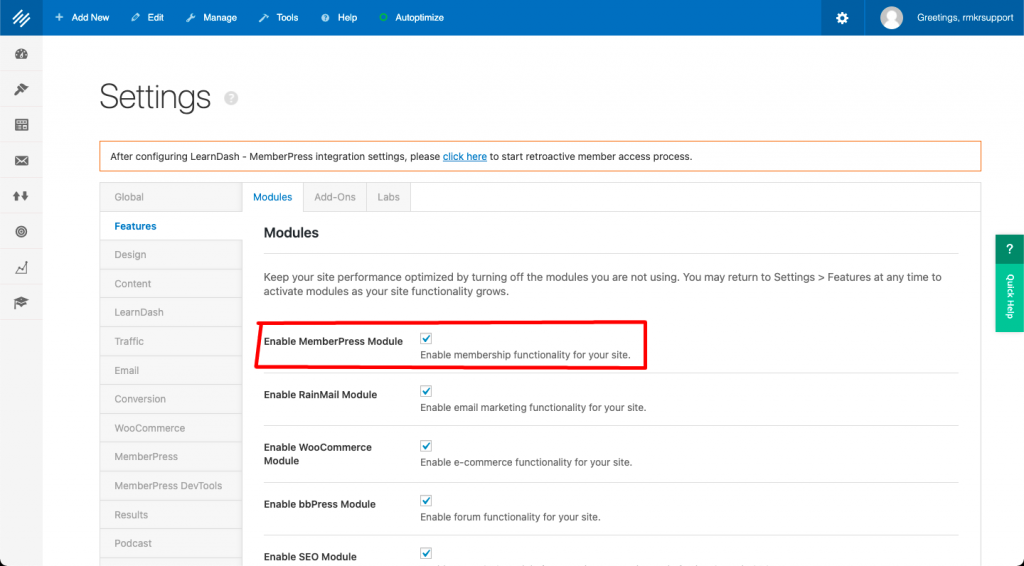
Rainmaker Platform includes a huge number of features that you can use. You will see the “Modules” available in Rainmaker Platform. Click to add a check in the box next to MemberPress to activate this feature. Then scroll down to the bottom of the page and click the blue “Save” button to save the settings.
While you’re here, check to make sure only modules you are using are active. Uncheck any modules that you don’t need so they don’t load unnecessary resources.
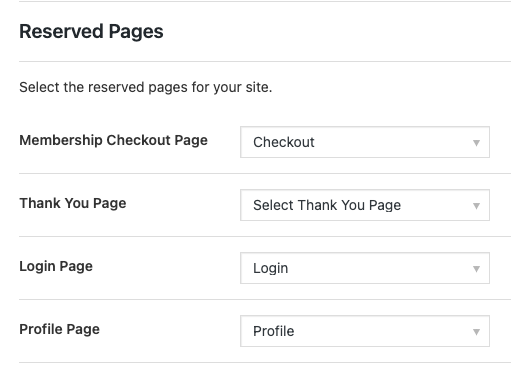
After enabling MemberPress, you’ll need to identify the pages that MemberPress will use for Checkout, Thank You confirmation, Login, and Profile. Most Rainmaker Platform sites already have these pages set up.
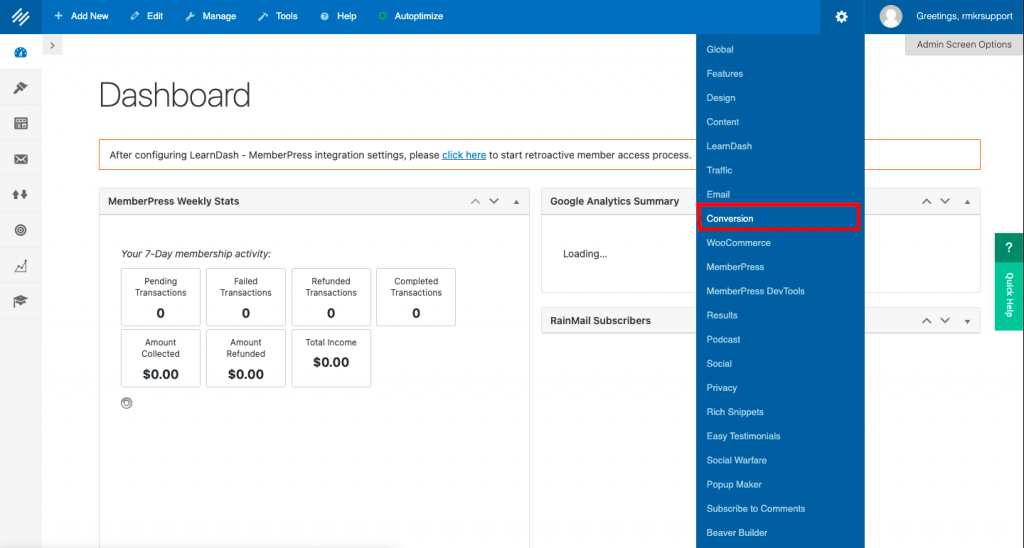
To specify those pages, go to the top Admin Toolbar, mouse over the gear icon and click on “Conversion.”
Scroll down on the next screen to the “Reserved Pages” section. Use the drop-down menu next to each Reserved Page to select the respective page. Yours may look slightly different if you have more features turned on (like WooCommerce, for example) — just make sure these pages are correct.
You’ll also need to set up a payment gateway. Scroll down and add your information based on which payment service you use — Stripe, Authorize.net, PayPal or Braintree. Don’t forget to save your changes at the bottom of the page when you’re done.
Once you’ve done this, you’ll be able to set up your first membership. MemberPress will now allow you to restrict access to different parts of your site based on whether people are members of specific memberships.
Say you run a yoga studio — you could put some LearnDash courses on basic movements behind a MemberPress membership and sell it as a subscription or one-time course fee. Through MemberPress, only the people that paid would have access to the content, not just everyone that comes to your site.
Memberships are perfect for premium content, and they also work well for audience segmentation. You could have different segments of your site set up for different audiences, and when they log in they go to their specific section. So in the yoga studio example, maybe you also teach tai chi. When someone logs in they either have access to the yoga content or the tai chi content based on which membership they’re using.
You can also enable WooCommerce and LearnDash from the same features screen where you enabled MemberPress. These two modules work hand in glove with MemberPress. Before we touch on these, though, we need to set up our first membership.
Your First Membership
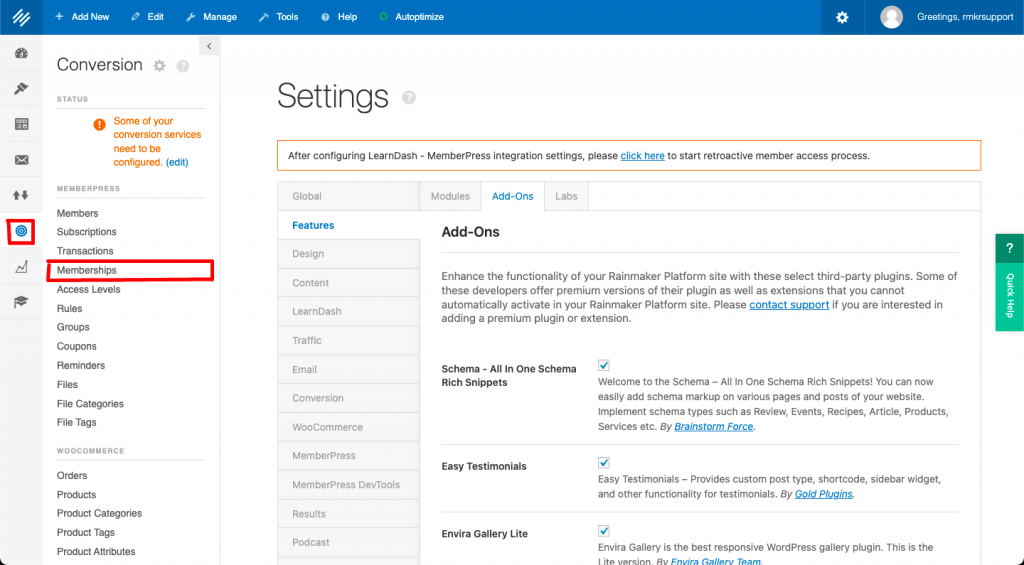
Navigate to the left-hand menu and click the “Conversion” section (the bullseye). Then click “Memberships” under the MemberPress section of the menu.
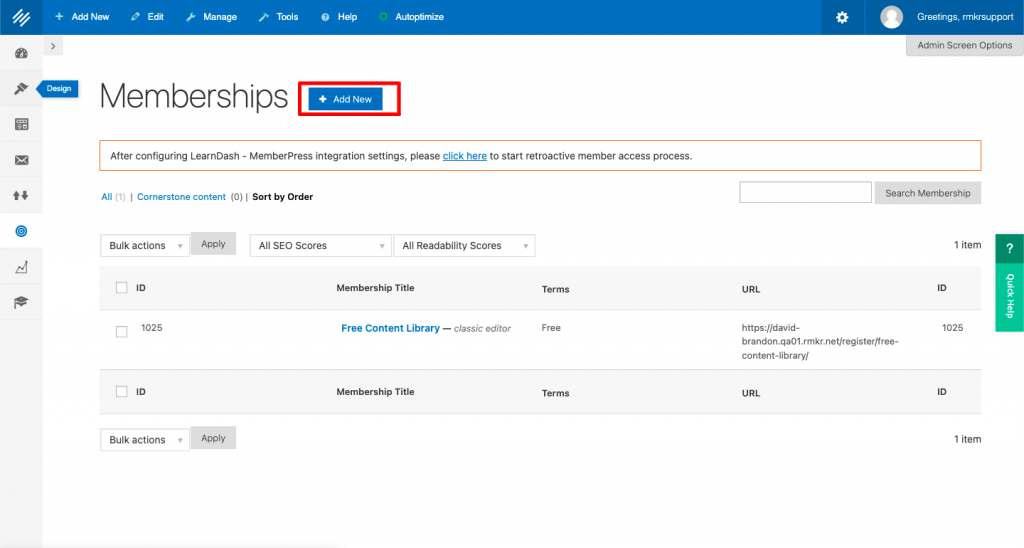
From the Memberships page, click the blue button that says “Add New.”
This will bring you to a new membership page, which will look similar to your regular page editor but has some extra options.
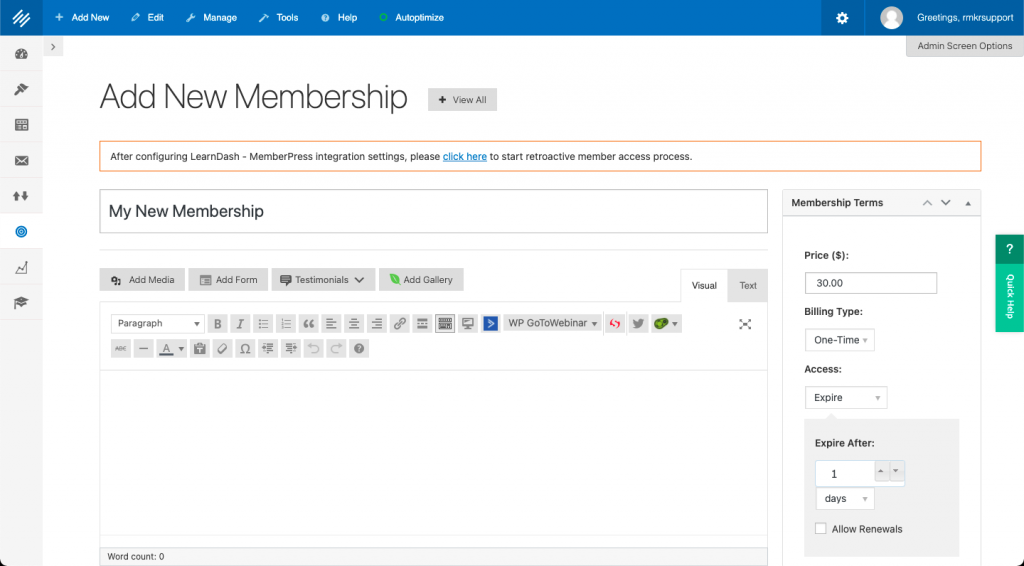
You can make the title of the membership whatever you like — in this example, I’ve just named it “My New Membership.” Then you can add content via the page editor which will appear above the registration form.
On the right, you’ll see a box called “Membership Terms.” This is where you lay out the details for the membership. You can set a price if you want it to be paid, choose whether it’s a one-time fee or recurring, set the interval for the fee and more.
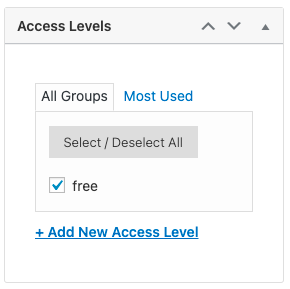
Below that you’ll see a box called “Access Levels.” You’ll need to check the box for the access level you want or create a new access level.
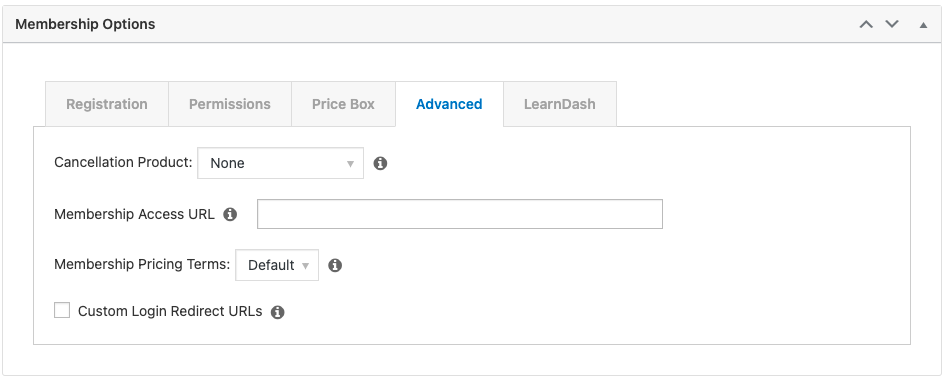
Scroll down a little further on the page and you’ll see a box called “Membership Options.” This is where you adjust most of the details of this membership.
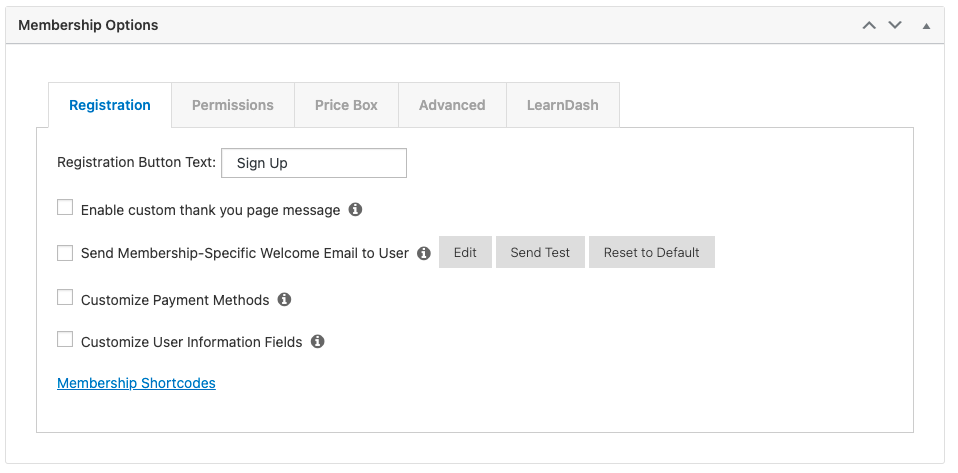
Under the “Registration” tab, you’ll be able to adjust things like payment methods and the email you send to the user when they sign up.
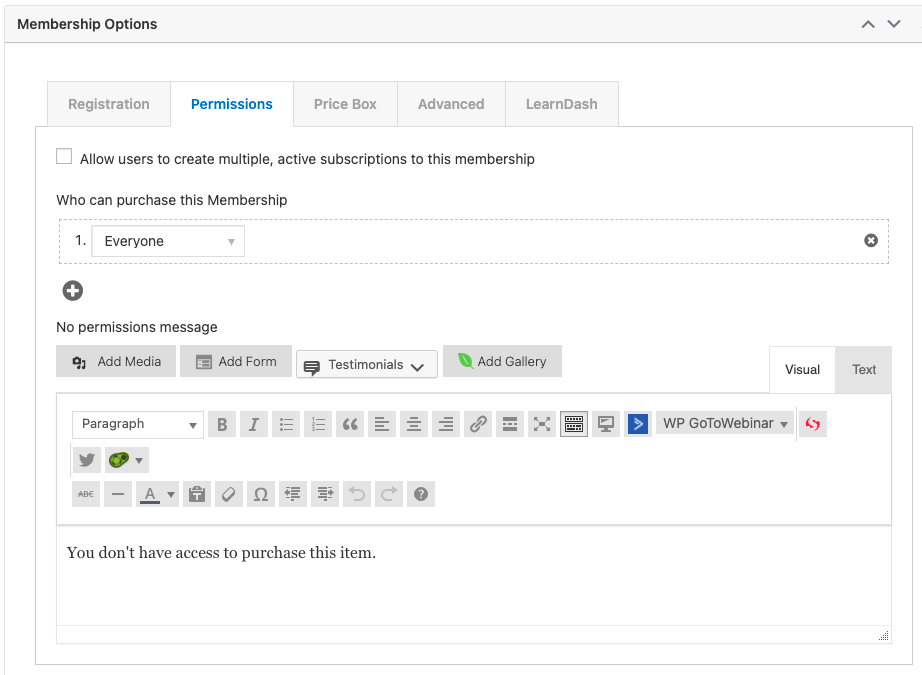
Under “Permissions,” you can choose who is able to purchase this membership and what message people will see when they try to access content without permission.
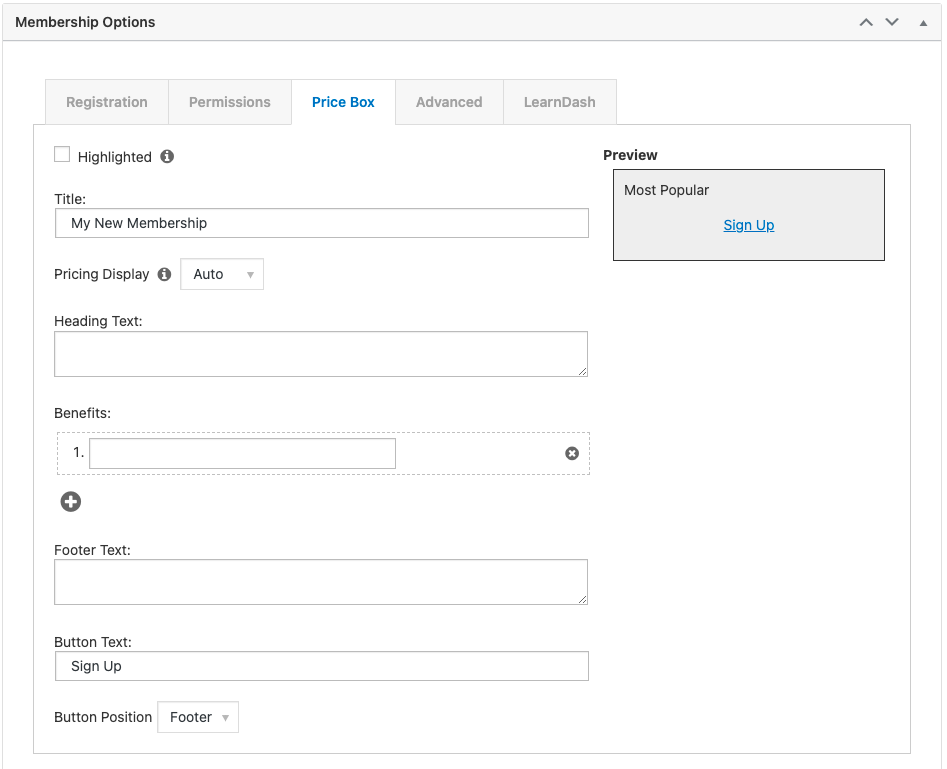
For setting up a single membership, the “Price Box” tab can be skipped. You’ll need to set up the Price Box content when you are creating a group of multiple memberships.
In the “Advanced” tab you can designate the membership that people will switch to when they cancel this membership. For example, you may have a free membership. The “Membership Access URL” field will make the name of the membership a clickable link on the member’s account page.
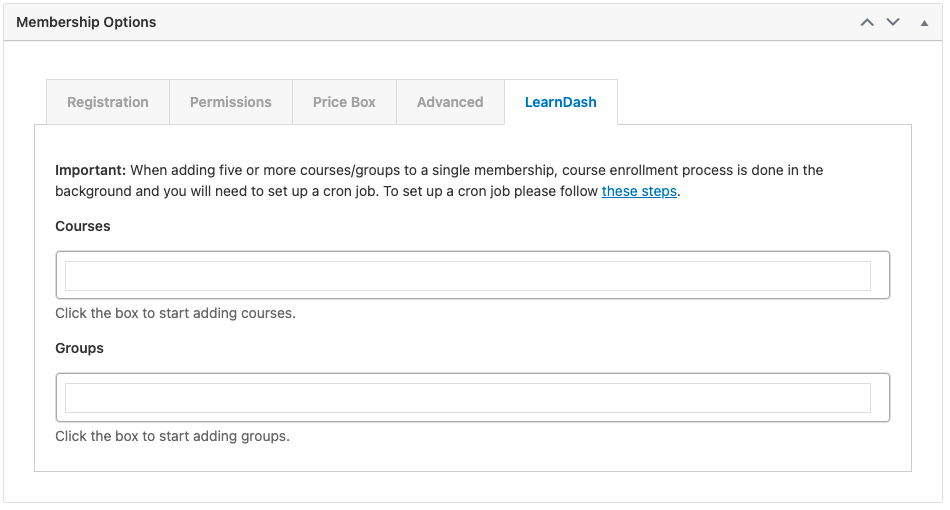
If you have LearnDash enabled, you will see a “LearnDash” tab where you can associate LearnDash courses you’ve built with this membership. If you’re interested in more about this we’ll walk you through it on our MemberPress webinar in a couple of weeks — sign up here.
With your new membership set up, you can now create rules for access.
Creating Rules
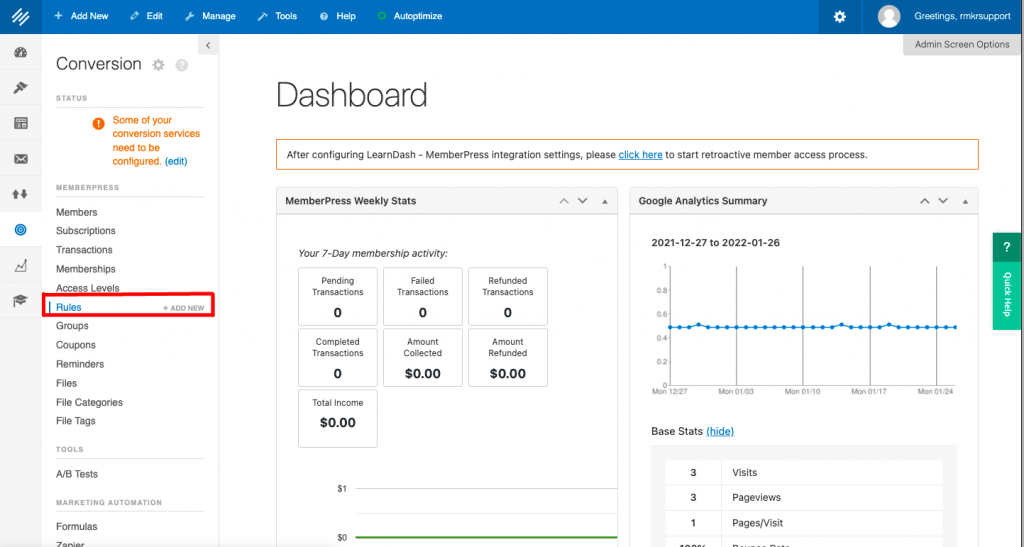
MemberPress controls access with Rules. You can access Rules from the left-hand menu under “Conversion” in the MemberPress section.
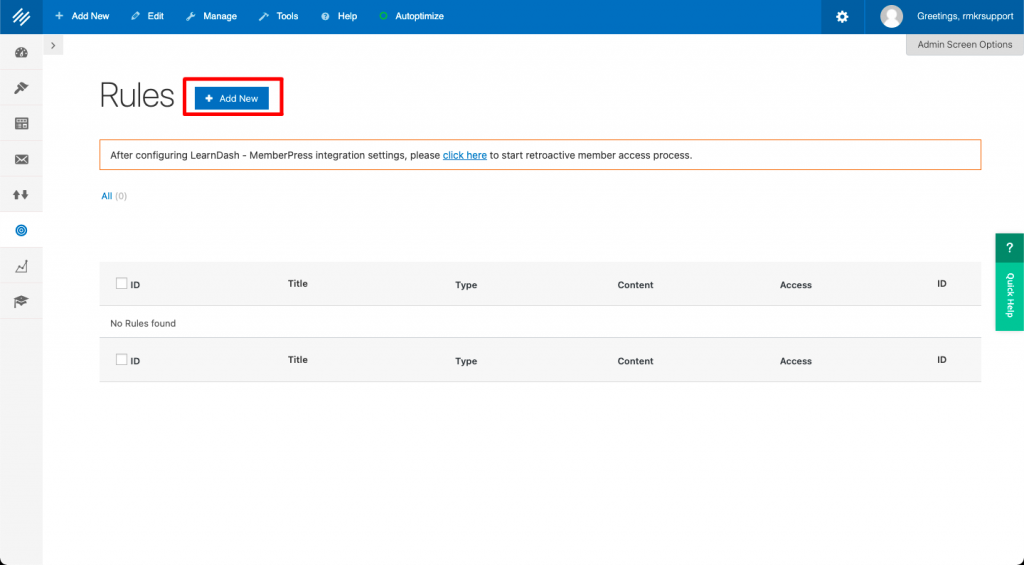
Once you get into Rules, you can click “Add New” to create a new rule.
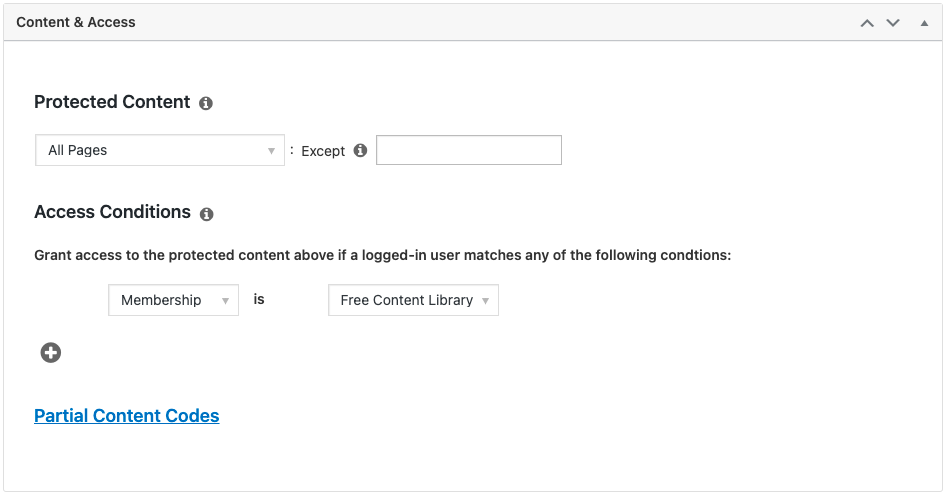
Now you can choose what content you’d like to restrict access to. In the “Content and Access” box, you can pick from the drop-down under “Protected Content.” It could be a single page, a tag, a keyword … any number of things. Then you choose which membership to associate that content with.
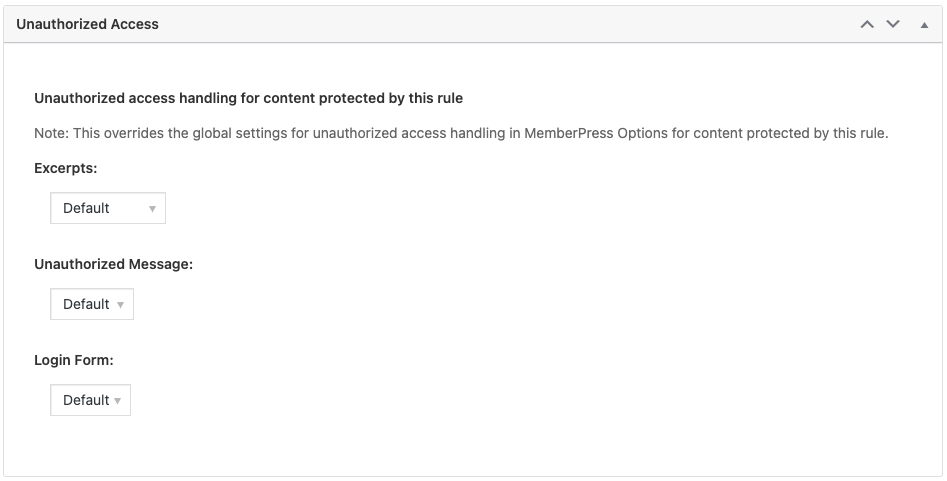
Scroll down further and you’ll see another box that handles unauthorized access. You can specify what message to show when they aren’t able to get to the content and whether to link to a login form or have a login right on the page.
These Rules are incredibly powerful and flexible, and allow you to control access from one central location instead of a page-by-page basis.
Integrating with WooCommerce and LearnDash
We’ve shown you one aspect of LearnDash integration already — MemberPress allows you to add courses to a membership fairly easily. You can also retroactively add courses to a membership through MemberPress’s tool suite.
WooCommerce is also available in Rainmaker Platform, and it integrates well with MemberPress. If you are already selling physical products with WooCommerce or if you prefer your customers to checkout through a traditional shopping cart, you can integrate WooCommerce with MemberPress for checkout.
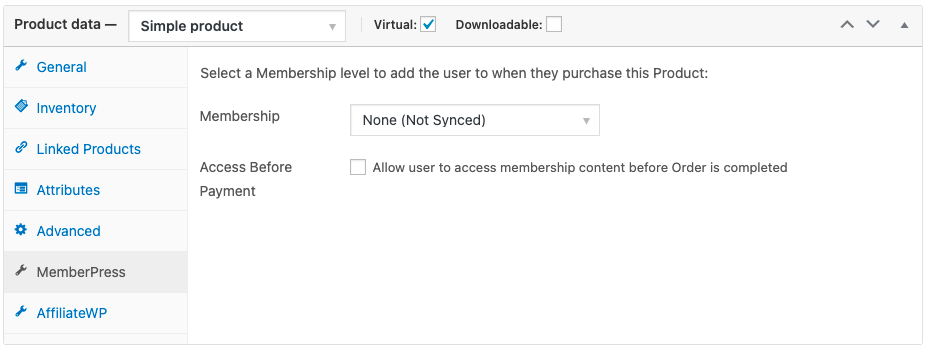
Add a new product to WooCommerce and set it as a virtual product in the settings box. You’ll see a “MemberPress” tab there where you can choose a membership level to add when they purchase the product. Click the right one from the drop-down box and that’s it — fill out the rest and you’re ready to sell your membership with WooCommerce.
Both LearnDash and WooCommerce have more functionality to explore with MemberPress, and if you want to learn more, we’re running a webinar in a couple of weeks. Sign up here and we’ll show you some of the more advanced ways you can use MemberPress with your Rainmaker Platform site.
The Power of Memberships
Hopefully this State of the Platform has whetted your appetite for what MemberPress can do. Every Rainmaker Platform Andromeda site can take advantage of this powerful tool. Use it to sell your virtual products, segment your audience and serve better content to your customers. And for even more tips and tricks, register now and plan to join our webinar on February 9.
Feel free to reach out if you need a hand with any of these features. We’re here to help.
David Brandon
Copywriter
Rainmaker Digital Services