
Are you using courses on your Rainmaker Platform site?
Online courses establish your authority, build your revenue and create value for your customer base. With the continual culture shift to working from home, online learning is becoming a huge part of many brands’ strategy. You need to take advantage.
You can create great courses through Rainmaker Platform Andromeda in multiple ways. One of the easiest is LearnDash. Over the past 18 months, we’ve seen many of our customers move towards LearnDash implementations.
LearnDash is integrated with Rainmaker Platform Andromeda. It makes course organization easy, and it’s a simple process to engage your audience and monetize your content. You can access everything through the Rainmaker Platform dashboard.
Courses don’t have to be math, science or a “school” subject. You can create a course on just about anything your audience is interested in. It could be the basics of the stock market, the digestive process or painting a wall. Whatever the subject, LearnDash can help you build a course that explains it clearly.
From business training to injury mobility, there are Rainmaker Platform clients with LearnDash courses devoted to their specialties. You can take advantage of this capability too.
In this State of the Platform, we’ll walk you through how you can use LearnDash to create courses for your members.
Getting Started with LearnDash
The first thing you’re going to have to do is enable LearnDash.
Mouse over the gear icon in the upper right hand corner of your screen and click “Features” in the drop-down menu.
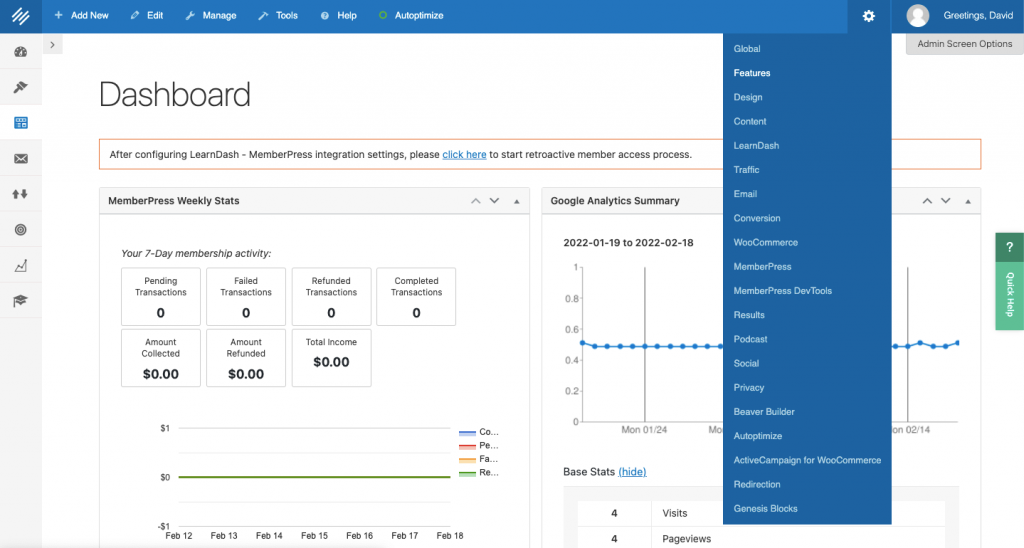
This will take you to the Modules, Add-ons and Features section of your Rainmaker Platform site, where you can enable and disable extra features on your site. You’ll need to enable LearnDash. Scroll down the page, make sure the box next to “Enable LearnDash Module” is checked, then click “Save” at the bottom of the page.
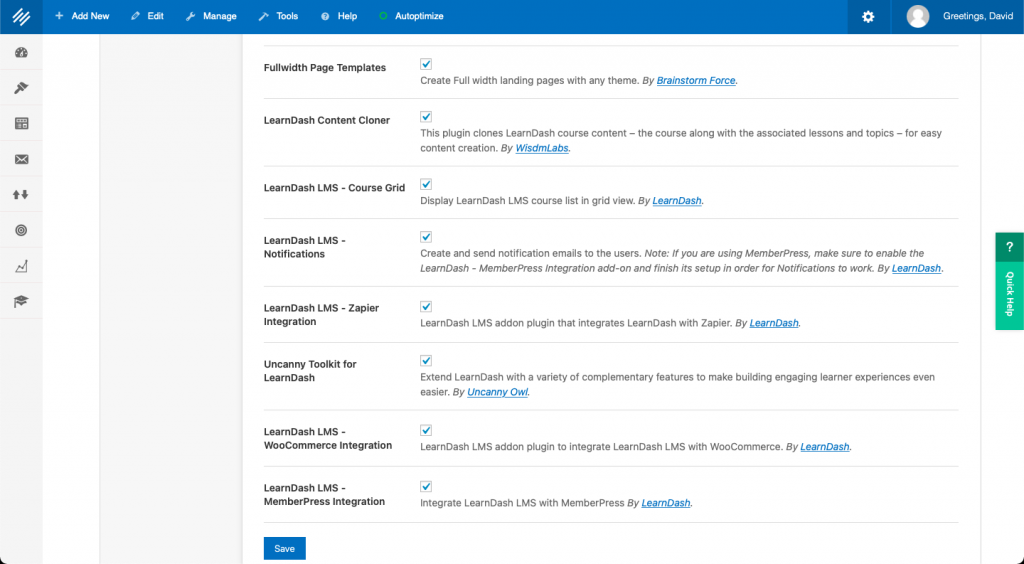
You’ll then want to click the “Add-Ons” tab to turn on a few other features. Make sure the check mark next to anything related to LearnDash is turned on — you may also want to turn on Fullwidth Page Templates. Click “Save” at the bottom of the page.
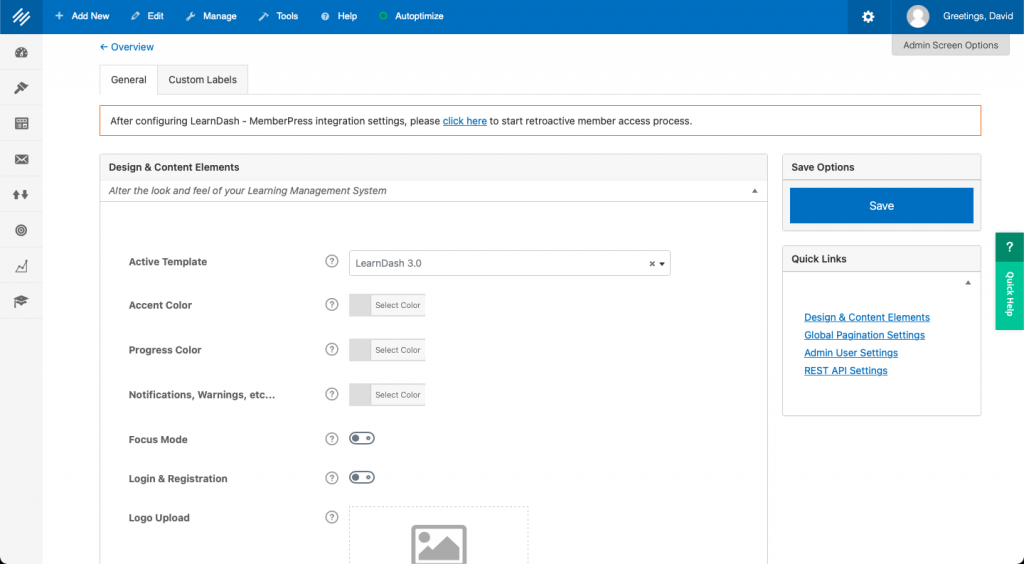
You’ll probably want to review your LearnDash settings as well. Mouse over the gear icon in the upper right hand corner of your screen and click “LearnDash” in the drop-down menu. You can edit your course appearance including design and color here.
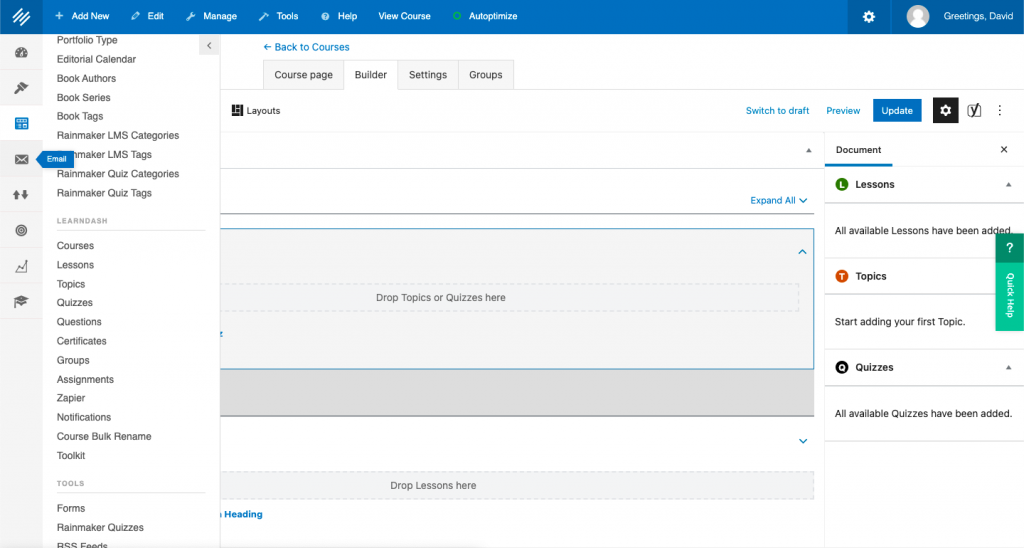
Now, go to Content > LearnDash and you’ll see your LearnDash options. This is where you can add courses. To get to this screen from your Rainmaker Platform dashboard, mouse over the left-hand toolbar. The third icon from the top is called “Content” — click on it and find the LearnDash section. You may need to scroll down in the menu to find the LearnDash option under your regular posts and pages.
Click on “Courses” in the LearnDash section of the menu and you’ll see where your courses will show up when you create them.
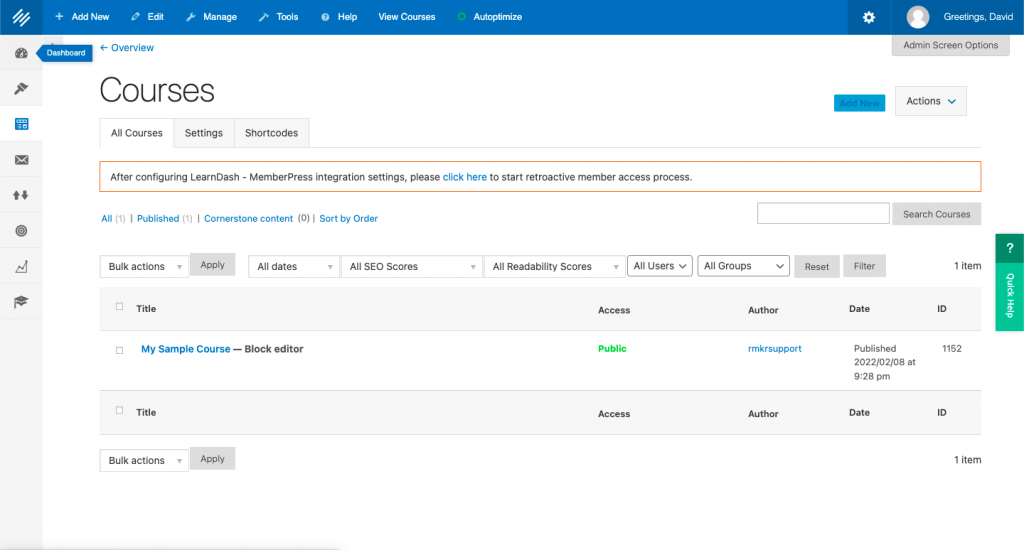
From here you can add or edit courses.
The Basics of LearnDash Content
LearnDash content can be created with the classic or block editor. If you have the Beaver Builder visual editor enabled, you can use that as well.
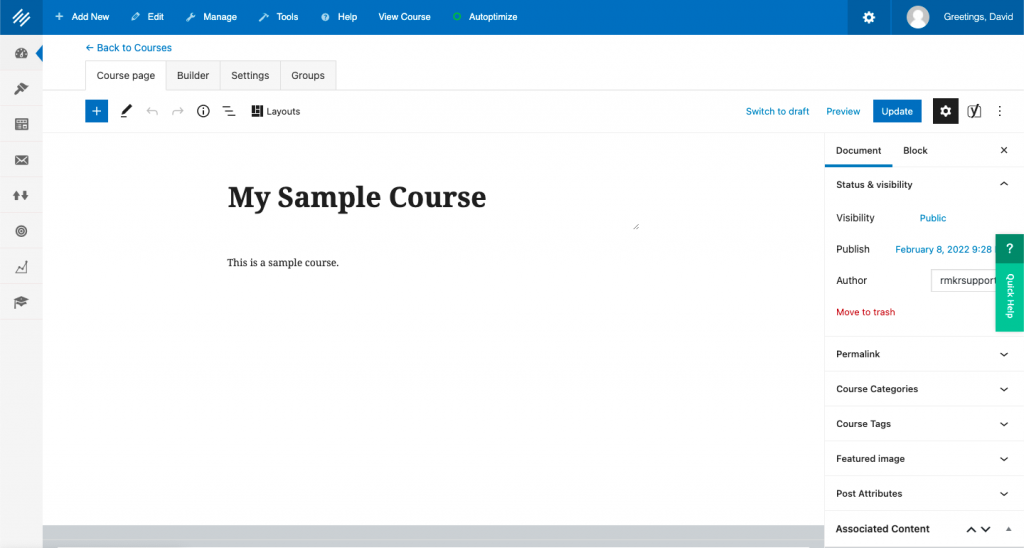
Click the “Builder” tab to access the structure of your course.
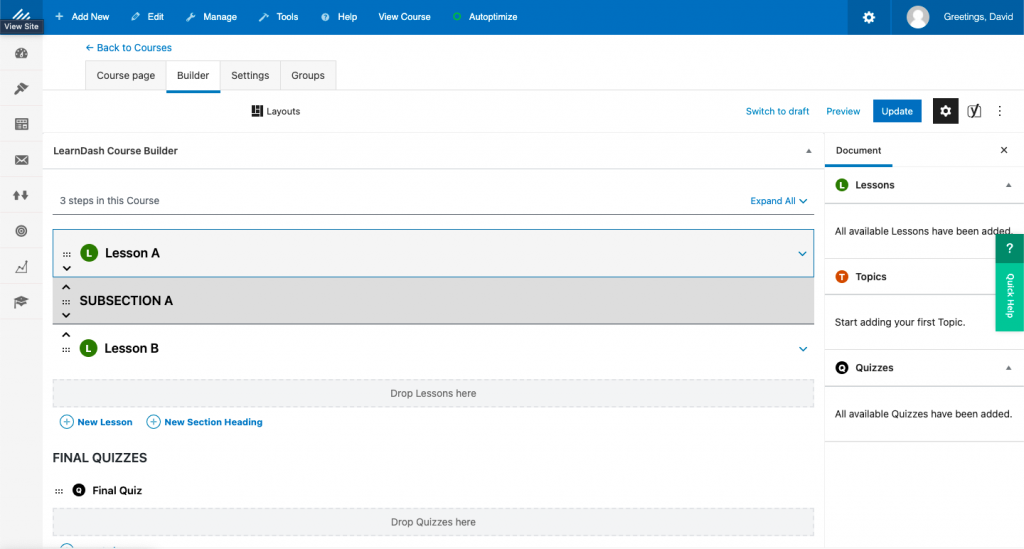
The Builder is the heart of the course design and production for LearnDash. Here you can organize the content with headings and add lessons and quizzes. Adjust the order of the elements in your course with the up and down arrows to the left of the course element names.
ProTip: You can drag and drop with the handles (the little clusters of dots) to visually reorder elements as well.
If you mouse over the course elements, you’ll see a little blue pencil icon — this lets you edit each element’s name. To the right of the name, there’s an “Edit” button that lets you go to the element’s page and make changes. There’s also a little blue arrow pointing down at the right of each element. Click it to expand or contract each element — this can help you when you’re working on longer courses with a lot of moving parts.
Understanding Course Hierarchy
To use the Builder effectively, you’ll need to understand course hierarchy.
- Course: The top level of LearnDash content. This would be something like “How to Build a China Cabinet.”
- Lesson: The next level of LearnDash content. This is specific content that explains a particular exercise. It would be something like “Building the Doors.”
- Topic: Topics nest under and combine to create lessons. “Gluing Your Face Frame Together” or “Attaching the Handles” would both be topics within the “Building the Doors” lesson.
- Quiz: LearnDash includes testing modules that can be assigned to content to test learners on their knowledge of topics and lessons.
Each of these elements can be moved around within the hierarchy.
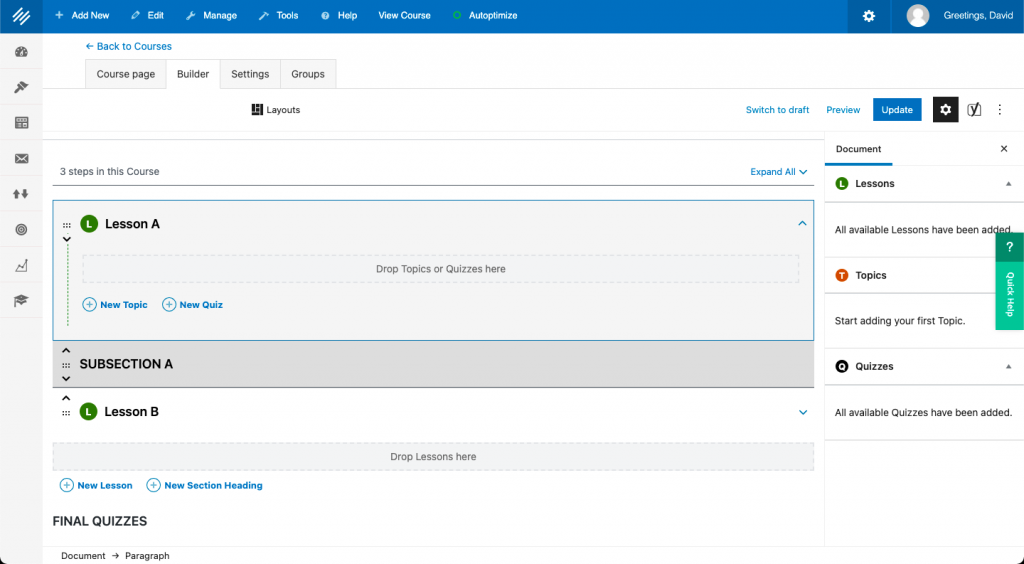
This is different from the Rainmaker LMS — Rainmaker LMS has Courses, Modules and Lessons instead of Courses, Lessons and Topics. You can create custom labels for the elements if you want to rename them through the global LearnDash settings screen (accessible through Settings > LearnDash > Custom Labels).
You also can add new topics and quizzes here or go to the left-hand menu under Content > LearnDash > Lesson > Add New.
Your First Sample Course
You’ll find LearnDash courses easy to build once you’ve done it a few times. Let’s walk through a sample course. This is an exercise you can try on your own Rainmaker Platform site.
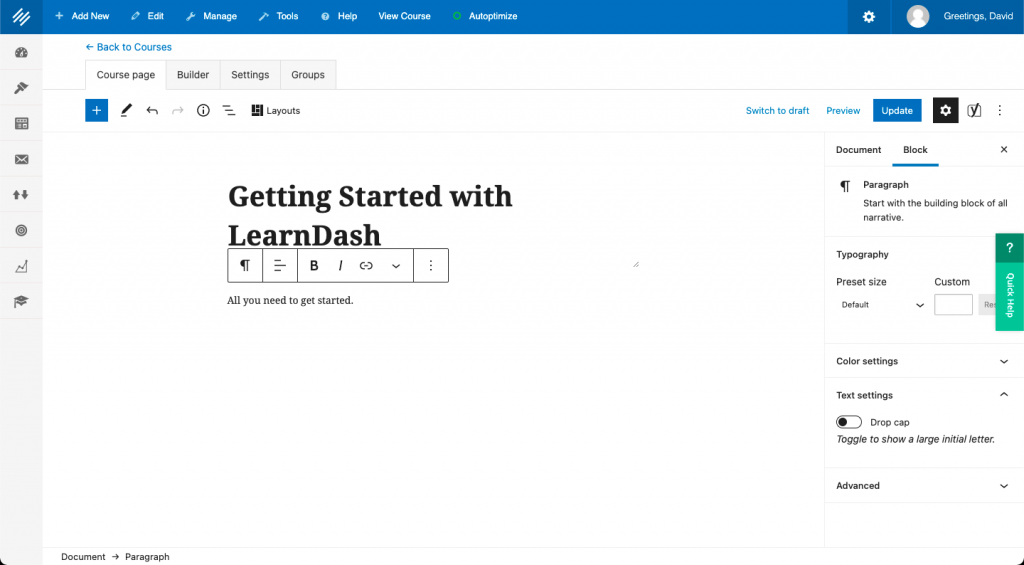
Step 1: Add a Course
Click “Add a Course,” name it and write a brief description on the main course page.
Step 2: Add Lessons
Click the “Builder” tab. For the first course, add two lessons with a subsection header in between. You’ll do this by clicking the “New Lesson” and “New Section Heading” buttons underneath the course elements.
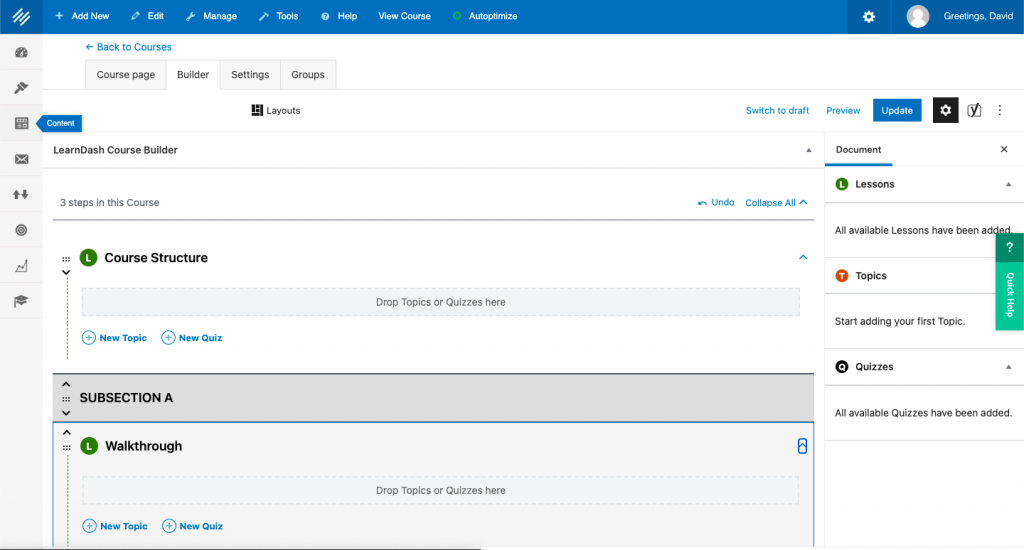
Within each element you’ll see similar buttons — so if you click the blue arrow at the right of any course element, it will open it up so you can see all the pieces nested underneath it. You can add new topics and quizzes under each lesson this way.
Step 3: Adding Topics to Lessons
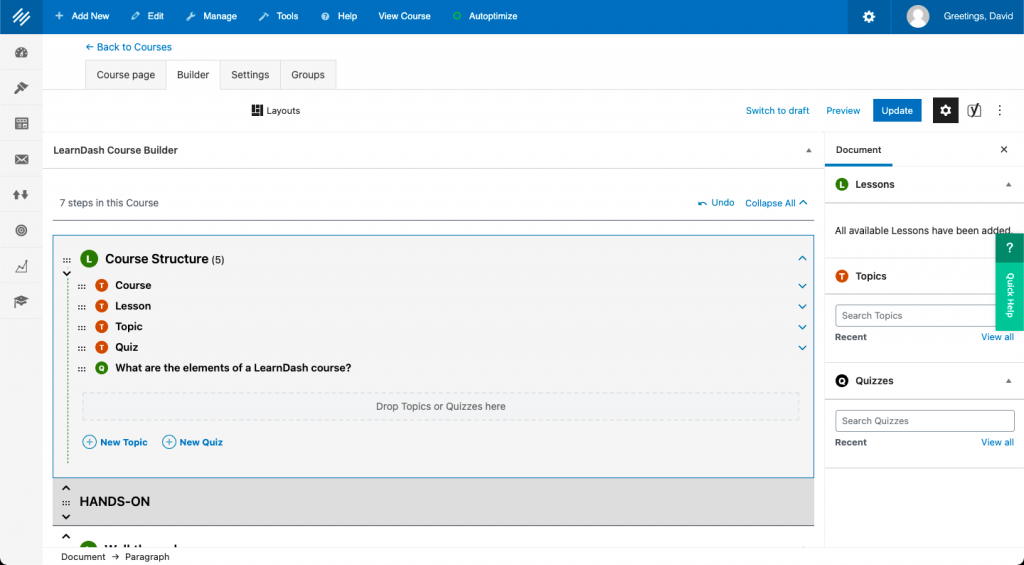
Under “Course Structure,” add topics for each course element by clicking “New Topic” and adding the correct title, then clicking the “Add Topic” button to the right of the title text box to save it.
Step 4: Creating Evaluation
Most courses include some method for students to demonstrate learning. With LearnDash, you can add quizzes to topics, lessons and courses in exactly the same way you added a topic.
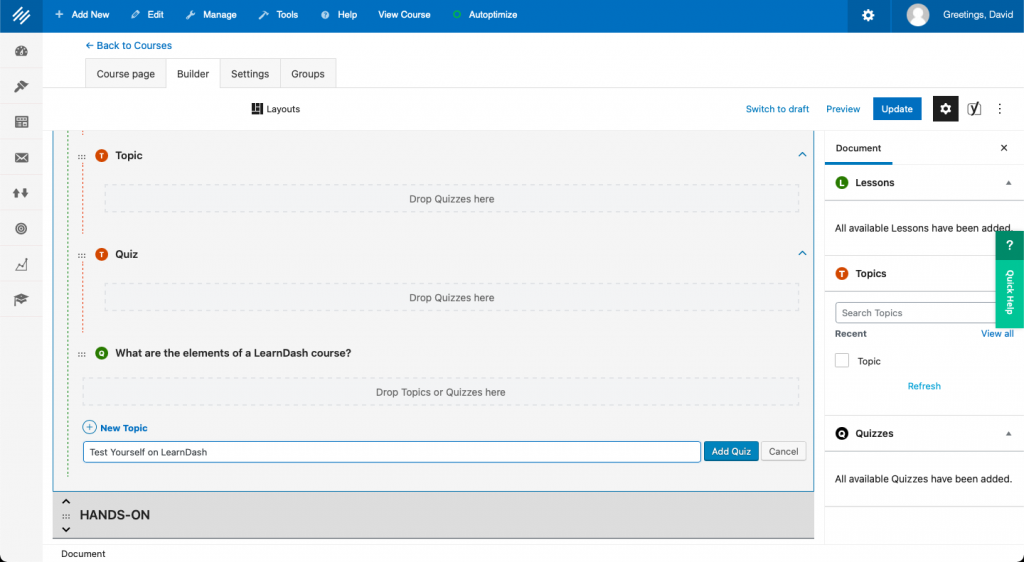
Our course structure is now complete. The next step is to fill it in.
Step 5: Adding Course Content
We now have the basic outline for the course. You could add content as you create the course structure, but you’d have to save after every step — it’s easier to create the structure first, then come back and add content. You’re also going to want to associate any memberships with the course — you can choose those from the right sidebar in the box called “Associated Memberships.”
But before you do that, go to the Settings tab to make sure the course is marked “closed” while you add the course content. Click “Publish” or “Update” at the top right of the screen once you’ve completed this step.
You can now add content to your course page. This is the first thing people will see when they open the course. You can use the same editor you’d use for your regular pages and posts.
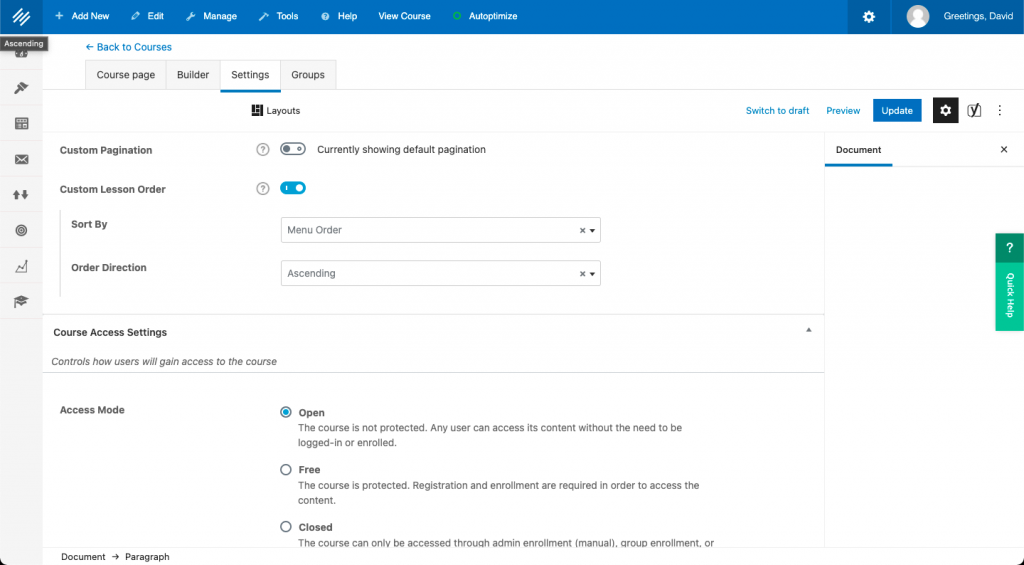
Now add content to your lessons, topics and quizzes. Mouse over the course element you want to edit (in this case we’ll choose the topic labeled “Course”) and click the blue “Edit” link on the right of the element. It may bring up a screen warning that you will lose your changes if you haven’t saved — make sure you don’t leave anything unsaved before clicking the “Edit” link.
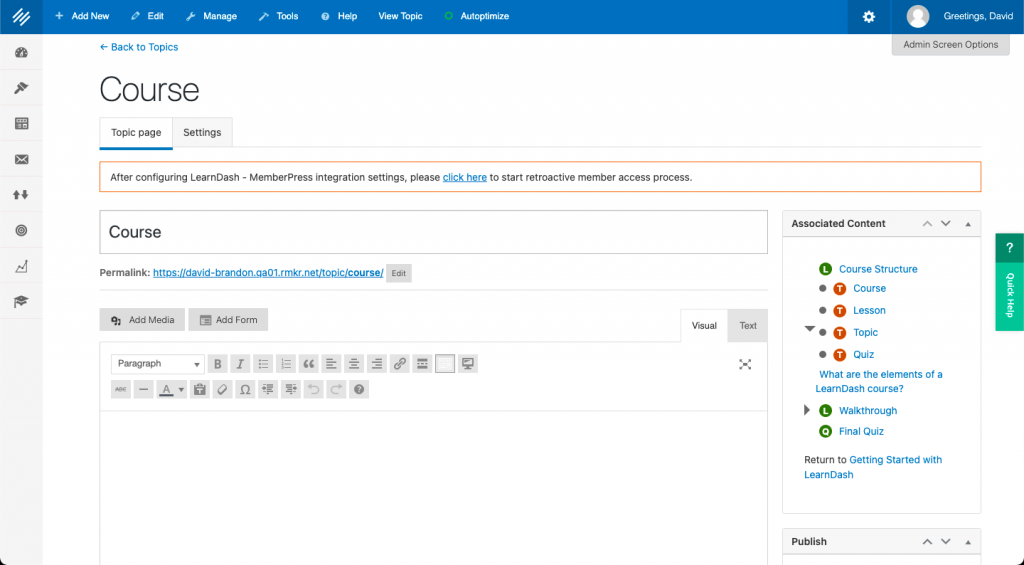
From here we can edit the content and save it just like a regular page. Once it’s saved, you can click on the elements in the right-hand sidebar to go to each of them and add content the exact same way. Each element also has a Builder tab of its own which lets you add pieces under it.
There’s one more tab you need to look at on your course. Check the “Settings” tab under your course. Scroll down to “Course Navigation Settings.”
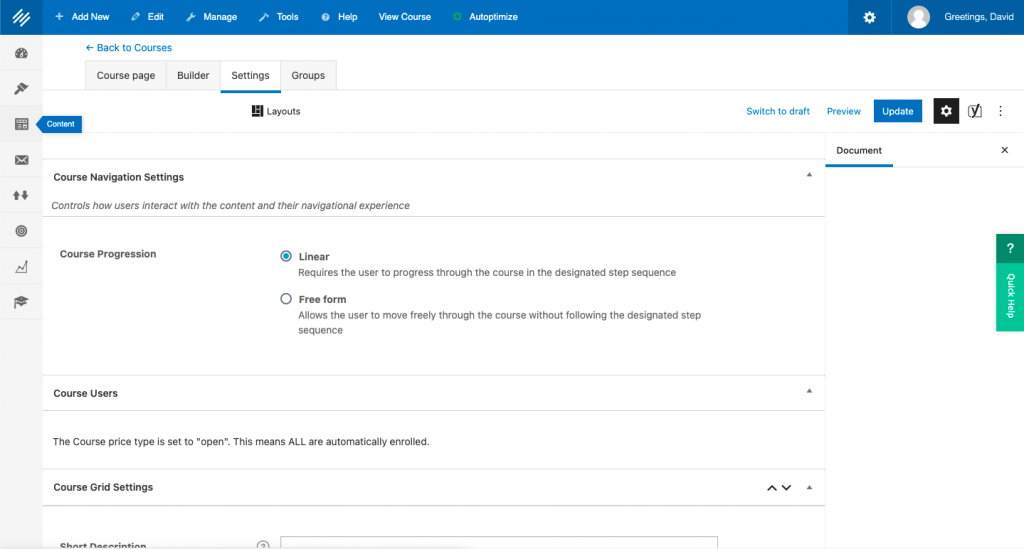
With some courses, you may want to have a defined order of progress. With others, you may want the course to be free form so people can explore the course elements in any order. Choose which one that best fits your goals. Ordered courses work best when the goal is skill or proficiency development; free form courses are useful for general understanding, student interest and inspiration.
Take a look at all of the settings while you’re here — this is where you can upload course materials, override global settings, add a certificate on completion and more.
Congratulations. Your course is complete.
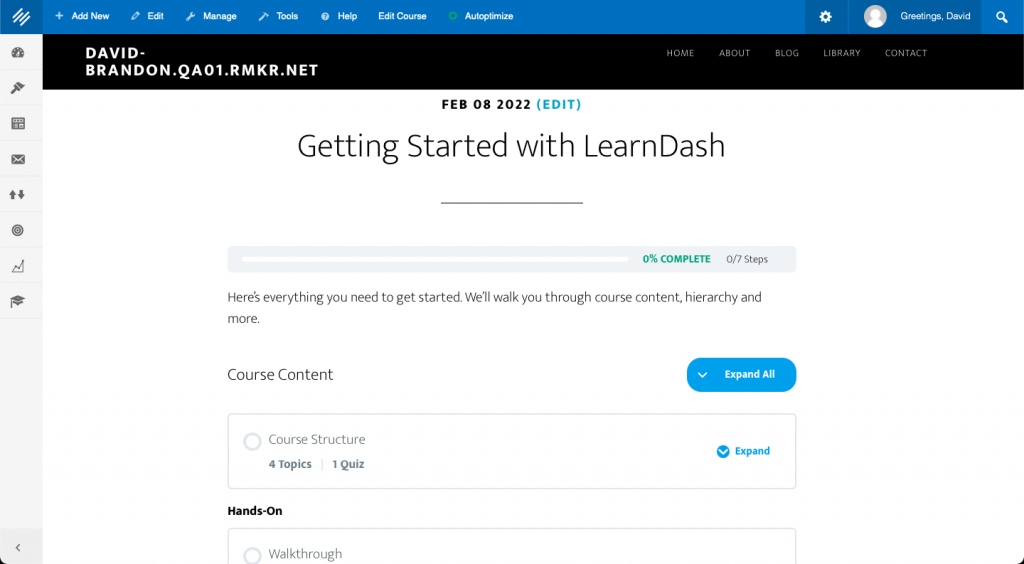
Once you’ve completed your course, you’re going to want to test it. Walk through it yourself, then get a friend to do the same. Mark any trouble spots or discontinuities so you can come back and fix them. Our sample course is very simple, but some courses may have upwards of 50 topics under a single lesson. It’s easy to slip up if you’re not paying very close attention.
We’ve barely scratched the surface of what LearnDash can do in this sample course. This is just a overview, not a comprehensive guide. Each course and topic you create will have different needs for structure and content, but once you have those pieces defined, you have a simple process that can be used over and over.
Learning to Use LearnDash Webinar
LearnDash is a powerful and flexible course builder that has a ton of options for each lesson, topic and quiz — more than we have the scope to cover in this short space. This sample course will get you started on the path to creating your own courses. But if you want to learn more, join us on March 9 at 1 p.m. Central Time and we’ll walk you through building your first LearnDash course.
And if you have any questions about LearnDash and your Rainmaker Platform Andromeda site, reach out. We’re here to help.
Best Regards,
David Brandon
Copywriter
Rainmaker Digital Services